The Straw House Blog

Interesting post on Earthen Plasters and Weather

Kara over at Stonehouse Straw House has an interesting post up now on a terrible experience they’ve been having with their exterior finish and their interesting (and very nice) solution. They used earthen plasters on their outside walls and under prolonged exposure to some pretty extreme rain the plaster actually started to slough off. Earthen plasters have been around for a long time but in my experience they’re mostly used in the southern (read: dryer) states. Despite this some folks have started using them in Ontario, and apparently the maritimes. Earthen plasters are very nice looking, easy (though very labour intensive) to apply, and have little of the health/environmental baggage that accompanies regular lime plasters such as we used. My suggestion, if you like earthen plasters is that you use them on interior walls, and stick to the tougher lime plasters for the exterior.

What I really like about the post though is their solution. They created a board and batten exterior wall that covers and shields the damaged plaster while still allowing for airflow. In the end the solution ends up being just as attractive, if not more so, than the original wall. Bravo!


Another Straw House Blog

There are lots of blogs out there now about straw bale (and other) homes, but we met Kara and Dave a while ago when they passed through Ontario on vacation. I’m excited that they’ve started construction on their own home, you can watch their progress on their blog.


project_sample1

Stonework and Serendipity

Joanne and I were driving up to my parents on Saturday when she pointed out a tent, high up on a hill beside the highway. “I wonder what’s going on up there?” she said. As we came by the base of the hill there was a sign: Dry Stone Wall Association of Canada. Well, I did what any self-respecting member of the Hunter family would do, I ditched Joanne and Gil at my parents and my father and I headed back to find out what was going on.

At the top of the hill we were warmly greeted by John, the leader of the seminar. Their goal was to build an arch from an old stone pile, and whatever other rocks they could gather from the pasture. The seminar was full but we were invited to stick around and observe, and if we had any questions, please feel free to ask.

John proved to be an excellent teacher and just watching, asking a few questions and taking it all in I learned more that afternoon than I have in all the various books I’ve read. I’ve been thinking of building the bottom 4’ of the south wall of Gil’s room from stone, and now I feel confident that I can get it done. Building a 12’ x 4’ x 18” wall would add 4400 pounds of thermal mass to the house, thermal mass that would receive heat from then sun, the new wood stove, and the radiant floor.

I was great to watch them build this because it was exactly the same kind of stone that we have here. The books tend to deal with nice easy to work with stones like sandstone, limestone, and shale. That’s nice but what we have is fieldstone, granite and other difficult to split stones.

The finished the arch late in the afternoon and it’s a fantastic sight. It looks like it’s been there forever, I suspect a lot of locals will be doing a double take as they head up the highway wondering why they’ve never seen that before.

The Dry Stone Wall Association of Canada


project_sample1

What’s happening this summer - inside

It’s going to be a busy summer.

Joanne is pregnant with #2, and so Gil is going to have to move out of the nursury, and into his own room. At the moment my office occupies the space that will be his room. The office has to go, the space needs walls, but before that the space needs a ceiling.

Here’s a view of the currrent floorplan along with notations.

  1. The new office. Just a long slim desk along the back wall. Simple clean, and I’m still working out how to hide the cables and computers
  2. Bedroom wall. This wall will be floor to ceiling bookshelves just like it’s opposite (bordering the master bedroom. The top area will be triangular pieces of sandblasted glass to let in light and maintain privacy.
  3. Bedroom wall. This wall will be clad with panel or drywall on the bedroom side and T&G cedar on the living room side. It will be built to move to expand the size of the bedroom when the time comes to break it into two rooms.
  4. Linen Closet. Lined with all of my leftover aromatic cedar
  5. Bedroom Door. We’re going need to enforce some privacy soon.
  6. Odd, there doesn’t seem to be a number six…
  7. This space is currently the nursury, but it is plumbed to be an ensuite. When competition for the main bathroom gets too fierce, we get our own.
  8. Walk-in closet. Lined with aromatic cedar. Staining is done, but it needs some trim and sliding doors.
  9. Front hall closet. Lined with aromatic cedar, it needs sliding doors, and some better shelves for seasonal storage.

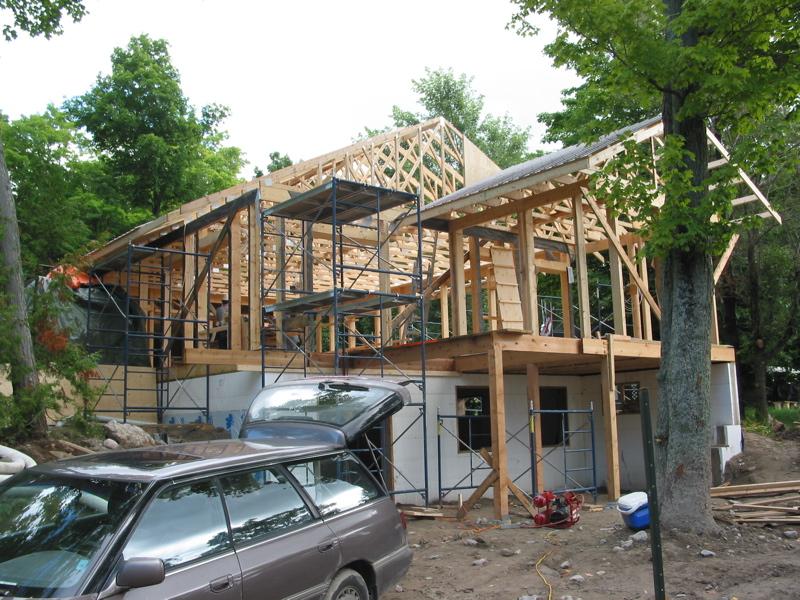
Before the walls for Gil’s room can be built a ceiling must be installed.

The Ceiling

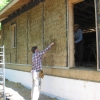
Many ideas have been floated for how to cover our ceiling. Right now it’s just vapour barrier over insulation. Functional, but not terribly attractive.

Drywall: We hate drywall. And installing it after you’ve moved in? On 2000 sq/ft of ceiling, I don’t think so.

Plywood: Nice concept, and I’ve seen it done well, but a huge amount of work, very tough to get the edges clean and straight, and very hard for two people to do, over their heads day after day. I’ve undertaken a fairly exhaustive search for pre-finished T&G plywood, and well, it doesn’t seem to exist. I can get prefinished, but it’s VERY expensive. Or I can get T&G but it’s used for subfloors and is very rough.

Tongue and Groove Wood: Similar to what you’d use for flooring. It’s expensive if you buy pre-finished, but unfinished Western Red Cedar is not too bad. VERY nice looks, somewhat expensive. Now I’d rather use my own wood, but my cedar is way too knotty to use for a ceiling, not to mention that most of the cedar I have right now is slated to be used in decks. I have some maple, ash and black cherry, but nowhere near the quantities I’d need for the ceiling, and it won’t be dry for a couple of years if I don’t get a kiln built. Then there is the work involved in planing, jointing, routing and finishing 2500 sq/ft worth of hard wood. I don’t mind doing the work, but I don’t see having that kind of time in the forseeable future. As the old addage of freelance work goes, “You either have money or time. You never have both.”

What we’re concentrating on now is the back ceiling, the ceiling over the bedrooms and open area. The ‘hallway’ and gallery will likely be done the same way. But I have greater ambitions for the front part of the house. I thought I’d share a few of my inspirational images with you.

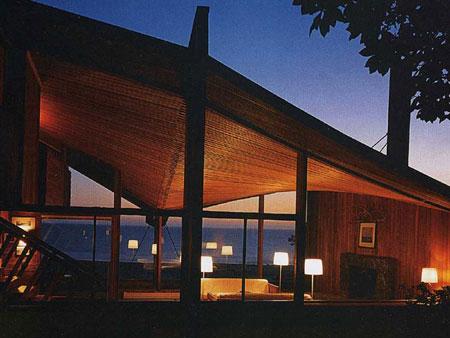
Oh man, what a ceiling. We can’t pull off something that daring, we don’t have the space to allow a drop like that, but I’m seriously thinking that a wave effect, done with straight boards could be very effective as well.

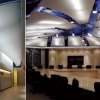
Eventscape makes cool tensioned fabric errr… things. Layered I think it would be very cool as a ceiling, but probably expensive.

Yes, that is industrial felt. Great because it’s rigid enough to hold a shape, and it absorbs sound. A big consideration when you’ve built a house that’s largely open concept, and more than somewhat reflective.


project_sample1

Paudash Lake House

I returned last night from four days working with the gang from Camel’s Back on a house on Paudash Lake, just south of Bancroft. In addition to Pete and Tina, Stephen, Lesley, Ryan and new guy Paul were also out. It’s a neat house, most of the wood was cut from the property, and it’s built with hemp bales. It’s first time that I’ve worked on a house built with hemp bales. They’re a pain in the ass. The hemp doesn’t rip, it’s bleeding hard to pierce them and they dull any blade. I think I’ll stick with regular straw for my next project.

There’s a neat/strange story behind the house though. The house was designed to fit on a pre-existing foundation. Imagine that you own some land. An acreage even, and one day you head out for a walk on that land and find the very definate beginnings of a house being built, on your property. That is what happened to the people Regis bought her land from. It seems that several brothers owned the land next door, and one of them decided to build himself a house. So he put in a foundation, a well, and a septic system. Apparently the brother didn’t have an accurate survey (or perhaps any survey at all). When this geographical faux-pas was brought to his attention his reaction was ... litigation - even after the actual owners offered to sell him the land at a very good price, even though he had already sunk so much money and effort into the property. He lost and Regis bought a piece of land with a foundation, a well, and a septic system. It’s a very nice piece of land with towering spruce trees and a view of the land to the east. The house will be off-grid, but I didn’t manage to get the details of the system.


project_sample1

Coboconk House

I spent a good portion of the week helping build a straw bale cottage up on Balsam Lake. The property is owned by a lovely lady named Gerarda Schouten, a retired schoolteacher who has decided to make the lake her home.

It’s a nice simple design with a bright and airy main floor for Gerarda, with a deck and straw bale sunroom, and a walkout basement with full guest quarters.

We’ve been doing bale work for the last two weeks, stacking, stuffing and stitching, work that I didn’t get to do much of on my own house. When we were doing the bale work here I spent most of my time dealing with the building inspector, the roof, the architect, and the infinite number of other questions that cropped up. It’s a running joke with Pete and Tina that the owners stack the first bale because they might not get a chance to stack another! At least not until the next day when things have generally calmed down. Next week they’ll be plastering and I’ll be out there again for a couple of days, baling isn’t easy work but plastering is HARD work.

A reporter came out from the Lindsay Daily Post to do an article on Gerarda and her new home.

But what you really want are the pictures… right?