The Straw House Blog

project_sample1

Unimog 401

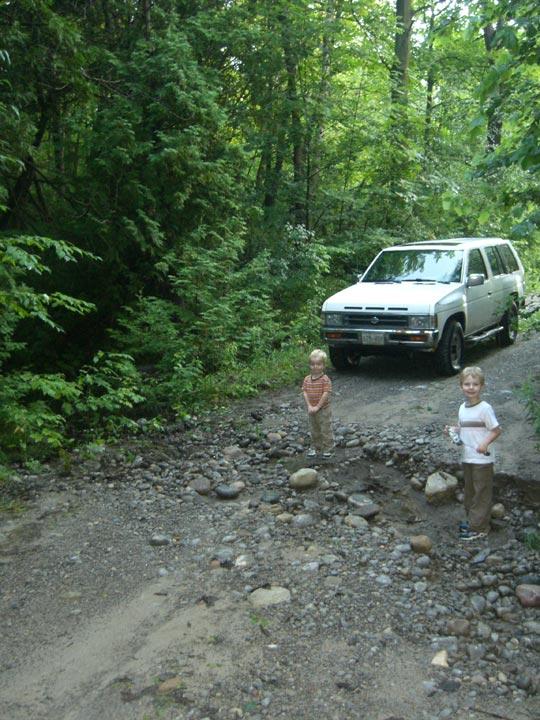
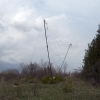
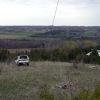
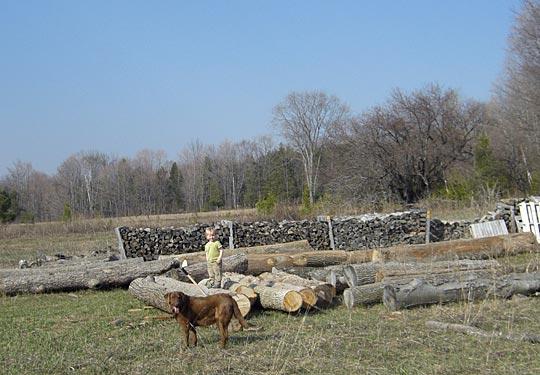
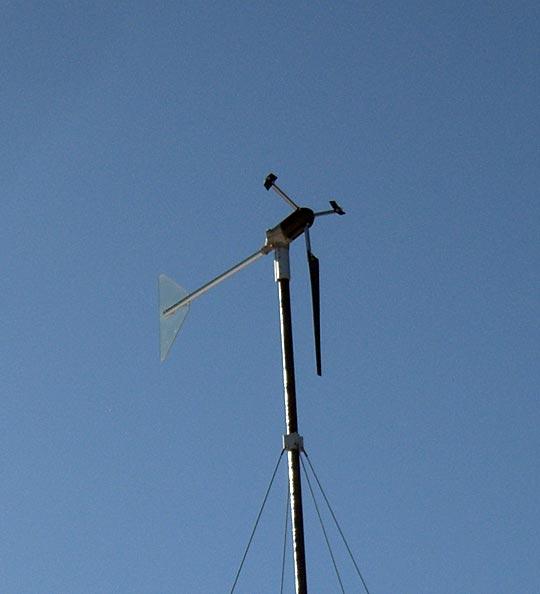
We’ve known for a while that our work horse ‘93 Nissan Pathfinder was approaching the end of it’s useful life. The exhaust system is wrecked, the brakes leak, and it isn’t capable of getting into the gnarlier parts of our property. It was useful for logging out the edges of the forest, but it’s both too big and not capable enough to make it into some of the more dense bush on the property. We’d have to invest thousands of dollars in repairs, tires, and a winch to make it useful again. So about a year ago we started researching various vehicles looking for a multi-use vehicle that could help us with logging, plowing our driveway, lowering our wind turbine, and collecting maple sap (yes, we’re making maple syrup this spring). We looked at full and mid-size pickups, 4 wheelers, side-by-sides, and then I stumbled upon Unimogs.

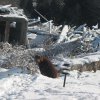
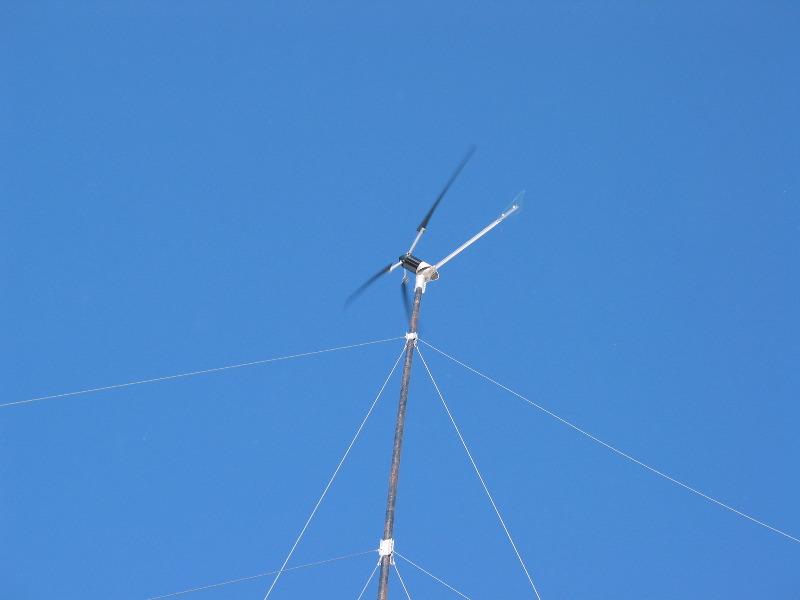
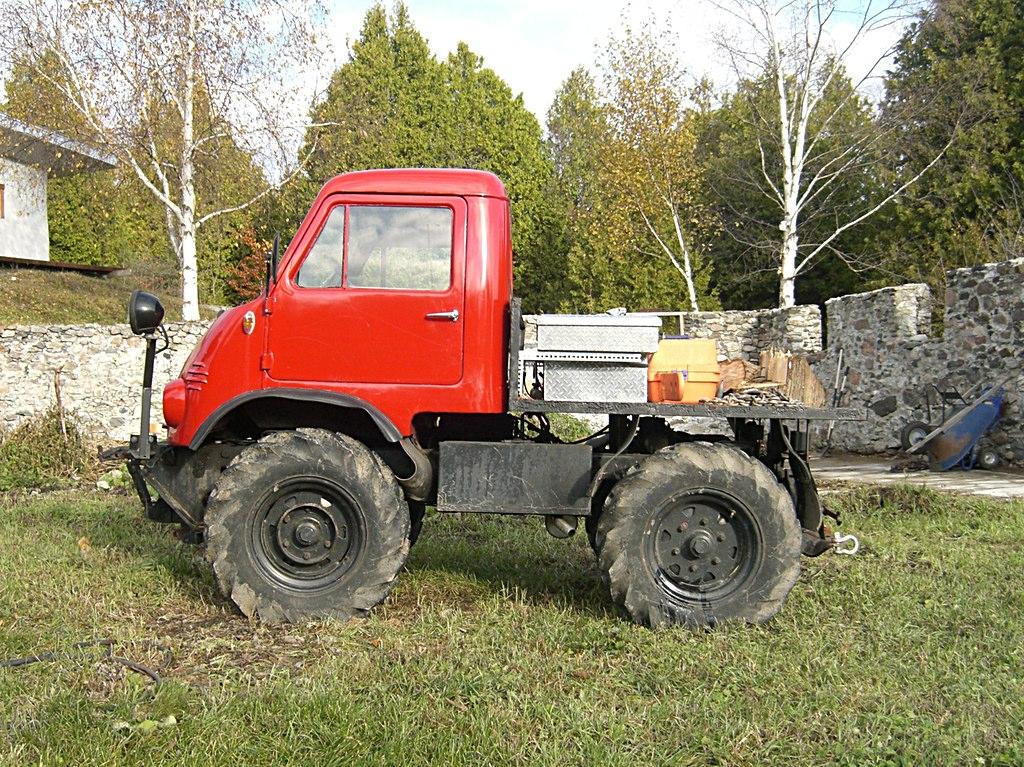
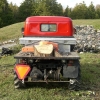
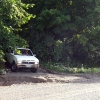
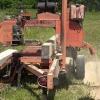
One year later we have purchased a 1953 Unimog 401 hard-top. It has a 25hp diesel engine, a 7500/lb winch and a snowplow. The machine is 10’ long, 7’ wide, and 7’ tall without the plow. The plow adds nearly 3’ to the length. The gearing on the Unimog is very low, in 1st gear it has a top speed under 5 km/h, 2nd takes you to nearly 10 km/h. Its top speed is about 50 km/h in 6th gear downhill with a tail-wind. With it’s big agricultural tires, massive ground clearance and low gearing we’ve been able to get to parts of the land that were completely inaccessible except by foot.

The lights are on stalks so they can project over the plow. The large black box between the wheels holds the battery.

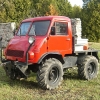
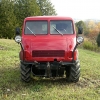
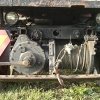
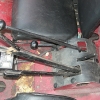
On the front you can see the hydraulics for the plow. The round grated part inside the front hub is meant to be a step. Not surprisingly these ‘mogs are often called “frog eyed”.

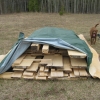
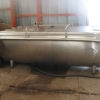
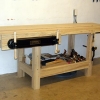
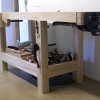
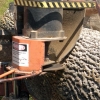
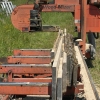
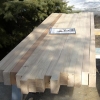
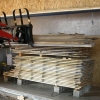
We added a truck box for storage. The wedges are used as wheel chocks when using the winch.

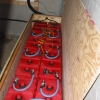
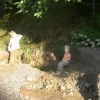
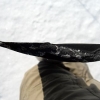
The winch is an original Werner, 7500/lb winch driven by the PTO. The wrench is our lever, up is forward, middle is neutral, down is brake. It has ~ 50’ of 7/16” steel cable on it but we’ve ordered 100’ of 7/16” synthetic winch rope. It’s stronger and safer than the cable. We’ll be having a fair-lead custom made to fit the drum.

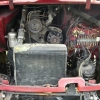
It’s an OM636 Mercedes diesel engine producing 25hp. Despite how cramped the engine compartment looks it’s quite easy to work on. Needs a good dose of degreaser.

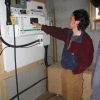
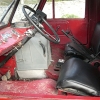
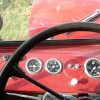
The cabin is a tight fit to say the least. I can just barely get my legs under the steering wheel. The seats are all the way back but the machine is very easy to drive, though it’s loud, hot and very noisy.

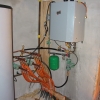
Key on for power, move lever left for glow plug, wait, move lever left again to start. Oil pressure, engine temp, mystery switch, windshield wipers, headlights, speedometer, and another mystery switch.

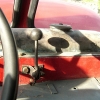
From top to bottom: Forward/Neutral/Reverse lever, gear shift lever, PTO engage lever, emergency brake, 2WD/4WD/4WD lock hubs lever. Reverse only works in 1st and 2nd gear. 3rd gear is the start of high range, 4th - 6th are only accessible from 3rd. Below the levers you can see the plow hydraulic controls.

The hand throttle allows you to set engine revs without using the foot pedal, it’s mostly used for setting an idle speed and controlling the take-up speed for the winch. Yes, that’s the coolant reservoir up on the dash.


project_sample1

Ceiling progress

We’ve been making some excellent progress on the ceiling. It’s rough work handling the hardwood boards up over your head, I can only manage about 4 hours at a time before I’m done. For the back section we’ll mill the boards thinner, we don’t need a full 5/8” for a ceiling, 1/2” would work out just fine.

Luckily we’ve been getting some help from friends and family. Phil and his boys made a trip up and we got a big section done, Stephen came by and lent a hand, and of course Dad’s been a rock.

Every board has to have each end squared up with the chop saw and all of the end boards have to be custom cut to fit. Joanne has become a master with the saw, tape and square.

We’re about two thirds done and might even be ready for trim in a few weeks.

Of course the boys wouldn’t mind if the job lasts a while longer, after all most kids don’t have a jungle gym in their living room.

project_sample1

Sorry it’s been so long.

As often happens around here it’s been quite a while since my last post, so I figured I’d upload some pictures to give a sense of some recent events around here.

We finished of the deck on the east side of the house with some steel grating we acquired a year or so ago. Near the back part of the house we built a sandbox for the kids. When they’re grown we’ll make a nice zen garden or something back there.

Joanne has been busy finishing the ash boards that will be going up on the ceiling. We figure that we have enough for the whole front half of the house. The scaffolding is out on loan right now, but comes back in a week or so, this will be a late summer job for us, but it will be fantastic to have a ceiling up.

Most blog readers beyond friends and family won’t know this but we lost both of our dogs in the last 12 months. Ceara had a stroke and had to be put down last May, she was 14 1/2. Gator had a tumour on his spine, we had to put him down in February. Gator made it to 11, which if you were familiar with his tendency to eat foreign objects was a miracle. We were devastated. The picture above is Cash. He’s our new boy, a 3 year-old Chesapeake Bay Retriever. The boys are head over heals in love with him. Fortunately he has shown no inclination to eat rocks.

Sometimes I can’t believe how lucky I am to have ended up here with such a fantastic family and place to live. Sometimes the universe concurs.


Interesting post on Earthen Plasters and Weather

Kara over at Stonehouse Straw House has an interesting post up now on a terrible experience they’ve been having with their exterior finish and their interesting (and very nice) solution. They used earthen plasters on their outside walls and under prolonged exposure to some pretty extreme rain the plaster actually started to slough off. Earthen plasters have been around for a long time but in my experience they’re mostly used in the southern (read: dryer) states. Despite this some folks have started using them in Ontario, and apparently the maritimes. Earthen plasters are very nice looking, easy (though very labour intensive) to apply, and have little of the health/environmental baggage that accompanies regular lime plasters such as we used. My suggestion, if you like earthen plasters is that you use them on interior walls, and stick to the tougher lime plasters for the exterior.

What I really like about the post though is their solution. They created a board and batten exterior wall that covers and shields the damaged plaster while still allowing for airflow. In the end the solution ends up being just as attractive, if not more so, than the original wall. Bravo!


project_sample1

The Ceiling - Part 1

Over the Christmas holiday’s we started covering the ceiling in the gallery space with tongue and groove cedar. Dad won the cedar at an auction last spring for a very good price. We won a large stack of boards almost all of which were 16’ long, 8” wide and all were tongue and grooved. Unfortunately about 40% of the boards were in pretty bad shape: worm-eaten, weathered, rotten, or warped in some way. We’ve been cladding our various sheds in the crappier boards and putting aside the good ones to use inside. This fall Joanne and Mom sanded and finished some of those good boards and that’s what we’ve been using.

Over time the Tuck tape that sticks the vapour barrier to the beams has lost it’s tack so I’m re-taping as I go.

Fitting the long boards is much easier with a helper. By the end of a day working over your head like this your arms feel like they are about to drop right off.

For extra fun every board in the middle row had to be custom cut to accommodate the light and fan junction boxes. Also because the boards need to be staggered the scaffolding had to make the full trip back and forth across the gallery about a half-dozen times over the course of the project.

We didn’t have quite enough boards so we’ll complete the job in the spring when we can finish the boards outside - the stain that we use for colour really reeks.

As usual when Dad works so do the children. What’s remarkable about this picture is that Gil is actually hammering real nails, into real wood with a toy plastic hammer. No I don’t know why there is a parking lot beside the board. Look at how long those legs are! Wonder where he gets his build from?


project_sample1

Happiness defined

Gil and Declan tobogganing.

project_sample1

New Panels

Last month we installed two more 175W solar panels to our array. For those keeping track we now have eight 85W BP solar panels, four 165W Sharp panels, and two 175W Sharp panels for a grand total of 1360W.

Unfortunately one of the realities of building an array piecemeal is that the sizes of the panels change from model-to-model and year-to-year. We really didn’t want to buy new racks so we decided to modify the existing racks that hold the BP Solar panels. We added two new mounting rails and moved the two existing rails to the sides. The new panels squeeze quite nicely in the middle.

This required that new holes be drilled to mate the horizontal rails to the rack uprights. If you look closely you can see a piece of wood we were using a blocker to prevent us from accidently drilling into the back of a panel. With Dad, J.P. and I it took most of the day to get the racks modified, panels mounted and wired.

Most of the time that we worked Declan played outside in the sand pile (side note: a pleasant side effect of straw bale construction is that you usually end up with enough leftover sand for a good play area.) He’s a remarkably self-sufficient kid.

We’ve been really lucky, so far this fall and we’ve had lots of sun. We call this time of year the “100 days of grey” because we typically go from late October to early January with little or no sun. In the last four weeks we’ve had many sunny days and have really seen the benefit of our new panels. Here’s a picture of the readout form our Outback MX-60 charge controller. You can see that the panels are bringing in 31.4A but the MX-60 is upping that to 38.3A. Typically we have to run the generator weekly through the 100 days of grey to keep the batteries charged but in the last four weeks we’ve only run it twice. In addition to saving money on gas, we really appreciate the peace and quiet.


Green magazine

Our house is featured in the latest issue of Green, an Australian magazine. The article is very nice - written by our friend and former neighbour Liza Finlay and the pictures by her cousin Naomi Finlay are spectacular. This article is the first to feature photos of our house in the winter. Aside from being one of our four favorite seasons winter provides lots of sun to the interior of the house. The pictures look sun drenched and warm on the interior, an excellent contrast to the snowy landscape outside.

We had a a photoshoot here a couple of weeks ago for a forthcoming coffee table book and the contrasts between the two photographers and publications was remarkable. Naomi captured images of a house that people live in, including one fantastic shot of Gil and Declan that we’ll treasure forever (cliche though that may be). The coffee table book people don’t seem to want any people in the pictures at all. In fact another of their books that we looked through did not have a single living creature in any of the houses featured. In fact some of the houses didn’t even seem to have furniture. Le Corbusier, one of my least favorite architects described houses as “machines for living” and the houses in this book had been staged to the point where the interface between house and human was tenuous at best. So why did we agree to be in the book? It was a last minute request from our architects and I didn’t have a chance to check out any of the other books from this publisher beforehand.


project_sample1

Washout

We’ve had quite a bit of rain here in southern Ontario this year. In fact we’ve already had more rain than we had all of last summer and we’ve shattered all previous records. I don’t mind rain at all, but I’m not a fan of massive downpours that wash out my driveway. So far we’ve had three such storms this summer, and since we’ve never been washed out before that’s pretty serious rain.

We’ve had Eric in with the backhoe twice now to fix the driveway, and the township has been working on the road pretty much continually all summer.

We think there used to be a culvert here. If there was, it’s gone now.

If you look behind Declan you can see most of road, back there in the forest where it doesn’t belong.

Fortunately this new gully is the township’s problem, not mine.

Joanne makes me drive the truck over the washout, neither of our cars could make it.

Here’s the road. There’s a brand new ditch, the old ditch is full of the washout from the previous storms.


project_sample1

The new deck

Long time readers might recall a post I wrote back in April of 2005 talking about milling cedar and the fabulous decks that would be built. I’m pleased to report that construction has finally begun on the east decks, including a new deck directly off the front door.

This deck is a team effort, unfortunately I have to spend as much time trying to keep the kids on my team as I do building the deck. It takes only a matter of seconds for them to not only form their own team but for that team to splinter into two entirely separate (and warring) factions. Things degenerate rapidly at that point. So as a result both children are gradually accumulating their own tool sets and each has a simple task that they must perform in order to “help” me. For example both travel with a handful of 3 1/2” screws that each gets to hand me in turn as I screw down the decking. Both kids help me measure the deck (each with his personal dollar store tape measure natch) which lends an interesting twist to the old saw “measure twice, cut once” since neither can actually read a tape measure.

I have noticed that they are doubly helpful when they are wearing superhero pyjamas.

It’s all worth it when you get a section done and the kids are so proud that they helped build the deck.

project_sample1

July Update

Spring and summer have been busy around the house. The bench is complete except for finishing. I haven’t decided yet what kind of finish I want to use on the bench yet, though I’m leaning towards Tried and True Linseed Oil and Beeswax finish as I love the depth and glow it gives to wood. Danish oil seems to be the traditional choice.

I had to disassemble the twin screw vise and re-install it, but that was expected. It’s very finicky to install correctly even when you follow the instructions to the letter. There’s still a bit of stiffness in the last inch of travel but I’ll probably leave it as is for a while and see if any other problems develop before taking it apart again. The rear vise jaws are secured to the bench with 5” bolts threaded right into the bench top. The front jaw, just like the end vise chop, is a piece of spalted Maple from a tree off our land.

We also had the portable saw mill in to mill the logs that I mentioned back in April. Of the thirty-eight logs only two proved to be rotten so we got away pretty lucky with storing them for so long.

Unfortunately some of what we had thought was Maple when we cut it in the winter turned out to be Basswood. On the other hand some of the Bassword was very nice. In particular we flitch cut the crotch of the tree and found some gorgeous grain and colour which is uncommon in Basswood which is normally very clear and white.

We’ll stack and sticker the wood through the summer and hopefully the Ash will be dry enough to go into the kiln this fall. My goal for this fall/winter is to get the ceiling done.

Green Home and Garden Tour

Peterborough Green-Up a local environmental group is holding a green home and garden tour on June 7, 2008, 10 a.m. to 4 p.m. We’re a part of the tour in addition to several interesting homes and businesses in Peterborough proper.

Details are available on the Green-up website.

Normally if you’d like a tour of our house you have to wait for the annual OSBBC Straw House Tour in October, so this is an early opportunity if October doesn’t work for you.

From the Green-up site: Take a tour of homes and businesses where real people are making real changes to reduce their impact on our local resources. These sites will showcase some of the inspirational environmental examples that residents in Peterborough are setting through personal actions.

Tour locations highlight examples of green lifestyles, including a totally off grid home, using recycled building materials, hot water heating, solar and wind energy, and more! Extensive natural gardens will also be on display at some tour stops, with examples of how to create great gardens while conserving water, providing habitat and food for wildlife, and enhancing the environment!


project_sample1

Wind Generator Update

We dropped the tower a couple of weeks ago to see if it was alright before we ordered new blades.

Our main concern was that the bearings and bushings might have been damaged by the vibration of the unbalanced turbine. Once the tower was lowered we took as much of the assembly apart as was feasible, checked the moving parts for excess movement and everything seemed to be just fine. We put the tower back up - the safest place for the tower is up in the air, not down on the ground.

J.P. from Generation Solar ordered us new blades and I figure they’ll probably arrive right as the summer doldrums start. Right now it’s sunny and there’s a strong (though gusty) wind blowing outside. Normally at this time of year there’s an abundance of both sun and wind that we never have to run the genset. With the wind generator out of commission we’ve had to run the genset a few times over the last couple of months. I hate that.


Here’s J.P. and a good shot of where one of the blades broke off from the turbine. You can see that the blades snapped off just past where they attach to the turbine. We still have no idea why they broke. We did find the other blade though, it was about 200 metres downhill from the turbine, laying in the grass.


project_sample1

Logging

We had quite a few logs ready for milling back in the fall and had even booked the sawyer. Then the first week of November the snow started. It has been a great winter for snow, not so much for milling logs. Most of the winter the logs were completely buried. So spring is here the snow is gone and Dad and I spent a good portion of the last two days cutting down trees and pulling them out of the bush.

Yesterday we took out a good sized ash tree, including one of the biggest logs that we have ever pulled. Today we dropped a dead butternut tree that fortunately was still solid. It yielded three good logs and one so-so log.

So at this point we have thirty-eight logs ready to be milled, including yellow birch (1), elm (1), ash (23), maple (3), cedar (5), butternut (3) and chestnut (2).

We’re planning on dropping some beech, poplar, ironwood, hickory, ash, black cherry, basswood and cedar this spring. We only drop trees that are in decline or dead, we try and get them before rot sets in, but it’s tricky, some species rot from within (like poplar) so by the time they look ready to take they’re already hollow. Our best guess is that in addition to the logs we’ll mill this spring we’ll have another thirty to forty to mill in the fall.

The logs are rolled up onto scrap wood to keep them off the ground, but this is a temporary storage solution. Hopefully we haven’t lost any logs to rot over the winter. We’re planning long term storage for air drying the lumber. Even with access to a kiln the wood should be air dried for at least six months. Some of the wood (mostly the ash) we’ll air dry for a couple of years so that we can use it for steam bending.

project_sample1

Bench Update

There hasn’t been a huge amount of progress on the bench this week. Both side have been planed (relatively) flat. The top will get a final touch up once the bottom has been completed and attached. Unfortunately some of the boards have pretty nasty grain and I’ve had problems with tear-out. I may splurge and buy a smaller low-angle plane to do the final surfacing.

This weekend I cut then ends of the bench square and started installing the end vise. The end vise is let into the end of the bench. Cutting out the inset involved lots of small kerfs and then chopping out the waste with a mortise chisel. I only have one mortise chisel, it’s a 3/8” Lie-Nielsen with an Ironwood handle. Ironwood is the hardest wood that grows in North America (we have a lot of it on the land) and you can tell. After an several hours of bashing on the chisel with a maple faced hammer the hammer is dented and the chisel handle looks brand new.

Now that the inset is cut the vise can be mounted. Hopefully I’ll get to that some evening this week. Next weekend I’m hoping to get the twin-screw vise mounted. Once both vises are mounted I’ll flip the bench on the saw horses and start building the bottom. I’m planning to build the entire lower structure with hand tools, including sawing the tenons and wasting out the mortises. It’ll be hard work but I need the practice and most of these joints are hidden and don’t have to be pretty.

project_sample1

Making the Bench Top

Holy crap I’m tired.

Dad and I started glueing up the bench top very early Thursday morning. The idea was that I could be there first thing in the morning, get one section glued up, then come home work all day, and head back up there right before dinner to glue up the next section. Then after dinner (thanks Mom!) we’d glue up a third section. With the top made up of fourteen pieces of wood we’d have make up four sections of three boards and one section of two boards. Those would then be jointed, planed and then glued to one another to form the bench top.

That worked very well on Thursday. So on Friday I arrived early and we got our first glue up done and clamped. Then we carried the glued up sections from Dad’s basement out to the back garage so that we could joint and plane them. Then we took them back to the basement again.

We figured that we would get the top to the point where we had an eight board section and a six board section, when we would transport those to my house for the final glue up. We didn’t think that we’d be strong enough to carry the completed table top out of Dad’s basement.

We almost weren’t strong enough to carry the two halves out of Dad’s basement.

And so, we made our first mistake. It was so much trouble getting the halves out of the basement we decided not to carry them to the back garage and plane them. “I’ll do them by hand” I said. “It’ll be fine!” Oh boy.

Once home we laid out the two halves on what I figured is the flattest section of floor in the house. Right at the front of the house. Joanne and I wrestled the two sections out of the truck and Gil and Declan carried all of the clamps from the back room to the front. By the way, I know that looks like a lot of clamps. It isn’t. There is no such thing as ‘enough clamps’.

So once we had everything ready Dad and I trial fitted the two pieces and found, to our surprise that they didn’t meet properly. Oh well, out comes the jointer plane, and I start taking strips off the edges of the sections. Now bear in mind that I’m fairly new to hand tools. To this point I’ve ‘six-squared’ several small boards, but the bench is two feet wide and seven feet long. Most of my planing exeprience has been with a #5 Jack plane but compared to a #7 jointer plane it’s practically a toy. The #7 is a significant hunk of metal. Once you get that thing moving it actually creates its own gravitational field. I do not recommend using it hunched over like that, much stretching was required afterwards.

So with the edges squared up we applied the glue with Declan’s supervision.

Then we clamped it.

While the glue was drying Dad and I drove in to the city to go to Lee Valley for the bench vises. I’m using the Veritas Twin screw vise as the face vise, and a large quick release steel vise as the end vise.

But those cannot be installed until the bench top has been flattened. By not carrying the two bench sections out to plane them I have guaranteed that by the time this bench is flat I will no longer be inexperienced with a #7 jointer plane. I have also discovered a wide variety of muscles that are apparently only used when planing. I’m nearly done one side, but I’m done for today. I intend to pour myself a generous portion of Highland Park 18 year-old and emulate Declan.


project_sample1

Building a Holtzapffel Bench

I determined some time ago, not long after building the coffee table in fact, that my ability to draw interesting furniture designs exceeded my woodworking skills. I also felt that it would be something of a tragedy to spend all of this time cutting and milling lumber only to wreck the boards due to my incompetence.

In January I took an an introduction to hand tool techniques course at the Rosewood Studio woodworking school. There I learned that:

  1. Most of my hand tools tools were shit
  2. I had a lot to learn
  3. I was going to need a proper wookbench

So I bought a few books about workbenches and started scouring the internet for information. The writer of the best of the workbench books is a fellow by the name of Christopher Schwarz. He’s the editor of Popular Woodworking magazine and Woodworking magazine (excellent if you are a hand tools enthusiast) and he knows more about traditional woodworking benches than anybody I know. Of the three bench types that he has written about I decided to build a Holtzapffel Bench. No, I have no idea how to pronounce it either.

The first step was acquiring the wood. We have plenty of 1” ash that’s already been through the kiln but I suspected that Joanne might take issue with wood that supposed to be used for the ceiling going towards a workbench. Unfortunately most of our wood has been milled 5/4 (~1”) which would require a lot of gluing. So I bought some 8/4 (~2”) ash from the fellow who rents us kiln space.

After it came out of the kiln we took it up to dad’s place so that we could dimension the lumber. Here’s the rough lumber ready to be cut up.

The idea here is that by rough cutting your pieces before jointing/planing you can save a fair bit of time and wood (thickness mostly). So as I cut out the rough chunks I carried them into the garage where Dad was running the big machines.

It took us a good portion of yesterday and all of today but we’ve got all of the wood for the whole bench ready to be glued up. I’ll pop up there a couple of nights this week and hopefully we can be ready to start building the base next weekend. The picture below shows the boards for the top laid out as they will be glued up. The darker coloured board is piece of Black Cherry from my land that Dad had in his garage and we have a lovely spalted maple board to use on the front of the bench top.


project_sample1

Tobogganing

The tobogganing conditions the last couple of weeks have been stellar. We have 2’ of hard pack snow than runs smooth down the back hills and almost right to the house. Conditions are best in the morning after a good cold night when the crust is still frozen. By mid-afternoon this crust is slushy and the hills are slower.

This is the view from the top.

Of course to get there you have quite a walk ahead of you.

Savour the view for a few minutes, catch your breath and then it’s time to come down.

The run from the top is too long and steep for the kids to do themselves but there is a nice hill about half way that Gil can handle on his own. The longest runs are around 300m. We toboggan from the back property line almost all the way to the house for our final run.

Though sometimes speed gets the better of you and you and the GT part company.

Declan thinks that a soother counts as protective headgear.


project_sample1

Throwing blades

We went out this morning to play in the snow (more on that later) and we could hear a strange rattling noise. Things are usually pretty quiet around our house and the sound was coming from the north, which is very unusual because there is nothing but fields behind us for quite a distance. It turns out that the strange noise was coming from our wind generator which had thrown two blades sometime early this morning.

I’m not sure how this happened as it wasn’t particularly windy or cold or this morning. When I got up around 6am we were producing around 10A of power from the wind generator so I can only assume that it still had three blades.

Anyway I tripped the brake on the wind genny charge controller which slowed it somewhat then climbed the back hill to trip the main brake which is located in a sealed box at the base of the tower. That brake shorts out the leads and causes the turbine to stop.

Once that was done I set about looking for the thrown blades. I found one quite near the base of the tower but the other is missing. Depending on how fast the turbine was spinning and what direction it was facing the blade could be very far away.

The biggest problem for us is that we make the bulk of our wind power in the spring. In fact we’ve had such a wonderful confluence of wind and sun for the last month and a half that we haven’t run the generator in ages. There’s so much snow in the back fields that it’ll be quite a while before we can get a truck up to the hill to lower the tower. Not to mention that the gin-pole is buried under nearly two feet of snow.


project_sample1

March Update - Snow, Photoshoots and the Return of Sun

We had a huge dump of snow in the last 24 hours. It’s the biggest snowfall in the time that we have lived here. There’s at least three feet of snow in most places and more in the drifts. It took Joanne and I a couple of hours to shovel down to the cars and clear around them. Even so we’re not going anywhere until the driveway gets plowed out.

I love the snow so for me this is great, I’ll be heading off into the bush with my snowshoes following animal tracks and watching for the birds. I love trekking through the parts of the land that are normally too wet and inaccessible in the warmer months.

The week before last we had a camera crew here from an Australian magazine taking pictures of the house. So we had Gil take some pictures of them while they took pictures of us.

Now that we’ve left the grey grey grey months of November, December, January and February we’re producing lots of power again. Those months are what we usually refer to as the “100 Days of Grey” because the sun rarely makes any substantial appearance. We make a fair bit of power off the wind generator at this time of the year, but we still have to run the gas generator far too often for my tastes. Through the worst parts of December and January we have to run the generator about once per week. By that I mean that we run one full tank of gas through the genset, which lasts for about 7 hours.

Around mid-February the sun starts to make more regular appearances and especially in those brutally cold -20C and -30C days we can do quite well. As we move into March we tend to get both sun and wind - today we’ve been generating about 25A from the solar panels and between 10A and 15A all day from the wind generator. As a result we’ve run the dishwasher, and done five loads of laundry and we’re still making tons of power. We haven’t run the generator in about four weeks.


The Driveway

Most people when they come to visit remark upon the length of our driveway. Because the front 30 acres of our land is part of the Oak Ridges Moraine we couldn’t build the house anywhere near the road. As a result the house is near the centre of the land and our driveway is nearly a kilometre long. The quality of the road varies seasonally: muddy and wet during the spring, dry and dusty during the summer, rough in the fall and not surprisingly, slippery in the winter.

Our driveway is plowed in the winter rather than blown. Now here in the country the snowblower vs. plow debate can be nearly religious in its tone and fervour but I personally prefer plowing because it builds up big drifts at the side of the fields which can act like crude snow fences. Our neighbour has a driveway nearly as long as ours and a snowblower and he has constant problems with the snow blowing right back over his lane within days of blowing it clear. The drawback to plowing is that in years with heavy snowfalls the driveway can get progressively narrower as you run out of room to put the snow. We’ve already had problems up where we park the cars where the piles are encroaching on our parking spaces. We pay about $300 a year for plowing for an average of twelve visits. This year we’re already at six so I’m expecting the bill will be higher.

The big problem this year is the ice. We’ve had ice storms before but the ice usually only lasts a day or two and melts or is covered by snow. Our driveway has been covered by ice for it’s whole length for several weeks now. The ice is so thick and so complete that I’ve been tempted to strap on my skates and try and skate the whole thing. The ice is causing us big problems with cars as you can well imagine. We park on a slope and on several occassions we haven’t been able to negotiate the hill. Backing down the hill is… exciting. Joanne has stuck her car in snowbanks twice - once so bad that I had to winch it out - I buried the truck so thoroughly that it looked like I had parallel parked it into a snowbank and my parents spent the better part of an hour trapped in the driveway on Christmas day. We can’t leave the cars at the bottom of the hill because there isn’t enough room to turn them around down there. So every day I go out with the ash tray and spread out the meagre ashes from the wood stove. We can’t get back to the pit and I’m loathe to spend the money on sanding (and I can’t get back to my pit) so we’ll just wait and hope that we get some snow soon.


Update - December 2007

I’ve gone back to Movable Type. The WordPress experiment was a disaster. Not only did I not like WordPress but it had been so long since I last posted that I had forgotten all of my login information. At least with MT you don’t have to be a programmer to modify the templates.

There’s no navigation yet so until I get that built here are links to the house page and the lights page. On the house page you’ll find information about the house and passive solar design as well as a list of books that we recommend. The lights page includes information about the line of LED lights that I build, including most importantly where you can buy them.

Another Straw House Blog

There are lots of blogs out there now about straw bale (and other) homes, but we met Kara and Dave a while ago when they passed through Ontario on vacation. I’m excited that they’ve started construction on their own home, you can watch their progress on their blog.


Canadian House and Home

There’s a feature article about the house (and us) in the May 2006 issue of Canadian House and Home. The magazine has been mailed out to subscribers, but it isn’t on the newstand yet.

The pictures are the best ever taken of the house. So good that both Joanne and I could hardly believe we were looking at pictures of the place we live (it doesn’t look that gorgeous day-to-day believe me - though Gil really is that cute). The article is excellent as well. Very well written, with informative sidebars, and no factual errors (a first).


project_sample1

An update in pictures and numbers

Ceara’s 13. She just got groomed. The groomer went a bit nuts with the sheers. Ceara is not impressed.

Gil’s nearly two and a half. He likes to help me build things. He helps by moving all the tools around.

Declan is 6 months old. This is his first meal of “solid” food. Not bad for flavourless mush.

We installed four more solar panels this winter. They doubled our production to 1.3KW. Life is good.

The first two of possibly five decks to be built this year.


Living Today for Tomorrow

The Friends of the Frink Centre are hosting a Symposium on Sustainability entitled Living Today For Tomorrow on April 22nd, 2006 at the Frink Centre in Belleville.

I’ll be giving a talk on living off the grid at 2:30pm. Also presenting talks throughout the day are my friends Chris Magwood, Patrick Marcotte, and Stephen Collette.

More information can be found here: www.hpedsb.on.ca/frink

The symposium features speakers, demonstrations and exhibits on sustainable construction, constructed wetlands for waste water treatment, renewable energy, and waste reduction and resource conservation.


Morso Stove Review

We’re very happy with our Morso stove. It puts out a nice even heat, lights very very easily and is quiet. Yes quiet. I’ve been around many wood-stoves that ping and pop and make all manner of noises as they heat up or cool down. The Morso does very very little of that which I suspect is due to the quality of its construction. It’s a solid little stove, there’s virtually no play in any of the moving parts, though there is a nasty squeak in the firebox latch. I’m not sure what to do about the squeak, can you grease a part that is that close to the fire?

Esthetically it’s exactly what I was expecting and everybody (so far) reacts very favourably to its clean lines, though Joanne says it’s a bit smaller than she was expecting. It’s very nice in that it isn’t the focal point of the room, it doesn’t demand attention, but it is pleasing to look at. A very nice addition to the room I think.

I’ve never used a stove that lights as easily and quickly as the Morso. It has two controls for allowing air into the firebox: the primary air lever has a very small throw and it used only while lighting the fire. The secondary airflow lever has a much longer throw and controls the burn temperature after ignition. I crumple up 4-5 pieces of newspaper, toss on a little kindling and a couple of small logs and the fire always catches right away. Even Joanne, who was worried (after watching my various travails with the cottage wood stoves), gets the fire going first try every time.

The firebox of the stove is very small (it’s a small stove), but I wasn’t prepared for how tiny it really is. If you are expecting to get a good burn going all night long in this stove forget it. I’ve also had to get used to cutting my firewood much smaller than I normally would. The Morso brochure suggests 12” for log size, but in reality 11 1/2” is a more realistic number - and the manual suggests 10”. I’ve also found that I need to split the logs a bit smaller than normal as well, just in order to fit more into the firebox. This could be an issue if you are getting your wood delivered from an outside source.

The small firebox does create one problem though, there is an annoying tendency for ash to leave the firebox when the door is opened. Either from overflowing over the grate or from the suction caused when the door opens. There is a lip on the front edge of the grate but it is only about 1 1/2” tall, and considering that Morso suggests keeping 1” worth of ashes on the grate that doesn’t leave much room. Consequently we find ourselves constantly cleaning up fallen ash and cinders. Worse if a log falls against the door while burning then when you next open the door you get a tidal wave of ash and cinders down onto the floor. If you open the door while the fire is burning you can actually get red hot embers falling onto the floor, or even onto the wood stored in the space below the stove. Not good. If we had carpet we’d probably have all sorts of charred bits of carpet by now, as it is this is a stove that pretty much requires a stone floor or a floor plate. To be fair the Morso manual only recommends adding new logs once the previous have burned down to coals, but that would be no defense against falling ash and cinders.

Speaking of the manual there is definitely room for improvement here as well. This is, by most people’s standards, a fairly expensive stove. Yet the manual is printed in black and white on cheap paper and while it does provide useful information for the installer is lacking when it comes to information for the end user. Indeed I had to read the section describing the separate uses of the pilot, primary and secondary air intake levers several times to discern their uses. Pictures and photos within the manual are small and not very clear - the downloadable PDF version is better. What I would like to see is separate manuals for installers and end-users. The end-user version would have bigger and clearer images as well some judicious copy editing. To put it another way, think of how much money most companies (and Morso is no exception) spend on their glossy brochures to try and sell you the product, but how little (comparatively) they spend on their manuals after you’ve bought their product. But then again I actually read (and keep) manuals so I may be in the minority here.

Overall we really like the stove, so much so that I’m already thinking of one of the slightly larger versions for our cottage.


project_sample1

More Pictures of Declan

As requested:


project_sample1

Interior Work - Part Two - The Stone Wall

One of the tenets of passive solar design is thermal mass, and from a passive solar standpoint there are two problems with our house: too much glass and too little thermal mass. But we’ve been over this before. This weekend we added about 3500 pounds of thermal mass to the north wall of the bedroom. Due to an odd coincidence I met again one of the stonemasons who helped build the arch mentioned here. I got to talking with him about my ideas for the north wall of the living room and ended up hiring him and his partner to help me build the wall using stone from my land. This is a dry laid (no mortar is used) stone wall measuring 12’ long by 3’ high and 20” deep. 20” is pretty narrow for a drystone wall but we’re not anticipating getting any frost heave in the living room. To figure out the weight of stone you usually use the weight of water which is 62 pounds per cubic foot.

Bright and early Saturday morning Matt and Mike arrived and we spent the morning drivinga round the land investigating and excavating the various stone piles around the land. Eight trips later we had a good bunch of stones to work from and we started work on the wall. I’ve rebuilt some of my grandfather’s mortared walls, but I don’t have very much experience with dry stacked stone. One of the secrets of a dry stacked stone wall is that it is actually two walls, that lean into each other. This lean is called the batter. We could cheat a fair bit because we were building on a solid surface that wouldn’t (hopefully) be moving. So we have only 1” of batter in 3’ of height; it’s barely noticable.

On Sunday Matt and Mike returned and brought John the fellow who was running the arch seminar that I crashed. With three of them working (and me helping) things moved much faster. We made four more trips for stone - if you’re building a wall budget on needing about two to three times as much stone as you need for the wall. Things wrapped up around noon, with the wall capped and level and looking pretty spectacular. It’ll take a bit of time to see if the wall is enough thermal mass, I suspect that we’ll need a bit more mass. But it looks spectacular, and when the wall is finished with our cedar I think the whole living room area is really going to come together.

Now if you know Gator, you know that he loves stones. Loves them in a way that is nothing short of disturbing. So imagine if you will attempting to build a stone wall witrh a dog who is obsessed with rocks. Imagine that dog spending two days with several men who are equally obsessed with rocks, though not perhaps in quite the same way as Gator (I never saw Matt lick a stone). It was an interesting weekend.


project_sample1

Interior Work - Part One

Sometimes life interupts the blog and this has been one of those times. But there has been some great progress in the last few weeks, despite more than a few setbacks. I’ve picked up a contract in the city and so with Joanne home on leave now I’m cimmuting into Toronto on a daily basis. Needless to say this has cut into my available time for working on the house. Recognizing this we hired a friend of my father’s, Russ, to help us with the framing if the interior walls. Gil has walls and a room, but no doors. We have an entry to our bedroom room and a linen closet but no door either. Our weekend alarm clock is Gil jumping onto our bed.

Gil’s room is drywall on the inside, we figure that kids are so hard on walls, why bother with wood. In the long east wall of his room we’ve actually roughed in a doorwayd. We figure that he and Declan can share the room until they’re about 10 (or so) and when the time come to separate them, we cut open the wall, throw up a door, and build a wall between them. Hey presto! Two bedrooms. So we have ten years to forget where the door is.

Dad has been busy dressing the cedar that we cut back in the summer. We tried to do it here using my generator (the tools are 240V and the house doesn’t do 240V). Unfortunately the generator doesn’t supply the quantities of current that the tools need and we blow motors on both the planer and jointer. The planer was fixed with a capacitor change, but the jointer needed a whole new motor, which we just got on Thursday. Next it’s routing and finishing and those walls can go up. The doors are on order and will hopefully arrive soon. We didn’t build the alls up to the ceiling yet for two reasons, we don’t really have a ceiling to build to, and we’re hoping to do something with sandblasted glass and awning windows for both light transmission and ventilation.


Introducing Declan Hunter

Born: Oct 2, 2005
Weight: 7 lbs 3 oz.
Length: 22 inches


National Post

Joanne was interviewed today about life in a Straw Bale house by a lady from the National Post. A photographer came by afterwards. It’s for an article about the OSBBC Straw House Tour. They said the article should appear in the Real-Estate section next week - Thursday was mentioned.


OSBBC Straw House Tour

The 3rd Annual OSBBC Straw House Tour is Saturday October 1st, 2005. We will not be on it this year. Joanne’s due date is October 3rd so I expect that we will either have a newborn in the house (Sokolowski’s tend towards the early), or we will be driving up and down the bumpiest roads we can find (as far as Joanne is concerned any day now would be just fine).

If you were counting on coming by and seeing the place I apologize, we’ll be back in 2006.


Costruire

We’re in the latest issue of the Italian Architecture magazine Costruire. I have a copy of the magazine and it is gorgeous, but unfortunately I don’t read a word of Italian.

German book, Italian magazine, does this mean we’re world famous?


Resource Conference

I’ll be speaking this Saturday at the Trent Hills Resource Conference. Look for me 10:30am on Saturday Sept 17, 2005. I’ll be talking about designing and building your own house, what’s involved, what to expect, what you’ll never be able to expect, with my home as a template.


project_sample1

The Wood Stove

We have a wood stove. Installation was completed a couple of weeks ago and we’ve already had several small fires (it’s getting cool at night - that’s our excuse, not that we just want to play with the new stove). So far it looks like we’ve made the correct choice, the little box (and it is very little!) puts out quite a bit of heat.

Many thanks to Andrew at Renewable Energy of Plum Hollow in Kingston who made two trips out for the installation to make sure that everything was just right.


More Press

We’re in the lastest issue of Canadian Homes and Cottages: a nice article with some good pictures.

We’re also in the latest issue of the Italian architecture magazine Construire - in Italian, so I’ve only read various translations, it’s very technical, not really interested in us, just the house.


project_sample1

Stonework and Serendipity

Joanne and I were driving up to my parents on Saturday when she pointed out a tent, high up on a hill beside the highway. “I wonder what’s going on up there?” she said. As we came by the base of the hill there was a sign: Dry Stone Wall Association of Canada. Well, I did what any self-respecting member of the Hunter family would do, I ditched Joanne and Gil at my parents and my father and I headed back to find out what was going on.

At the top of the hill we were warmly greeted by John, the leader of the seminar. Their goal was to build an arch from an old stone pile, and whatever other rocks they could gather from the pasture. The seminar was full but we were invited to stick around and observe, and if we had any questions, please feel free to ask.

John proved to be an excellent teacher and just watching, asking a few questions and taking it all in I learned more that afternoon than I have in all the various books I’ve read. I’ve been thinking of building the bottom 4’ of the south wall of Gil’s room from stone, and now I feel confident that I can get it done. Building a 12’ x 4’ x 18” wall would add 4400 pounds of thermal mass to the house, thermal mass that would receive heat from then sun, the new wood stove, and the radiant floor.

I was great to watch them build this because it was exactly the same kind of stone that we have here. The books tend to deal with nice easy to work with stones like sandstone, limestone, and shale. That’s nice but what we have is fieldstone, granite and other difficult to split stones.

The finished the arch late in the afternoon and it’s a fantastic sight. It looks like it’s been there forever, I suspect a lot of locals will be doing a double take as they head up the highway wondering why they’ve never seen that before.

The Dry Stone Wall Association of Canada


project_sample1

Woodstove - A decision has been made….

We placed an order for a Morso 4600 woodstove today. Hopefully we’ll have it installed by the end of the month. Because, you know, it’s important to have a brand new woodstove in August.


Recommended Reading

I’ve added a recommended reading section to the house section of the website. In this section I’ll be listing the various books that we used while designing and building the house as well as other books that we have found helpful recently. If you’re looking to learn about straw bale building, passive solar design or off-grid power these books make excellent resources.


project_sample1

Logging

We had Rick Allen back with his sawmill this weekend. As you may recall we had a few logs to cut up. Well all those logs are gone. We don’t know how many logs we milled yesterday, but today we milled 18 logs. We managed to stack and sticker more than half of that as well.

We were lucky in having two very nice days to work. Neither too hot or too cold, sunny but cloudy enough to cool things off, and a nice breeze. It rained everywhere all around us, but except for 15 minutes on Saturday, never on us.

We started on Saturday with our Cedar - that’s a Cedar log on the mill in the picture above. We were looking to cut both 1” and 2” stock, one inch for panelling inside the house and 2” for decking outside. By our count we have more than enough wood for all of our new inside walls, and enough to build both the south and east decks. As I mentioned before, we’ll probably be building the south deck this year, and the east deck next year. 

The big news though is that we think we have enough wood to cover most, if not all, of the interior ceilings. Now the drawback is that unless we find a nearby kiln willing to rent space, or build our own, we won’t be able to use the wood for about two years. That’s how long it can take to air dry wood. That’s Dad sitting on one of our stickered stacks. He’s sitting on 1” ash, and his feet are on 2” Cedar. The bulk of the ceiling would be Ash, with borders of Black Cherry, Basswood, Butternut, and Yellow Birch.

Black Cherry on the left, and Basswood just behind. Black Cherry is very hard, has a beautiful grain, and smells fantastic when cut. It’s not a very common wood and we probably have fewer than fifty Black Cherry trees on the land. We only cut down dead trees.

Basswood is very soft, very white and has almost no grain. Most people consider it a garbage wood, and it’s primarily used by wood turners to make bowls and such. We took this tree because it had split in a wind storm and it was either harvest the tree or watch it rot where it stood. We only cut it up because it was very large.

This stack is mostly a mix of 1” Cedar and 1” Ash. We have a lot of Ash on the property and it’s time for some of the larger ones to be harvested. We have two more that we’ll be bringing down soon, both should yield about four logs. Ash is very strong, and has a nice grain. Some call it ‘the poor man’s Oak’, but I like it better than Oak.

This is Butternut, one of my favorite woods. We don’t have very much Butternut on the land at all, and by volume most of it is in three huge trees that are so old and decrepit that there’s no point in even dropping them. I like Butternut for it’s rich brown colour and pleasing grain.

From left to right, Eastern White Cedar, Maple (Spalted and Quilted), Yellow Birch, and Ash. This is the first Yellow Birch that Dad and I have ever cut, or even seen in board form. Rick says it’s pretty rare. I have a whole bunch of it, including several trees so large that I can’t even get my arms around them. The sap wood is a lovely yellow colour and the heartwood is very red. It is a beautiful wood and we have one more piece in the bush to pull out.

This is the slash pile. As the logs are squared, and when you hit rot all the scrap is thrown into this (actually these) pile(s). Because we hope to use as much of the tree as we possibly can we have three piles, softwoods and hardwoods are separated, hardwoods can be cut up and burned in our wood stove (to be installed this year, we seem to have agreed on Morso - well that’s the concensus right now anyway). Softwoods that have any scraps of dimensional lumber on them will be cut up and used for steps on bridges on trails, and the rest will go to neighbours to use in their maple syrup evaporators. Anything that is left will be tossed into the bush to rot.


The German Book

Building with StrawBuilding with Straw book
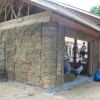
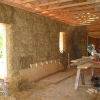
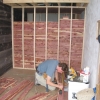
I have the German straw bale book I mentioned back here, and much to my surprise it isn’t in German it’s in English.There was something sort of undefinably cool about having our house in a foreign book that we couldn’t read. I suspect it’s just more that Friedemann was kind and thoughtful enough to send me a translated copy that we could read. It’s called Building with StrawBuilding with Straw: Design and Technology of a Sustainable Architecture
I haven’t had a chance to do a complete reading yet, though my quick scan shows lots of good clear drawings and an abundance of technical information. The featured houses are grouped at the end of the book with several nice colour pictures of each, as well as technical drawings and a nice write-up. In terms of the houses shown this one of the best straw bale books I have ever seen, as most of the houses are very interesting, modern and different.

I’ll try and post more when I’ve had a better chance to go through the book in a more thorough fashion.


project_sample1

The Ceiling - Part One: Strapping

Well I guess that was easier than expected. Though I don’t know how we would have done it without a nail gun (Thanks S!). Thursday I had 200 1"x2” delivered and Friday we braved pre-May 24 traffic to buy supplies.

We started after lunch, and had the bedroom done before dinner.

Where we can we’re strapping on 16” centres as we still haven’t decided on a final ceiling material. Things are tricky out at the ends as the trusses run east/west, rather than north/south (due to the overhang), and so we’re pretty much stuck with 24” centres. We’ll cope.

I’ve also been retaping all of the edges of the vapour barrier, as the red tape - which sticks to everything else - does not adhere very well to paralam. Once the ceiling is up the will be a trim piece that essentially tacks the red tape permanently in place.

Saturday was spent cursing at wiring. One of the more interesting conceptual problems in designing and building a home is imaging not just the current uses of any given space, but the future uses as well. When my parents retired and sold my childhood home the running joke was that if anybody had ripped out all of the extra wiring that we had run over the years the house could become structurally unstable. That is why our house is really just four exterior walls, with the interior as open as possible. The problem lays in running the plumbing and electrical systems. Plumbing is run under the slab, so really there is not much to be done about that. We’ve circumvented many of the potential problems with electrical wiring by using conduit as baseboard, but power for lights and rooms like the kitchen and bathroom must be run through the ceiling. So to that end we located a J-box in the centre of each of the back ‘bays’ of the house. Then we ran a line of 14/3 Nomex from each J-box to a post. 14/3 instead of 14/2 simply because the cost is relatively low and why not run an extra conductor if you can? I don’t know why I’d need it, but if I ever do I’ll be very happy that it is there, and very very annoyed if it wasn’t. The 14/3 was left coiled up in amongst the trusses when the insulation and vapour barrier was installed. This was OK with the electrical inspector because the 14/3 IS NOT wired into power at the J-Box. If it had been we’d have had to terminate the 14/3 in another J-box with the ends properly capped, etc. 

So now we get to the cursing. I couldn’t find one of the coils of 14/3. I knew where it should be, and even after stuffing my arm through a slit in the vapour barrier and rooting around in the insulation I couldn’t find it. And in 1500+ pictures of the house being built I didn’t have a single one that showed where the coils we located. Note to budding home builders: You CANNOT take too many pictures of your house under construction. Buy a cheap digital camera and don’t leave every day until the thing is full. Document every single step, from many different angles. Trust me on this.

I found the cable, did the preliminary wiring for Gil’s room and the track lighting for the new office/work area. That was Saturday.

Sunday Dad came over in the morning and we were done by late afternoon.

So that’s the whole back area done. I have enough 1"x2” boards left to do the hallway and probably most of the front part of the house, so we may get that strapped very soon as well.

Next weekend we have the sawmill coming in again. I think we’ll just be doing the front deck and entrance way this summer, and the east deck next year.


project_sample1

The Barn is Gone

The barn is gone.     

project_sample1

From the apple doesn’t fall far from the tree file

Gil sands the door.


Green Expo this weekend

The 2nd Annual Natural Events Green Expo will be held this Saturday at the Peterborough Armories. Last year’s Expo was well attended and a lot of fun, this year they have twice the exhibitors, and some good presentors.

I’ll be there, come on up and introduce yourself.


project_sample1

What’s happening this summer - Outside

Did I mention that it’s going to be a busy summer?

Last fall Dad and I logged a bunch of cedar trees from the west and south parts of the land. We’re lucky, in that we have good cedar, it often rots from the inside out, so you can’t tell how good a tree is until the tree is on the ground. The other problems with cedar are that it tapers considerably from bottom to top, and that there are lots of small branches that sprout out directly from the trunk all the way up the tree. This usually means that you have to clear around the base of the tree first before dropping it, both to have space to cut, and to ensure an escape route. I drop the trees, so I’m damn careful about making sure I have lots of space to run if the tree doesn’t drop in the right direction!

What we want from the cedar is mostly 2” thick boards. I’m hoping to build some decks around the house this summer. We don’t bother drying the cedar first, it dries very quickly in place with minimal cupping, and we use screws rather than nails to make later adjustments easier. In two years when it’s dried out in place, we’ll rent a floor sander and get rid of any cupping/bowing. We did that on Dad’s deck and it seems to have worked out just fine.

Here’s a sketch of the proposed decking:

Clicking on the image will bring up a larger version. As an added bonus there is a bunch of extra info on the sketch for those of you interested in the interior changes.

The deck across the front is largely cosmetic, as you wouldn’t want to sit on it, it would be much to hot and sunny for most of the year (reflection from the windows). The 12’x12’ area to the west is a small deck for the BBQ, and to sit and look out over the forest, we may also screen in this deck. The large east deck is the main sitting portion as it has the best view, and is sheltered from most of the summer sun. We aren’t big fans of sitting out the sun. We’re also lucky in that we get a bit of a breeze around the house year-round, and that helps keep the bugs away in spring/summer.

At this point we have probably 1/4 of the wood that we will needs for these decks, and as a result, they may get built in stages. Over the next couple of weeks Dad and I will be dropping another six cedars (at least), as well as some more standing dead Black Cherry, and at least one standing dead Ash. The Black Cherry isn’t very large, it’s hard to get much more than 2 or 3 inch boards out of it, but it’s a very interesting wood, and I think I may use it to replace the cupboard and drawer faces in the kitchen.

The other big job I’d like to get started on this summer is the barn. The original barn collapsed a couple of decades ago, and we’ve pulled a great deal of the lumber, and farm machinery, and cow bones, and old straw, and…. Yep, it was pretty bad. Unfortunately once all that stuff was removed it allowed the weeds, shrubs, and even trees a chance to set roots. Something must be done. The plan is to bulldoze all of the old timbers into a hole on the other side of the driveway where they can continue to rot in piece. The part that is currently standing will be torn down and rebuilt as a shed. Cheap and cheerful, will be the name of the game. With a low roof line that matches the look of the house without obscuring the view. I’d also like to clean off the top of the walls and pour a new concrete cap to prevent further deterioration. Right now water is getting into the tops of the walls each fall, freezing in the winter and spalling off the top layers of stones. I don’t intend to re-point the whole walls, I have neither time nor inclination for that, I only hope to slow their inevitable collapse.


project_sample1

What’s happening this summer - inside

It’s going to be a busy summer.

Joanne is pregnant with #2, and so Gil is going to have to move out of the nursury, and into his own room. At the moment my office occupies the space that will be his room. The office has to go, the space needs walls, but before that the space needs a ceiling.

Here’s a view of the currrent floorplan along with notations.

  1. The new office. Just a long slim desk along the back wall. Simple clean, and I’m still working out how to hide the cables and computers
  2. Bedroom wall. This wall will be floor to ceiling bookshelves just like it’s opposite (bordering the master bedroom. The top area will be triangular pieces of sandblasted glass to let in light and maintain privacy.
  3. Bedroom wall. This wall will be clad with panel or drywall on the bedroom side and T&G cedar on the living room side. It will be built to move to expand the size of the bedroom when the time comes to break it into two rooms.
  4. Linen Closet. Lined with all of my leftover aromatic cedar
  5. Bedroom Door. We’re going need to enforce some privacy soon.
  6. Odd, there doesn’t seem to be a number six…
  7. This space is currently the nursury, but it is plumbed to be an ensuite. When competition for the main bathroom gets too fierce, we get our own.
  8. Walk-in closet. Lined with aromatic cedar. Staining is done, but it needs some trim and sliding doors.
  9. Front hall closet. Lined with aromatic cedar, it needs sliding doors, and some better shelves for seasonal storage.

Before the walls for Gil’s room can be built a ceiling must be installed.

The Ceiling

Many ideas have been floated for how to cover our ceiling. Right now it’s just vapour barrier over insulation. Functional, but not terribly attractive.

Drywall: We hate drywall. And installing it after you’ve moved in? On 2000 sq/ft of ceiling, I don’t think so.

Plywood: Nice concept, and I’ve seen it done well, but a huge amount of work, very tough to get the edges clean and straight, and very hard for two people to do, over their heads day after day. I’ve undertaken a fairly exhaustive search for pre-finished T&G plywood, and well, it doesn’t seem to exist. I can get prefinished, but it’s VERY expensive. Or I can get T&G but it’s used for subfloors and is very rough.

Tongue and Groove Wood: Similar to what you’d use for flooring. It’s expensive if you buy pre-finished, but unfinished Western Red Cedar is not too bad. VERY nice looks, somewhat expensive. Now I’d rather use my own wood, but my cedar is way too knotty to use for a ceiling, not to mention that most of the cedar I have right now is slated to be used in decks. I have some maple, ash and black cherry, but nowhere near the quantities I’d need for the ceiling, and it won’t be dry for a couple of years if I don’t get a kiln built. Then there is the work involved in planing, jointing, routing and finishing 2500 sq/ft worth of hard wood. I don’t mind doing the work, but I don’t see having that kind of time in the forseeable future. As the old addage of freelance work goes, “You either have money or time. You never have both.”

What we’re concentrating on now is the back ceiling, the ceiling over the bedrooms and open area. The ‘hallway’ and gallery will likely be done the same way. But I have greater ambitions for the front part of the house. I thought I’d share a few of my inspirational images with you.

Oh man, what a ceiling. We can’t pull off something that daring, we don’t have the space to allow a drop like that, but I’m seriously thinking that a wave effect, done with straight boards could be very effective as well.

Eventscape makes cool tensioned fabric errr… things. Layered I think it would be very cool as a ceiling, but probably expensive.

Yes, that is industrial felt. Great because it’s rigid enough to hold a shape, and it absorbs sound. A big consideration when you’ve built a house that’s largely open concept, and more than somewhat reflective.


More Publications

We’re going to be profiled in this Friday’s edition of the Globe and Mail. It’s the Architourist column, in the Real Estate section. I’ll post a link when I have it.

We’re also in a recent book on Modern Straw Bale building/design, the book however is in German, so even when I get it, I’ll just be looking at the pretty pictures.

A review copy of the German book was sent to an Italian architecture magazine, and now they are working with SMA (the architects) on a feature article. They are working with SMA rather than us because they are a very technical magazine and are more interested in the engineering and architecture of the house than ‘our story’.


Spring Redesign

Yup, I’m redesigning the site again.

Things will likely be a bit iffy over the next day or so, please bear with me.

Update: Well I think I’ve got most of the kinks worked out of the site. If you find anything please drop me an email. Otherwise… welcome spring!


The Danes prepare to eat our lunch

WorldChanging has an excellent article on Denmark and its move into renewable energy on a grand scale.

In 1973, during the Yom Kippur war, Denmark was 98% dependent on foreign oil for its power. Today, thirty-two years later, the country derives 21% of its energy from wind and is a net exporter of energy.

They’re investing 10 billion dollars of R&D money into renewables over the next 10 years. And this, my frineds is where the rest of the world will be eating North America’s lunch in the decades to come, as oil gets more and more expensive more and more of our money will be going overseas not just to pay for oil, but to pay for any kind of alternative energy infrastructure as well. Meanwhile we drop another 100 million dollars trying to get another reactor working a the Pickering nuclear plant.

But the best part of the article, for me, was this quote from Svend Auken, a member of the Danish Parliament and former Minister for Energy & Environment:

Finally, he envisions the pathway to a bright green future, saying that �it need not be dull, it need not be boring, we don�t have to give up our lifestyle, we just have to be a little bit more smart about how we live.�

Amen brother.


project_sample1

Now in More Colours

I managed to get my hands on some more coloured acrylic tube and so I have a veritable bouquet of colours available for my lights. I managed to find some burgundy, blue and purple tubing. The stuff is hard to find in Canada because the demand is so low, these tubes were imported from the US, which is usually too expensive for me, but I piggy-backed on somebody else’s order.

In the works right now is a table lamp with multiple 1W LED’s. I’m trying to work out something where more lights can be easily added depending on lighting requirements. Of course lights could just as easily be removed, even moved between bases if you had multiple fixtures.


project_sample1

Winter 2005 - Part Two: Hot Burrito #1

When it is sunny (in the winter) the house gets very warm. It has been sunny all day today and the inside temperature is 27C. It’ll probably get up to 28C before the sun goes down. Now as uncomfortable as 28C is (to us) one big benefit is that most nights we can carry that heat through to the enxt morning. In other words the floor system (which consumes a lot of electricity) does not have to come on. That said, a shading strategy is under development and will hopefully be put in place by next winter.

Opening windows isn’t really an option since that just brings cold air in along the floor. So your head stays hot and your feet get cold. Not to mention that we really don’t want to bleed off too much of the heat, since it will last over night and even into the next day.

This certainly isn’t the fault of the architect (though I don’t think he realized how hot it might get in here), since we wanted the wall of windows, and the high ceilings, but if we were doing it again I’m not sure that we would do things any different, we like the windows that much.

Here’s some pictures that show why.


Winter 2005 - Part One: She’s So Cold

It has been, so far, an odd winter. We spent most of December with the temperature hovering down around -20C to -30C at night. Daytime highs could get up to -15C or -10C if we were lucky. The second half of January was warmer, and February, so far (again with the so far!) has been positively balmy with temperatures hanging around the 0C mark. When it gets down to -30C the windows get frost on the inside, the dogs don’t like to go out, the vehicles don’t like to start and you can get frostbite on exposed skin in minutes.

October, November and December were also dark, so dark in fact that we went nearly 100 days without a full day of sun. Fortunately they were pretty windy months since the generator broke (the pull-cord snapped) on December 24th and I couldn’t get it fixed until January 5th. We went more than 11 days with no generator in December that’s a very very long time.

Once the temperature gets below -10C you can actually feel a very light cool breeze coming off the windows as the cool air falls down the inside of the front windows. And here we enter into one the problems with our house. We wanted the windows, we love the windows, we bought the best windows we could find. But in the winter we have a love/hate relationship with our windows. The problem, in a nutshell, is that we have too damn many of them. When it gets really cold the windows allow the house to cool too quickly - windows after all, even really good ones, have a pretty low R value.  As a result our floor system (which consumes a great deal of electricty, and propane) runs all the time on very cold cloudy days. The floor is unable to radiate heat as fast as we lose heat through the windows. This problem, we think, is a function of volume. The square footage of our house isn’t all that large (about 2000sq.ft. in the main house) but it is very tall, 17’ at the front down to 10’ at the back. We have a lot of volume.  We use fans to push the hot air down, but the fans use electricity. What we need is a method of quickly adding some heat, without worrying about it radiating throughout the day. What we need is a wood stove.

When we designed the house we added a re-enforced pad in the centre of the living/dining room for a masonry stove. We have since learned that a masonry stove would likely have been a grave mistake. If you don’t know a masonry stove burns a certain quantity of wood very fast and very very hot. It has a great deal of mass (they’re made of stone or brick) that captures that heat, holds it, and radiates it throughout the day. In most cases this would be a splendid idea, however imagine in our house if you woke up in the morning and it was cold and cloudy, so you lit a fire and burned 50 pounds of wood in 30 minutes, the stove starts a radiating a lovely warm heat. And then the sun comes out. Initiate evacuation procedure!

So a wood stove. But now we get into some serious issues. Firstly we only like modern stoves. Modern stoves are almost all quite expensive. And European. Now expensive is unfortunate but we’re willing to save for the right stove, because we are going to be looking at this thing for years. But European, now that’s a problem. Canada is a pretty small market, and most European manufacturers don’t have Canadian distributers let alone local dealers. So now we’re looking at importing a stove, and moreover buying and importing a stove that we have never seen. All the stoves look real pretty in the pictures, but it’s kind of hard to get a sense of scale from a brochure. I think I’m going to end up making cardboard mock-ups.

The stoves we’ve been looking at are:

In all cases these stoves are meant to heat a space of aproximately 1000sq.ft. and burn very efficiently. That’s should be enough to heat the main common part of the house. We don’t care so much about spot heating the bedrooms since Joanne and I both prefer sleeping in a room that is on the cooler side.


project_sample1

The Bench

In the course of cutting and milling wood we have gathered a fair amount of very nice decorative slab. To us slab is wood that’s at least two inches thick and, for whatever reason, not worth milling into boards. Generally we leave the edges rough and I’ve been working on various methods of building legs to turn the slab into benches. Because the wood generally isn’t great quality, and most of it is cedar I’ve been thinking of building outdoor benches to scatter around the land anywhere I think a person might want to rest or where there is a particularly nice view.

When I had the metal legs made for the coffee table I also has some legs made up for a bench for my front hall. Like the coffee table the orginal front hall bench was made by me in a style I call modern plywood. But it was too small for the front hall. It had storage inside that was sufficient for dogs leashes and gloves when we lived in the city, but not the outdoor gear required for the country. It certainly couldn’t accomodate the vast vast plethora of footwear, gloves and hats that we have accumulated. So I moved it to the back door and built this bench.

The legs are stainless steel, welded, with a horizontal brace at the top. The slab is two inch thick cedar finished with multiple coats of spar varnish, to protect it from the sun. It has plenty of space underneath for boots and I’ll either buy or build a couple of nice open baskets for gloves, hats, etc. These legs are too expensive for me to use more than one set, though I could drive the costs way down by bending the steel rather than welding it, and moving to mild steel rather than stainless (though then I would have to worry about rust).

We have recently cut some ash, maple and black cherry hardwood. From that I have some very nice ash slab, and a maple beam with both spalting and quilting in the grain. I intend on doing some sort of George Nakashima/Brent Comber style piece with it, the form is nearly complete in my head, soon I’ll get it down on paper. No work will be done on this piece until the summer though, since the maple is still wet and heavy enough that two of us could barely move it.

Drying wood is starting to become a big concern for us, as hardwoods can require several years to dry outside on their own. There are numerous lumber yards and kilns around us but none of them will rent space, so it looks like one of the first summer projects (money permitting) will be a solar kiln and drying racks. Details, you can be assured, will follow.

Just in case that you’ve been worried that father’s been bored, what with not being here and working on my house all the time. Well you need not worry. He’s built himself an iceboat. The iceboat uses a windsurfer sail for propulsion, but that’s way too pedestrian for my Dad, he’s building a wing.


project_sample1

The Coffee Table

I built our old coffee table one apartment and one house ago. As a first effort it wasn’t bad; wood legs on castors with a glass top and metal lower shelf. It was very early 90’s. But like many projects I never quite finished it, the glass was never firmly attached to the legs and could slide if bumped by a leg, a dog, or more recently (and dangerously) by an energetic and highly mobile toddler. Joanne decreed the old table dangerous and it was dismantled.

So I designed a new one. I’ve been toying with the concept of lighted furniture for a while now. I like the idea of creating small discreet sources of low light scattered around a room and using point sources where more illumination is needed (i.e. for reading). One method of doing that is embedding lights within furniture. In the case of this table the light is provided by two 1W LED’s. It shines both up and down. The light up is very pretty, but not particularly useful (you can’t read by it). The light down illuminates the bottom shelf, in our case the home of our stack of current magazines.

I’m fairly pleased with how it has turned out and for a prototype it’s pretty good. Right now it’s sitting in Eurolite’s showroom, so if you’re in Toronto you can go and check it out.

Right now I’m building new slabs for the table top, the current ones are cedar (not a great material for table tops - too soft), the new ones will be butternut. They will have an improved method of holding the light in place. I’m also ordering some flat low voltage wiring to use for the lights, which will allow me to run the wireing to the table, up the leg, and to the lights and have it almost invisible.

Update: Not to sound all, “You like me, you really like me!” but Land+Living (a design blog I enjoy) has some very kind words to say about the coffee table.


I’m Back!

Life, I’m afraid, has interupted the blog. Hopefully I’ll be getting back onto a regular posting schedule, but here’s a quick list of what been going on:

1. Mojo Productions Inc., (i.e. my company) has been pretty busy lately with several clients on the go. Mostly web page development but also some thin-client user interface design (which I really enjoy).

2. I’ve designed and built a bench and coffee table, plus new versions of the rod lights and some new lighting prototypes.

3. Gil is now 16 months old and he’s walking and (sorta) talking. Since I work from home I take care of morning and early evening daycare.

4. It has been a very cold winter here so far and I’ve had my trusty caulking gun out extensively sealing cracks - when it’s -35C it’s pretty easy to find the tiny gaps where the cold air is getting in! We’ve decided that a small wood stove is imperative for our house, but due to both financial and timing constraints that won’t be happening until the spring/summer.

5. While we have stopped giving tours of the house (for now) we have appeared in Private Power magazine and have been interviewed a couple of times for other publications.

6. Dad and I have been logging cedar out of the bush to use for decking as well as a some ash, maple and black cherry for future use. A bunch of the maple and ash is spalted and/or quilted which is both rare and quite lovely. Some the ash slab is destined for benches as is a fantastic 10” square maple beam that we cut.


project_sample1

Northern Lights

Last night as I let the dogs out I noticed lovely shimmering curtains of colour in the sky. The Northern Lights were out. It’s only the second time on my life that I have seen them, and I got out my camera and tripod to take some pictures. These were mostly greens, with a touch of orange. Last year we got to see reds, which only occur at very high altitude and are rare.

Another benefit to living in the country, the light pollution is so bad in cities that few people ever get a chance to see the Northern Lights.


October Update

It’s been a pretty busy fall around here, we had the OSBBC house tour right at the beginning of the month, I’ve been very busy with various work projects and Joanne’s maternity leave has come to an end and she has returned to work.

Aside from my regular work (which has been going very well, thanks for asking) I just recently built a custom 6’ long version of my dining room light for Eurolite. I was somewhat apprehensive at first, I didn’t think it was going to come out very well, I was worried that the proportions would all be off, plus it would have to be hung from four wires rather than two. In the end though I was very pleased with the results, if I had enough plastic I would probably build another one for myself. There are some images of the custom fixture on the lights page.

The Tour

Given the weather (it poured rain most of the day) the tour went quite well. We had fewer people than we expected but still had around 75 people over the course of the day. Mom was on the door, Dad helped with tours, Simon and J.P. from Generation Solar, Peter Mack from Camel’s Back Construction, and Paul Dowsett from Scott Morris Architects were all answering questions, showing people around and handing out business cards by the fist-full. Surprising (to me anyway) was that the majority of people who came through the house had read the blog, many of them from the very beginning.

Afterwards we had a nice BBQ, Tina, Steven & Laurie & Malaika, and Regis (from the Paudash Lake house I worked on) all came by, a pleasant visit was had by all.

Final Grading

We have finally completed the final grading around the house, Eric was here last week and the week before dumping topsoil around the house and leveling it back out. The ICF"s are covered and the west and north sides are backfilled with topsoil. The east side of the house has been built up with gravel/sand from our pit - since we are building a deck on that side we didn’t see any point in buying topsoil.

The Floor

Dan Peel was here again working on the radiant floor system and it looks like we have finally got all of the kinks out of the system. We had been having a series of problems where the various aquastats on the hot water tank couldn’t read the temperature of the water inside the tank accurately and as a result the floor would rob all of the heat from the tank. This always seemed to happen right as we were about to shower and you wouldn’t find out there was no hot water until 5 minutes into the shower - and only then would the boiler come on. Over the course of last winter we also had two broken pumps and a malfunction in the boiler that kept it running for one month non-stop (before we clued in), these problems masked the underlying aquastat issues until spring of last year. But by then the sun was out more frequently so we decided to spend the summer thinking about the problem and Dan suggested drilling a hole through the side of the tank cover, through the insulation and placing a temperature prob right up against the stainless tank insert. That seems to have done the trick. We’ve had almost no solar gain for over a week now and the house has been quite comfortable. Thanks Dan!

Site Update

I recently purchased a Kill-A-Watt, which is a meter that shows how much power in Watts and Amps a device uses over time. It can also display Volt Amps (VA), Power Factor (PF), Kilowatt/Hours (KWH) and time (how long it has been plugged in). It has no data logging built in, while it is plugged it works, unplug it and it loses all data.

So I’ve been wandering around the house plugging all of my various tools and gadgets into the Kill-A-Watt and compiling a list. The list is ongoing but I have added in the values of the various lights around the house and posted it in the house section: Load Chart. As I measure more devices I will add them to the chart, right now it’s mostly just the power tools, and computers.


Straw Bale House Tour

This Saturday October 2nd is the Second Annual Ontario Straw Bale Building Coalition Straw House Tour. We missed last year because Gil had just been born, so we’re excited to be taking part this time. The Tour runs from 10am to 4pm, rain or shine. Full details can be found at the OSBBC Tour page.

Peter Mack from Camel’s Back Construction,  Simon Boone and/or J.P. Pawlins from Generation Solar, Paul Dowsett from Scott Morris Architects, and my Mom and Dad, will all be at the house giving tours, answering questions and hopefully having a good time. If you’re in the area please drop on by and introduce yourself.


project_sample1

Paudash Lake House

I returned last night from four days working with the gang from Camel’s Back on a house on Paudash Lake, just south of Bancroft. In addition to Pete and Tina, Stephen, Lesley, Ryan and new guy Paul were also out. It’s a neat house, most of the wood was cut from the property, and it’s built with hemp bales. It’s first time that I’ve worked on a house built with hemp bales. They’re a pain in the ass. The hemp doesn’t rip, it’s bleeding hard to pierce them and they dull any blade. I think I’ll stick with regular straw for my next project.

There’s a neat/strange story behind the house though. The house was designed to fit on a pre-existing foundation. Imagine that you own some land. An acreage even, and one day you head out for a walk on that land and find the very definate beginnings of a house being built, on your property. That is what happened to the people Regis bought her land from. It seems that several brothers owned the land next door, and one of them decided to build himself a house. So he put in a foundation, a well, and a septic system. Apparently the brother didn’t have an accurate survey (or perhaps any survey at all). When this geographical faux-pas was brought to his attention his reaction was ... litigation - even after the actual owners offered to sell him the land at a very good price, even though he had already sunk so much money and effort into the property. He lost and Regis bought a piece of land with a foundation, a well, and a septic system. It’s a very nice piece of land with towering spruce trees and a view of the land to the east. The house will be off-grid, but I didn’t manage to get the details of the system.


LED Lights

Inspired (some might say shamed) by the attention from MocoLoco I have built a page devoted to my LED lights.

Included is information on the lights, a bit about how they were designed and built, and in the future info on how you might buy one of these lights, if you were so inclined.


Check Us Out at Talk Energy

We’re the featured story at Talk Energy right now.


project_sample1

Mission Green Part Two

I wanted to wait to post this until after Garry had his update done on the Mission Green site so that I didn’t “scoop” him. It’s a nice article with some really nice pictures, obviously the secret to good interior shots is to take them when it’s raining outside.

Around 2pm, right as a huge thunderstorm hit, the convoy rolled up. I grabbed all of our umbrellas and headed out to greet everybody. Once safely inside we gathered in the front and Garry told everyone about Mission Green and some of the goals they hoped to achieve, and a bit about his own history.

With that squared away he proceeded to ask a series of well thought out and focused questions about all aspects of the house. I highlight that because I get asked a lot of stupid questions about the house and so it’s a pleasure to answer smart ones. Let that be a warning to you if you’re coming on the House Tour! Not a single one of them cracked a Three Little Pigs joke, they were a class act. Pete Mack and Simon Boone were there as well and both had to field questions on the off-grid system and the straw bale structure.

After touring around the house we headed outside to check out the trucks. We largely ignored the big Yukon SUV since the only difference between it and the regular one is that its engine has been tweaked to run the special 85% pure cellulose ethanol made by Iogen. Nice, and certainly a very definate improvement to what would normally be a very non-Green vehicle. But what really interested all of us rural geeks was the hybrid Silverado pickup. You can find out all you need on their site, I’m not a GM PR person, but the feature that really thrilled all of us was the two exterior 120V 15A outlets in the pickup bed. The truck can act as a generator, it has an inverter and will feed 120V off the batteries until they get low and then it will start the engine (!) to charge them back up! I wish we’d had that when we were building the house, no more listening to the generator idling all day.

All in all it was a very nice visit, I really enjoyed meeting Garry and his team, and I’m pleased and honoured that they chose to visit us.


project_sample1

Coboconk House

I spent a good portion of the week helping build a straw bale cottage up on Balsam Lake. The property is owned by a lovely lady named Gerarda Schouten, a retired schoolteacher who has decided to make the lake her home.

It’s a nice simple design with a bright and airy main floor for Gerarda, with a deck and straw bale sunroom, and a walkout basement with full guest quarters.

We’ve been doing bale work for the last two weeks, stacking, stuffing and stitching, work that I didn’t get to do much of on my own house. When we were doing the bale work here I spent most of my time dealing with the building inspector, the roof, the architect, and the infinite number of other questions that cropped up. It’s a running joke with Pete and Tina that the owners stack the first bale because they might not get a chance to stack another! At least not until the next day when things have generally calmed down. Next week they’ll be plastering and I’ll be out there again for a couple of days, baling isn’t easy work but plastering is HARD work.

A reporter came out from the Lindsay Daily Post to do an article on Gerarda and her new home.

But what you really want are the pictures… right?


Mission Green

Mission Green is coming here.

Mission Green is a cross-Canada tour that salutes 85 local Canadian environmental initiatives that are creating a cleaner, healthier environment for all Canadians. Garry Sowerby, renowned adventure traveler and world record setter, hits the road in GM’s advanced technology vehicles to highlight what we all have in common - a shared concern and compassion for the places we call home. Follow the journey with us as we tour Canada!

We’ve been asked to be one of the stops on the tour. Garry and his team will be coming by next Friday afternoon for a tour of the house, some pictures with local press and all that fun stuff. I’m pretty excited to meet Garry as I’ve followed his career for some time and even have a well worn copy of Road Fever, the book written by Tim Cahill about their drive from the bottom tip of South America to the northernmost edge of Alaska.


July - August 2004 Solar Stats

It’s been a pretty crappy summer, and I’m saying that as a guy who doesn’t even really like summer. It’s been rainy, cloudy and cold. We openned the top windows once and within three days had the ladder back out to close them again. Whereas last year we were sleeping with the sliding doors and side windows open this summer we’ve mostly kept them closed. A friend was saying that we’re going to have a really cold and snowy winter but this summer has been so weird I can’t help but wonder if there isn’t a reasonable chance that it’s going to be 30C in December.

June Solar Stats
Monthly Total: 1225.3 AH
Daily Average: 40.84 AH
Best Day: 54.7 AH
Worst Day: 19.3 AH
Days Below 5 AH: 0

July Solar Stats
Monthly Total: 989 AH
Daily Average: 31.9 AH
Best Day: 57.6 AH
Worst Day: 0 AH
Days Below 5 AH: 0

I haven’t been very disciplined about my record keeping this summer so there is some margin for error in those stats. They look about inline with last year though; June was better with 1225.3 AH versus 1174.8 AH (based on daily average for June 2003. July is a bit down with 989 AH versus 1066.8 AH for 2003.


What a July….

I’m stuck sitting here just trying to come up with words to describe the roller coaster ride that was July 2004. Really stuck. What a month.

The month starts off well enough, work’s starting to pick up after a slow start to the summer, and then my laptop dies. The screen turns grey and that’s the end of it. Fortunately I bought AppleCare (Apple’s extended warranty) and so I place the call.

“The screen is dead.”

“OK sir, please reboot.”

“OK, it’s rebooted.”

“Good, now what do you see?”

“Nothing, the screen is dead.”

Repeat with subtle variations for half an hour.

“Well sir, it sounds like your screen is dead.”

*sigh*

There are a thousand stories like this on the web, now I’m one of them. So off it goes to Apple Canada with a note that this is my main machine, please rush, can’t work without it, etc. I call all my clients and explain that I’m down for a week or so, hang in there, I’ll be back up soon, Apple said I should have it back in a week.

I take the opportunity to drag in Pete, Tina and Stephen and we stucco the front of the house. The time is not wasted the house looks great!

While we stucco Gator suddenly gets very sick, he can’t keep anything down, he’s shivering convulsively. Off to the vet he goes. Gator has swallowed a stone. It is lodged in the juncture where his large and small intestines meet. They cut Gator open and remove the stone. With all the diagnostic x-rays and such it’s a $1200 procedure.

While all this is going we learn that Joanne’s grandmother, her last surviving grandparent, has been admitted to hospital with pneumonia, she is 94 and she is not expected to live through the night. She does, she’s a fighter to the end but passes away early the next morning. We take the dogs to my parents and head off to Burlington for the funeral.

We return and I still don’t have a computer, “Maybe early next week.” They said that last week to so I decide that I’m going to need to buy a new computer. My clients have been very patient but it’s been three weeks of no work and that’s three weeks of no billing. I buy a new computer that I really can’t afford. Of course I get my laptop back three days later.

During the no-computer hiatus I get an email from the editor of MocoLoco saying that they’d like to show our house on their site, could I please send pictures? I really like MocoLoco, I read it everyday, I’m thrilled and send off pictures.

A couple of days after the MocoLoco posting I’m reading WorldChanging another site I like and a group of people that I really respect, and I start yelling, “Joanne! Worldchanging! Linked! Worldchanging!” I could play it cool, but I’m just way too excited, first MocoLoco and then Worldchanging, I am chuffed.

By late July the site has long since passed the most vistors that we’ve ever received in a month and I’m reading the stats every night wondering how high it will go. The house is starting to get mentioned on a whole variety of sites. On July 28th we get picked as a Hot Site of the Day by USA Today’s online edition. All told almost 19,000 people visit the site in July, and we serve over 64,000 pages. That means that a fair number of people that visit the site stick around and read more than just the home page.

While all this is going on Gil learns to sit up, crawl and then stand up on his own (while hanging on to something). Suddenly we have to pay very very close attention to him, because man, he can move FAST when he wants too. The dogs seem slightly alarmed that the noisy little attention hog is suddenly mobile. The safety plugs go into the outlets, the floor lamps get moved away, and the glass end-tables and coffee-table in the living room are packed for temporary storage.

Then, on the 30th of July, Gator starts throwing up again. He starts shivering and quivering. I take him into the vet, he’s x-rayed and there doesn’t seem to be anything inside him, we figure he’s just really sick, they advise me to give him some Pepto-Bismol and bring him in the next day if he throws up again. He pukes several times during the night. Back to the vet. This time they do a barium series: they feed him barium and then x-ray him to see how it moves through his system. There’s a blockage, same place as the last one. It’s the 31st of July, the date of the annual Hunter family picnic, I’ve spent most of my day at the vet clinic, talking to the vet on the phone or waiting for her to call, I walk onto my parents back-deck three hours late and announce, “They’re cutting him open again.”


project_sample1

Interior Pictures of the House

These interior pictures of the house are pretty much the same as the ones that appeared on MocoLoco, but larger and with additional captions.

Aside from from the ceiling and some minor pieces of trim the front part of the house is finished, or at least as finished as it is going to be for the foreseeable future. The ceiling is a whole other matter. Right now it is nothing more than vapour barrier over insulation.

There are a variety of options available and the debate revolves around the inevitable nexus of cost, appearance and trouble. The normal, obvious choice is sheetrock (drywall), but I hate drywall, I’m not adept enough at mudding to do it over my head, and even professionals are going to make an unholy mess when it comes to that stage. One problem with open concept is that it is very hard to contain dust. Once it’s up it needs to be painted, which is also a pain. Basically we would need to hire professionals for the whole process.

The next option is tongue and groove (T&G) plywood. Pre-finished T&G isn’t that expensive, with a lift and a nail gun isn’t that hard to install (similar to drywall). The cost is about $60.00 per sheet and we’d need 75 sheets, which comes out to: $4500.00, more than I’d like but not outrageous.  We’ve seen lots of pictures of houses with this done and they all look very nice.

But not great, and whatever we do we’re going to be looking at this for a long time. The best looking option would be T&G wood, and we’re fortunate enough to have a great deal of wood available to us. BUT, we don’t have nearly enough cut yet, and certainly not enough of any given species. So, we could cut down a whole bunch more stock, but the only species we have that is plentiful enough for the ceiling is cedar and I already have most of that earmarked for decks. One idea that is interesting involves taking all the various species and mixing them, creating a patchwork effect. None of this would be ready for a year or so though since the wood needs to be cut, dried (which can take a year or more without a kiln) and routed. The cost though is pretty minimal, the sawyer costs should be around $1500.00 for that much wood, and if get it kiln dried that will add another $1000.00.

We could buy T&G wood but that’s quite expensive, 2400sq/ft at $4.00sq/ft is $9600.00, and far more than I want to spend on this.

One option that we’ve explored is Strawboard, but unfortunately it doesn’t come in T&G or a pre-finished form. Either job is bad, but having to do both is a deal killer for me.

Regardless we’re going to be staring at vapour barrier for the rest of the summer.


We’re in World Changing!!

World Changing a blog devoted to “Models, Tools, and Ideas for Building a Bright Green Future”, has picked up the story from MocoLoco and has mentioned us on their blog, and I couldn’t be more thrilled.

But, it’s important to note that while these sites refer to it as my house, I most certainly did not build it on my own. A whole lot of people helped and I want to thank them all again here, especially: Mike Cooper, Simon & J.P. at Generation Solar, Pete and Tina at Camel’s Back Construction, Paul Dowsett at Scott Morris Architects, and my father, Ron Hunter, who was on site everyday, and without whom this house just would not be here. Thank you Dad.


We’re on Mocoloco!

The house has been featured on Mocoloco! A website devoted to modern contemporary design and architecture Mocoloco is one of my daily reads. Given the fantastic stuff that appears on the site I am totally stoked to be included!


project_sample1

Cladding the front of the house

From the very beginning there has been a debate over how we would finish the front of the house. We went through the first winter with no cladding at all which was a mistake.

As you can see from the image above there are a great many cracks and crevices along the front wall. We believed that sealing up the inside would be ‘good enough’ to get us through the first winter. We were wrong. The house was drafty and at times cold. At the very least we should have put up house wrap and taped all of the seams.

We knew that cladding the front was a priority for this year but what material? We had always thought of covering it with western red cedar, similar to our doors, which contrasts nicely with the grey stucco and soffits/fascia. WRC also weathers well and is durable. The drawbacks are that it is (in Ontario) an expensive material and that with all the windows would require a great deal of custom work to make it all fit. Even then guaranteeing a weather-tight seal would be very nearly impossible. We talked to Paul (our architect) and he and Charlie came up with a plan. First we would prime the walls, then a layer of a material called Blueskin, which is adhesive and waterproof over the wood and attaching to the sides of the windows (which stand proud of the front of the house by almost one inch). Over this we would apply strapping and then the WRC would be attached to the strapping. As Paul says you start from the assumption that water is going to get behind the cladding and work from there. Unfortunately all of these layers would leave the wood about one and a half inches out from the windows - and aesthetically we were not very happy with that idea.

Earlier this spring I helped Pete and Tina from Camel’s Back Construction on a stuccoing job at Camp Kawartha and I began to wonder about using stucco as our cladding. It has several benefits for this kind of job: it’s very easy to shape which would make working around the windows a breeze, stucco as it is used in strawbale homes is breathable so water is less of a concern, and it is relatively inexpensive. So back to Paul and Charlie for a plan.

Paul and Charlie’s new plan was very similar to the old one, primer, Blueskin, but adding rigid foam insulation and a sheathing to allow water to run behind that over the Blueskin (should water ever get back there). Over the foam they wanted mesh and then stucco. All told this came out to six layers and again would have resulted in cladding that was proud of the windows.

While I agree with the base philosophy - water will get in, so build to expect it - the whole thing seemed overly complex and to me six layers means six places where failure can occur. Water is just about the worst thing that can get into a strawbale wall, yet they’re just covered with only two or three layers of stucco. Why does this work? Because the walls are breathable - moisture from inside passes freely through the wall to the outside, water from outside has a very hard time getting through the stucco to the bales. I believe this is one of the reasons that people find strawbale homes so comfortable to live in. Blueskin is not breathable, any water vapour that manages to migrate through the wall to behind the Blueskin would remain there. That’s why the rigid foam was necessary, to move the dew point out of the centre of the wooden beams.

So we formulated our own plan. The cladding needs to perform two functions: seal the house from drafts and water, and protect the front from the elements. First we caulked all of the seams in the structure and any gaps around the windows with a high quality caulking. Then we applied a layer of Tyvek house wrap and taped all of the seams with Tuck tape. Tyvek allows moisture to travel one way, from the house out, but not from the outside in. It will greatly (if not completely) cut down the drafts, but will be an imperfect water barrier since it’s pierced hundreds of times by staples that hold down two layers of plastic mesh. The plastic mesh is in place to give the stucco something to grip onto, since it will not adhere to Tyvek. We’re counting on the stucco to stop the bulk of the water from ever getting though to the Tyvek. Since the front of the house rarely gets directly rained on this shouldn’t be too much of an issue. The east and west ends of the gallery do get some weather and we will have to keep our eyes on them.

There are some risks to our method: if a quantity of water gets behind the stucco, or the stucco gets saturated that could present problems to both the stucco and the Tyvek covered wood. While straw is quite breathable, wood is less so and if a quantity of water (condensation for example) builds up inside the beams it may exceed the breathablility of the materials, mould and rot could occur (though this could happen with the other method as well). It’s possible that the plaster could shrink back somewhat from the windows and we may need to apply a thin bead of caulking around the windows. We did use metal mesh for the corners but two layers of plastic mesh for the faces. Plastic mesh is not as strong or stiff as metal, but is much easier to work with. To test the plastic mesh we plastered the north face of the gallery first, left it for several days and checked it before starting on the front of the house.

In the end only time will tell if we have made the right decision, but there’s no debate that it’s made a huge improvement in the look of the front of the house.


March to May 2004 Solar Stats

This May was our one year anniversary in the house. I can barely articulate how much we have learned in the past 12 months. It has been a fantastic experience, and, notwithstanding the birth of Gil, probably the best year of my life.

We’re quickly coming to appreciate that the spring is a great time to be living off grid; we’re getting appreciable amounts of both sun and wind.

March Stats
Monthly Total: 718.3 AH
Daily Average: 23.17 AH
Best Day: 58.5 AH
Worst Day: 0 AH
Days Below 5 AH: 4

April Stats
Monthly Total: 1011.4 AH
Daily Average: 33.71 AH
Best Day: 63.7 AH
Worst Day: 0 AH
Days Below 5 AH: 4

May Stats
Monthly Total: 985.2 AH
Daily Average: 31.78 AH
Best Day: 57.1 AH
Worst Day: 7.2 AH
Days Below 5 AH: 0

These stats are for the solar panels only, I still don’t have any method of measuring the output of the wind generator (H80) over time.


Talk Energy

A new discussion and news site based on Slashcode has just started up called Talk Energy.

It’s worth a look.

From their site: “Talk Energy is an online community that bridges the gap between those who desire a sustainable future and those with ideas of how to achieve it. It focuses on energy conservation and alternative energy within the home. If we want to make a real difference in the world that we live in, that change will begin at home.”

I found this through the fine folks at World Changing.


Off-grid System Maintenance

I’m not sure why but some people seem to have it in their minds that living off-grid, generating your own electricity involves lots of work (though if tinkering is what you want it can, as a quick browse through the the archives of Homepower magazine will demonstrate). However for most people, myself included, the system takes care of itself quite well. So for the benefit of the curious I thought I’d detail the maintenance needs of the various parts of my system.

The Solar Panels
The panels themselves are solid state and require no maintenance. In the winter I prefer to brush off the snow, but that’s just because I don’t want to wait for the snow to melt off. If I’m up on the roof I usually do a quick inspection of the panels and racks just to make sure that nothing is loose or damaged in any way, and in the last year nothing has been.
Total Time: one hour every six months (if that)

The Wind Tower
Like the panels whenever I’m at the top of the hill I do a visual inspection of the tower, just to make sure nothing is obviously loose or noisy. Every two years the tower must be lowered to do an inspection of the generator itself, and lubricate/clean/tighten various parts.
Total Time: visual inspections / half day every other year

The Batteries
Once a week we try and make sure that the batteries get a full charge in them, this often means running the generator for a few hours. Once every month to three months (depending on the season) we do an equalize charge, which requires sun, wind, and the generator running all day. Every month I check the fluid levels of each cel, and top them up with distilled water if needed. Before and after an equalize charge I take readings of each cel with a hydrometer to measure the specific gravity of each cel, this is the most accurate method of determining stage-of-charge.
Total Time: half an hour every month

Electronics
I’m lumping the inverter, solar charge controller and wind charge controller into this group, and aside from monitoring (see below) there is no maintenance for any of this equipment, it’s all solid state.
Total Time: zero

Monitoring
Monitoring the system performance is important for many reasons: first it lets you know how your power generation and power consumption are comparing, which I think we can all agree is pretty vital, second by tracking base line numbers you’ll realize if something does go wrong. My biggest gripe with various aspects of the system is the lack of quality monitoring, especially where the wind generator is concerned. I keep a chart by the inverter and every night before I go to bed I write down how much the solar panels generated that day and cumulatively, the battery voltage, amp/hours away from full charge (which is an approximation), and details about whether the generator was run, if we achieved float, full charge, equalize, and if water levels were checked.
Total Time: two minutes each night

Gas Generator
Unfortunately this is still an important part of the system, and with months like November likely always will be. Aside from adding gas, I check the oil once a month, clean the air filter every other month, and just generally check it over whenever I gas it up.
Total Time: one hour every month

To sum up that comes out to about three hours every month, which is less time than I spend cutting the grass. Every couple of months I might have to spend an extra hour on some aspect of the system, and in fact most of the extras (like equalizing) are highly automated, start the generator at the beginning and stop it when the equalize is done.

For most people using a wind generator or solar panels in a grid inter-tie situation there is even less work to be done, since the vasy majority of my maintanence is the care and feeding of my batteries.

I have a well planned system installed by professionals (I recommend the fine folks at Generation Solar), if you’re a hard-core do-it-yourselfer your milage may vary, and if you go with some fly-by-night installers all bets are off. Remember when you’re talking to any kind of contractor ask lots of questions, if they can’t answer them in a way that you can understand that’s a bad sign. Ask for references, and CHECK THEM! Ask to see some systems they have installed, pay attention to the details, is the wiring neat and well routed? Does the system look like a pro job or some kid’s science fair project? How long have they been in business? How many systems have they installed? You might spend a bit extra but the results will be worth it.


project_sample1

Logging

As much as possible we have tried to use wood off our own land inside the house. The inside and outside walls of the bathroom are cedar milled from trees on our land, as are the maple window and door frames.

Before we started the house we marked 102 trees and sold them to a logger. They had a big machine that carried out the logs, and that could navigate nearly anywhere. Before the job was over we traded them an additional ten maple trees in exchange for taking down and cutting into 12’ sections 6000 board feet of white cedar. White cedar are difficult trees to drop because their branches come directly off the trunk and run from the ground up. They can be very dangerous when they fall. The trees are also problematic because, unlike most hardwoods you can’t tell if the tree is any good until you’ve dropped it. White cedar, like Poplar, tend to rot from the inside out. We were very lucky, it turned out that most of the trees they cut were very good. The boards we got from those cedars built a deck on the back of Dad’s house, and most of the walls of his garage. It was the leftovers that went into our bathroom.

Over time, walking around the land, we started finding sections of trees that had been left in the bush. Good trees, on the sides of hills, in gullies, even out in the open. We pulled eleven oak and maple sections, all solid, at least 18” in diameter, and about 12’ long, out of the north west corner a couple of years ago. We had them milled and have just come to the end of the maple.

Recently Dad and I have managed to pull out two pieces of black cherry, five really nice pieces of ash, and a bunch of oak from the south east corner of the property. The main section of ash was 22’ long and 18” in diameter and had fallen across a small gully with a creek in the bottom. There were tracks from the logger’s big machine but they couldn’t seem to get close enough to grab the logs. We pulled them up from the other direction, up a very steep hill using a pulley and my truck. While we were down there we found two more pieces of ash and several sections of oak. We’re also going to drop a couple of cedars from the same area.

In addition to this wood we’ve also cut up and dragged out two poplar trees that were solid, but had blown down in a wind storm. We’ve also been marking and dropping cedars from other parts of the land. The various hardwoods we’re going to cut up into 1” planks, possibly for use on our ceilings. The cedar we’re going to cut into 2” stock that will be used to build decks on the south and east sides of the house.

Four of the cedar trees that we took down were just below the house near where we park the cars. They were taller than any of the trees around them and spoiled the view to the south east. With them gone the whole view from the front door is greatly improved. How much? Well check the pictures and see for yourself.


2004 Ontario Strawbale Home Tour

The OSBBC Annual Straw Bale House Tour has been scheduled for October 2nd, 2004. We’ll be on the tour this year, last year Gil was just two weeks old and we just didn’t feel up to having dozens of people trooping through the house. If you’d like more info about the tour send me your contact info and I’ll forward it to the appropriate people - or you can go to their website.

As far as I know we’re the only off-grid house on the tour it will be interesting to see if that effects the number of people coming to see the house. OK, so it turns out there’s at least three other off-grid homes on the tour. Thanks to Tina for making me feel so much less unique.


project_sample1

Collecting Maple Sap

Dad and I went out today to help Allen collect sap from his two maple stands. All told he has about 500 trees tapped, this is down from 1100. We collected about 500 gallons of sap.

Here are the pictures.


project_sample1

Making Maple Syrup

Many of our neighbours tap trees and make maple syrup. In our little area there are several good sized operations and one of our neighbours has even won a few ‘World Champion’ ribbons for his syrup (I add the quotes because maple syrup is only made in Ontario, Quebec and a few north-eastern states).

Our neighbour Allen invited us over today to watch them boiling off the sap to make syrup. Allen has quite the operation, he has a dedicated sugar shack with a large evaporator. He can boil off 500 gallons of sap at a time. The ratio of sap to syrup is 40 to 1. So 500 gallons of sap will boil down to about 12 gallons of syrup. Allen has 500 trees tapped, some people hang line from tap to tap ending at a 50 gallon drum. All of Allen’s trees are hung with taps and buckets. When the sap runs they go from tree to tree and empty each bucket to get the sap. They used to have around 1100 trees tapped but are scaling back the operation.

Tomorrow I’m going back to help with collecting the sap and more of the boiling. Allen gave us a sample to bring home and it is very good stuff. Sometime in the future I plan on tapping a bunch of my trees and making some of my own syrup. They sell small evaporators for the ‘hobbyist’.

Here’s a bunch of pictures with explanations.


No More Comments

I’m sick of dealing with comment spam so I’ve turned comments off.

My email link is at the bottom of each page if you want to get in touch.


Stats - December 2003 - February 2004

Things definitely improved as we progressed through the winter.

December Stats
Monthly Total: 607.1 AH
Daily Average: 19.5 AH
Best Day: 45.5 AH
Worst Day: .2 AH
Days Below 5 AH: 8

January Stats
Monthly Total: 654.1 AH
Daily Average: 21.1 AH
Best Day: 55.1 AH
Worst Day: 0 AH
Days Below 5 AH: 8

February Stats
Monthly Total: 868.8 AH
Daily Average: 31 AH
Best Day: 63.1 AH
Worst Day: 0 AH
Days Below 5 AH: 3

This doesn’t take into account the power from the wind generator. I still don’t have any method of measuring the output of the H80 over time. I can state that we have been generating much more power from the wind generator, we’ve had several days where I am certain that we made more than 100 AH from wind.


Pre-Spring Thaw

We’ve had our first hit of warm weather and the driveway is a mess. If you do not have 4-wheel drive you cannot come and visit. The propane guys tried to come in yesterday, unannounced, I’d have warned them off, and judging by the gouges in the driveway he’s lucky he got back out. I don’t even know how he got in as far as he did, which was only about 100 metres. The benefit is that the worst has passed, most of the snow is off the fields and it can only get better.

On that note I’m also pleased to report that we managed to get in another two equalizes last week due to a full day of both wind and sun. So over the last six months we’ve equalized four times, which from what I can gather is pretty darn good.

Fixing the driveway has now jumped right up to the top of the list, since we don’t want to relive this mess every year. The only way that I can see doing it is to ditch the north (uphill) side of the drive and drop in two or three culverts. That way the melting snow will pass harmlessly under the driveway rather than over it. Then we need to build up the weak spots with another 6-10 inches of gravel. It’s times like these that I’m glad we have our own pit.

Of course none of this can happen until the frost leaves the ground and it is thoroughly dry, which won’t be for another couple of months. Another benefit to the ditching strategy is that the top soil removed by ditching can be spread around the house to build up the landscaping, which also needs to be done this year. Don’t think we’ll be doing any gardening anyway.


Positioning Solar Panels in Northern Climates

This isn’t a post about solar panel azimuth or anything so technical. It’s far more practical advice I’m offering today: if you live in an area that gets a great deal of snow (currently we have between 2 and 3 feet), and you are going to be putting your panels up on your roof, make sure that you have a easy, safe method of clearing snow off of them. Yes the snow will eventually melt off, but I hate losing a full day of sun waiting. Clearing the snow off our panels is a chore that I do not enjoy, climbing the ladder onto the very slippery steel roof and clearing the panels is bad enough, but getting back off the roof and onto the ladder is NOT FUN. The only consolation is that if I fall it will be into four foot deep drifts and onto Gator, who will be trying to catch the falling snow, and will instead get me.

If I were doing it again I would build in a dedicated rest for the top of the ladder that prevented it from sliding sideways. Then I would build a metal catwalk with some angle irons and metal mesh - neither of which is an expensive material. For the sake of a couple of hundred bucks I’d be able to walk around the panels in confidence.

Better yet, if your site allows it, mount the panels on the ground.


project_sample1

The House in Pictures

I’ve put together an overview in pictures of the house from the day we broke ground (August 2002) to when we moved in (May 2003).


Extreme Cold

With temperatures dipping down to -30C (-22F) at night (colder with the windchill), we’ve had a pretty frigid couple of weeks. It’s cold enough that the dog’s paws hurt when we go for walks, cold enough that the oil froze in the pipe between my neighbour’s oil tank and his furnace, and cold enough that one of the hoses in our generator froze solid; one of eight the shop had seen that week with the same problem.

So how does the house behave when it’s his cold? Pretty well I’m pleased to report. If the sun is out the front part of the house will get up to 25C (77F) during the day and will hold most of that heat until we go to bed. Of course with the quantity of glass we have across the front of the house we do bleed heat, and the colder it is the faster that heat goes.

If there is no sun though the floor works pretty well. It can hold the house comfortably around 20C-21C (68F-70F), trying to go any higher seems a waste of propane, we just wear sweaters. Because the way radiant floor systems work it’s a ‘slow heat’. The slab is heated to a certain temperature and from there it just radiates (obviously). But we have a huge interior volume of air, much greater than most houses of the same size because we have such high ceilings. At its lowest point our ceiling is over ten feet high, at it’s highest it’s around seventeen. The floor just cannot react fast enough to compensate when the sun goes down. As a result we’ve moved a fireplace up to near top spot on the wish-list. We built a re-enforced pad into the floor to carry the weight of a masonry fireplace but have decided that what we need is actually just an airtight insert or a good woodstove. We need something that can heat the air quickly, but can also stop relatively quickly. The last thing we want is to light a fire on a cloudy morning in a masonry heater, than have the sun come out and have the stove radiating heat all day long. We’d cook ourselves out of the house!

I’ve been running around with the caulking gun sealing cracks and hunting for drafts, and there have been lots. At this point I have gone through more than three dozen tubes of caulking and I have one piece of advice for those building a house: the expensive caulk is worth it! Buy the best stuff you can find, we’ve used various grades around the house and we’ve had all sorts of failures wherever we used cheaper caulk. It might cost more up front but it’s worth it to save the aggravation and cost of having to do the same job twice.


The Dining Room Light

I’ve finished the prototype of the dining room light (pictures here). It’s been hanging for a week now and I’m fairly pleased with the results, though there are some adjustments to be made. Like the gallery lights this fixture uses LED’s. There are four bulbs, each 1 watt, wired with two small power supplies on the ceiling. The drawback to using two power supplies is that I need to run four conductor wire down to the light (which is bulky). The benefit is that all four lights are quite bright.

The body of the light is maple, stained with the dark victorian mahogany stain that we’ve used elsewhere in the house. This matches our dining room table and chairs. The LEDs shine through plastic rod that has plastic tube of the same outside diameter joined to the top. This results in a slight glow from the top sides and a bright glow from the bottom sides. The majority of the light shines down - as is intended. The effect, is very pleasant.

The light hangs from two very thin lines of wire, which are secured for now, with simple plastic screw clips. Once Jo and I have decided on the perfect height for the light I will cut the wire to length and secure it internally (and invisibly).

One of the big problems with the LED bulbs is that the manufacturing process is not perfected at this point. As a result the lights are slightly different colours. They range from a shade of violet-white to a greeny-white. I’ve also had some tinted towards yellow and blue. When the bulbs are made a small amount of phosphure is sprayed onto the inside of the bulb, with the red, orangle, and green bulbs this process is highly tuned, and the colours of those bulbs are very uniform. As it stands right now if I were making these lights commercially I’d have to colour-match all of the bulbs.

I’m going to try another version of the light using plastic for the body. I’m hoping to use blue-tinted plastic so that the light shines down white, but glows outward in a deep blue from the sides. I’m also working on some overheard lights for the ‘bedrooms’, and a couple of other designs for the dining room.

The guys at Eurolite have a whole bunch of brand new prototype LED lights and are getting me a bunch to play with. I can hardly wait.


project_sample1

The Wind Generator & High Winds

Some folks have asked how my wind generator deals with high winds. I took some pictures the other day with wind speeds around 35km/h.

Basically there is a angled pivot in the body of the generator. As wind speeds increase the blades are pivoted up at an angle, out of the wind. In the highest possible winds, I imagine, the blades would be parallel to the ground, horizontal rather than vertical.


State of the World

Bruce Sterling’s annual ‘State of the World’ address/dialogue is up on the Well right now. As always, it makes for great reading.

Since we’re talking about Bruce Sterling I highly recommend that anybody interested in Green Building/Sustainable Living check out the Veridian Design Movement.

And no, I haven’t yet posted that list, and I wouldn’t count on seeing it soon. I do have a working dining room light though, that I will post pictures of real soon, and some other lighting news.


Living in the Country

We’ve been here six months now, we’ve gone through our first summer and are headed into our first winter. I was thinking last week, as I walked across the fields to get my mail, how much I’m really enjoying living in the country. Joanne and I have a knack for choosing good locations, our first house was on a really fantastic street in downtown Toronto, with amazing neighbours, and all that downtown has to offer. Good and bad. It looks like we’ve lucked into a great neighbourhood once again.

Last Saturday was the neighbourhood Christmas party. Every year everybody on the Line gets together at one house to celebrate the season. Everyone brings a little something to add to the table, some booze, and this year, a sealed envelope with a contribution for a young boy on the line who has cancer and is going through chemo.

This is an adult affair, though an exception was made for Gil, since he’s so young. As soon as we walked in the door Gil had been wisked out of my arms and I hardly saw him for two hours, though you could follow his progress around the room by all the cooing of the women. He slept through the whole thing. Midway through the night my next door neighbour and I slipped out and went to play hockey in Millbrook. When we came back two hours later the party was still going on.

Hockey in Millbrook is a quintessentially Canadian affair. Pick-up hockey, played on a small-town rink with a bunch of guys of various skill levels in various levels of equipment, with either classic rock or country playing at ear-splitting levels over the PA system. I step on the ice and I feel like singing Oh Canada. We rarely have enough players (or goalies), there are no lines, no positions, and nobody seems to keep score, it really is hockey played for the sheer joy of it.

I’ve been composing a list of things I love and ... er ... like less about the country. I’ll post it soon. Right now there’s about 6 inches of snow on the ground, it’s minus 10C, and the whole countryside looks like a Christmas card. I love winter in the country - that’s number one!


project_sample1

Six Month Stats

Now that we’ve been in the house for six months I’ve compiled stats for what we’ve generated off of our solar panels since June of 2003. Because we reset the system when we swapped in the new battery in early June the stats for June start at the 11th.

I have no stats for the wind generator because we have no way to track its production over time right now. If I can find a method of storing data for the wind generator that isn’t expensive and that doesn’t consume electricity itself I’ll set it up, until then it’s all anecdotal. Most of the summer was pretty still and winds have been steadily increasing since late September/early October.

All readings are in amp/hours (AH). Our solar panels and battery bank are wired for 48 volts (V). To calculate Kilowatts (KW) multiply AH times voltage (V) which will give you kilowatt/hours (KWH) at 48V, divide by 2 for KWH at 110V.

Our solar collection system consists of 8 BP Solar 85 watt panels, which feed 48V through a Trace C40 into our battery bank. All of the stats are taken from the C40.


project_sample1

Making LED lights

We had always intended to install lights in the gallery, and had run wire for four lights, at either end and in between the fans. But while I found many lights I liked I never found any that met that sweet spot of looks, power consumption (low) and price. So I decided to try and make my own.

We decided that for the gallery we wanted lights that didn’t do much more than provide a nice glow, enough to aid in walking around the house without barking your shins on furniture but certainly not enough light that you could read under them. They have to be very low wattage, so that if when go out we can leave them on without worry.

I was in Eurolite one day pestering them about LED lights when Traian brought out some new ones that they had just got in. Basically they’re a single LED in a small plastic shell that incorporates a reflector and a lens. There are two lens’, a flood and a spot. On the back side is a metal disk that has two leads soldered to it and takes care of heat dissipation. The LEDs are very bright, the spots from head on are way to bright to look directly into, like little halogen lights. But best of all, each light is just 1 watt. So all four lights, spanning the whole front of the house, will use just 4 watts!

They cost $20.00 each, plus $50.00 for the power supply - I needed the big one since it’s 50 feet across the gallery. My idea was to mount the lights on the end of 2” clear plastic rod, and hang them from the ceiling. I hoped the rods would glow as well as shine downwards. I was wrong.

I found out that 1 3/4” rod is half the price of 2” rod so I changed that, and it had been my intention to cap the lights with orange tube of the asme outside diameter as my rod but I couldn’t get any cheaply so I bought clear instead. I thought I could paint it. I was wrong.

Every kind of paint I tried cracked the tube. I thought clear would look pretty crappy so I got out the yellow pages and called every single plastic supplier until I found one that could get me affordable orange tubing.

With that settled I started experimenting with my rods and lights and I found out that the clear tubes, with polished ends, act as fibre optics. No glow, just the light coming right out the end. I took some sandpaper and scuffed up both ends of a rod and that helped somewhat, but it still wasn’t quite the effect I wanted. So I gritted my teeth and sanded the sides of the rod as well, so the whole thing now looked like it had been etched, or sandblasted. And it glowed. That was the look I was going for. I sanded the remaining three rods and glued on the lights.

The orange tubing has two purposes: first it covers and protects the light, and second it provides and anchor point for the downrod. The downrods, incidently, were salvaged from the kitchen lights. They couldn’t be used there because the rods are a fixed length and the ceiling in the kitchen slopes, so we had to hang those lights with wire instead. I wanted coloured tubing to provide some contrast between the whitish plastic rod. It might have been interesting to have both the rod and tubing the scuffed white colour, and if I were building more I’d probably try that. I was hoping that the orange might also glow a bit from the light, and it does, but not as much as I’d like. I also left the orange tubing clear, and if I were doing this again I’d probably sand the outside of it as well - for more glow.

I started to installed the lights on Sunday but two of my glue joins weren’t very strong and had to be re-done. Dad was over today and he and I installed the other two lights. During the day they are barely visible and in sunlight I’m sure you wouldn’t even be able to tell that they were on. At night they glow very nicely, sort of a purplish/blue colour - not pure white, which could be due to the LEDs or the plastic. I’m not sure how ‘white’ white LEDs actually are. Esthetically they are very nice, but from a practical standpoint I’‘d like it if they threw just a bit more light. The frustrating thing about all projects like this is that I have built the prototype of a production unit. I now know all of the pitfalls, flaws, and weaknesses of the design and if I had to build them again I could do a much better job. But of course that would double my costs and I don’t really want to do that, so these lights will have to be good enough.

The materials cost per light came out at $100.00 per light. I didn’t really keep track of my labour so I’m not sure what that would add to the cost. But still even at $200.00 / light I’d be pretty darn happy with them!

As always I took a bunch of pictures as I built them. Many thanks to Traian, Charles, and Jerry at Eurolite.


project_sample1

Fall Colours

Last week while Joanne was out and about she took some really nice pictures of the land and the fall colours.

I had planned to post them, but then I got sort of sidetracked…

So here they are, if you look in the third picture you can see the wild turkeys back out in the field.

I’m running out of space for this web site so I’m moving a bunch of the photos in the archives over to another server, so if you notice any broken links in the archives please let me know.


project_sample1

The Obligatory Baby Picture

Here you go, Gil Hunter, age <24 hours.


The Obligatory Birth Announcement

He’s a week early, but Gil Hunter was born October 18, 2003 at 6:20pm. He’s 7lbs 4oz, 21” long. Everyone is healthy and happy.


project_sample1

Shelves & Ends

The shelves are up and my Mom is currently applying a coat of urethane - she likes painting but hates sanding, I don’t mind sanding but hate painting, we’re a good team. This afternoon we’ll slide (ha! - they’re huge and heavy) them into place and start laying in the books! We’re leaving the backers as wood for now, but I want to replace it with 1/8” translucent polycarbonate sheets. These look like sandblasted glass but are actually cast in place with the texture. They allow light through but only show the faintest of silhouettes. At night they should have a gourgeous glow from the bedroom lights. The drawback? $102.50 per sheet and I need 5 sheets.

Here’s some pictures, including close-ups (by request) of the kitchen handles.


project_sample1

Kitchen & Closet

With Joanne due in less than three weeks the house has once again been the focus of frantic activity. The kitchen is done except for an upper shelf and kickplates.

I bought some rough aromatic cedar which we planed, jointed, ripped and routed for a walk-in closet and coat closet for the mudroom. The walk-in closet is pretty much done but the coat closet will have to wait a bit. The benefit to using rough cedar is the thickness. Regular aromatic cedar that you buy pre-cut is barely 3/8” thick and won’t withstand many sandings, our cedar is over 3/4” thick and should last a lifetime. Aromatic cedar is Eastern Red Cedar which only grows in the south, while regular cedar does smell it isn’t “aromatic”.

I designed bookshelves to create a wall separating the bedroom from the rest of the house. We cut the wood on Gene’s big machine and we’ve been busy sanding and staining the shelves and uprights. Installation should happen tomorrow. I will take pictures, until then here are some pictures of the kitchen and closet, including a very pregnant Joanne.

So far as power goes we had mostly been breaking even but all of the extra work (sanding, sawing, vacuuming) has been putting us into a deficit. Fortunately the insurance company came through and gave us the money to buy a new generator. This proved to be harder than expected since we got the money right after the big blackout so of course all of the good Honda generators in Southern Ontario were sold, but then Honda was diverting all shipments of new generators to the west coast to help fight the forest fires. Stores were telling us that they weren’t expecting a shipment until late October at the earliest. But we got lucky and found one in Uxbridge and drove out there the same day.

Ideally we’d like to put four more solar panels on the roof but that’s going to cost nearly $4K and I’m not sure that’s in the cards right now.


Media #3

Yesterday was fairly hectic around here. We had an electrical inspection to hopefully close out that permit but there’s apparently still some debate around our battery box. So we wait again.

In the morning I received word from Simon Boone (Generation Solar) that CHEX TV (our local CBC affiliate) had seen the Peterborough Examiner article and wanted to do an on camera interview with me for the six o’clock news. The CHEX guy showed up while the inspector was still inspecting so he did some shooting around the house. Then he did a segment outside the house looking up at the panels and a short interview with both Simon and myself inside. Unfortunately he cut Simon’s piece such that it appears Simon is almost recommending against solar power (based on cost). Off-grid and grid-intertie aren’t all beer and roses but I doubt that you’ll find many people on the east coast expressing great support for the status quo. From what others have told me I looked and sounded fine, it’s hard to judge personally since it’s always just sorta freaky seeing yourself on TV.

One of the things that bothers me a bit about this media attention (and yes, I knew it was coming after last Thursday) is the natural bias of the media to see us as radicals. Not in that we choose to live differently but in that since we choose to live this way we must also be out blocking whaling ships in Zodiacs on the weekends, churning our own butter, and such. Each reporter, upon learning that Joanne is pregnant, asked if we will be doing a home birth (we aren’t). I tried very hard especially with the CP interviewer to reinforce the idea that we are just normal people, living our lives in a normal home, except of course that we generate our own power. I have found with some people that as the environmentally friendly buzz words about our home (passive solar) start to pile up (straw bale) I can sense that (off grid) we are being further and further marginalized in their minds. This perception definately appears in most of the media surrounding houses like ours. In a way I end up trying to seem less green that I really am in the hopes that people might start see renewables as a reasonable option.

What I would rather see is some indication from the media, from the government that there are lessons to be learned from the events of last Thursday, and that some of them might be learned by looking, really looking at houses like mine and the thousands of other people around North America who produce their own power. Or they could just patch the grid, everyone can crank their air conditioning and hope that the problem solves itself. Guess which I think is going to happen.


Canadian Press Article

It looks like finding a online link for the Canadian Press article is going to be problematic so for now (or until CP sends me a cease and desist) here’s the article text:

Canoe.ca has picked up the article, thanks to Art for the heads-up.