Cladding the front of the house
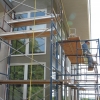
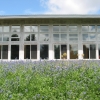
From the very beginning there has been a debate over how we would finish the front of the house. We went through the first winter with no cladding at all which was a mistake.
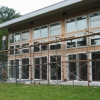
As you can see from the image above there are a great many cracks and crevices along the front wall. We believed that sealing up the inside would be ‘good enough’ to get us through the first winter. We were wrong. The house was drafty and at times cold. At the very least we should have put up house wrap and taped all of the seams.
We knew that cladding the front was a priority for this year but what material? We had always thought of covering it with western red cedar, similar to our doors, which contrasts nicely with the grey stucco and soffits/fascia. WRC also weathers well and is durable. The drawbacks are that it is (in Ontario) an expensive material and that with all the windows would require a great deal of custom work to make it all fit. Even then guaranteeing a weather-tight seal would be very nearly impossible. We talked to Paul (our architect) and he and Charlie came up with a plan. First we would prime the walls, then a layer of a material called Blueskin, which is adhesive and waterproof over the wood and attaching to the sides of the windows (which stand proud of the front of the house by almost one inch). Over this we would apply strapping and then the WRC would be attached to the strapping. As Paul says you start from the assumption that water is going to get behind the cladding and work from there. Unfortunately all of these layers would leave the wood about one and a half inches out from the windows - and aesthetically we were not very happy with that idea.
Earlier this spring I helped Pete and Tina from Camel’s Back Construction on a stuccoing job at Camp Kawartha and I began to wonder about using stucco as our cladding. It has several benefits for this kind of job: it’s very easy to shape which would make working around the windows a breeze, stucco as it is used in strawbale homes is breathable so water is less of a concern, and it is relatively inexpensive. So back to Paul and Charlie for a plan.
Paul and Charlie’s new plan was very similar to the old one, primer, Blueskin, but adding rigid foam insulation and a sheathing to allow water to run behind that over the Blueskin (should water ever get back there). Over the foam they wanted mesh and then stucco. All told this came out to six layers and again would have resulted in cladding that was proud of the windows.
While I agree with the base philosophy - water will get in, so build to expect it - the whole thing seemed overly complex and to me six layers means six places where failure can occur. Water is just about the worst thing that can get into a strawbale wall, yet they’re just covered with only two or three layers of stucco. Why does this work? Because the walls are breathable - moisture from inside passes freely through the wall to the outside, water from outside has a very hard time getting through the stucco to the bales. I believe this is one of the reasons that people find strawbale homes so comfortable to live in. Blueskin is not breathable, any water vapour that manages to migrate through the wall to behind the Blueskin would remain there. That’s why the rigid foam was necessary, to move the dew point out of the centre of the wooden beams.
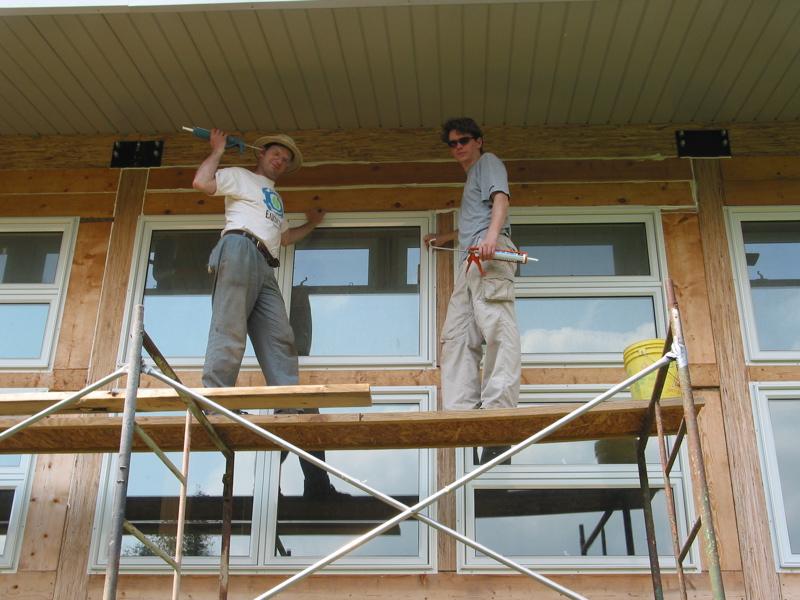
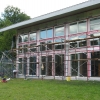
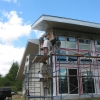
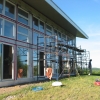
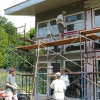
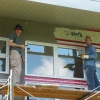
So we formulated our own plan. The cladding needs to perform two functions: seal the house from drafts and water, and protect the front from the elements. First we caulked all of the seams in the structure and any gaps around the windows with a high quality caulking. Then we applied a layer of Tyvek house wrap and taped all of the seams with Tuck tape. Tyvek allows moisture to travel one way, from the house out, but not from the outside in. It will greatly (if not completely) cut down the drafts, but will be an imperfect water barrier since it’s pierced hundreds of times by staples that hold down two layers of plastic mesh. The plastic mesh is in place to give the stucco something to grip onto, since it will not adhere to Tyvek. We’re counting on the stucco to stop the bulk of the water from ever getting though to the Tyvek. Since the front of the house rarely gets directly rained on this shouldn’t be too much of an issue. The east and west ends of the gallery do get some weather and we will have to keep our eyes on them.
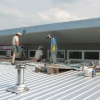
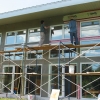
There are some risks to our method: if a quantity of water gets behind the stucco, or the stucco gets saturated that could present problems to both the stucco and the Tyvek covered wood. While straw is quite breathable, wood is less so and if a quantity of water (condensation for example) builds up inside the beams it may exceed the breathablility of the materials, mould and rot could occur (though this could happen with the other method as well). It’s possible that the plaster could shrink back somewhat from the windows and we may need to apply a thin bead of caulking around the windows. We did use metal mesh for the corners but two layers of plastic mesh for the faces. Plastic mesh is not as strong or stiff as metal, but is much easier to work with. To test the plastic mesh we plastered the north face of the gallery first, left it for several days and checked it before starting on the front of the house.
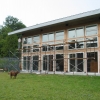
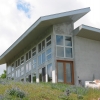
In the end only time will tell if we have made the right decision, but there’s no debate that it’s made a huge improvement in the look of the front of the house.


-

- July, 17, 2004