The Obligatory Birth Announcement
He’s a week early, but Gil Hunter was born October 18, 2003 at 6:20pm. He’s 7lbs 4oz, 21” long. Everyone is healthy and happy.
-

- October, 19, 2003
He’s a week early, but Gil Hunter was born October 18, 2003 at 6:20pm. He’s 7lbs 4oz, 21” long. Everyone is healthy and happy.
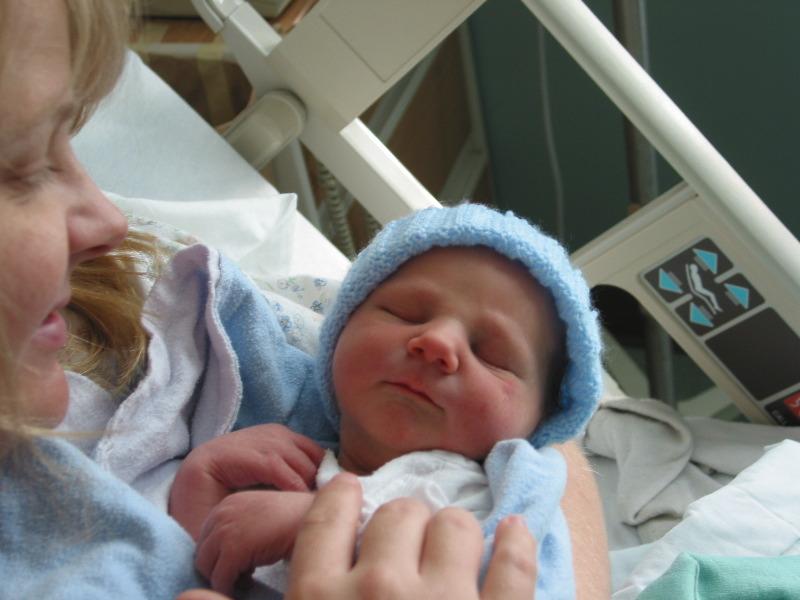
Here you go, Gil Hunter, age <24 hours.

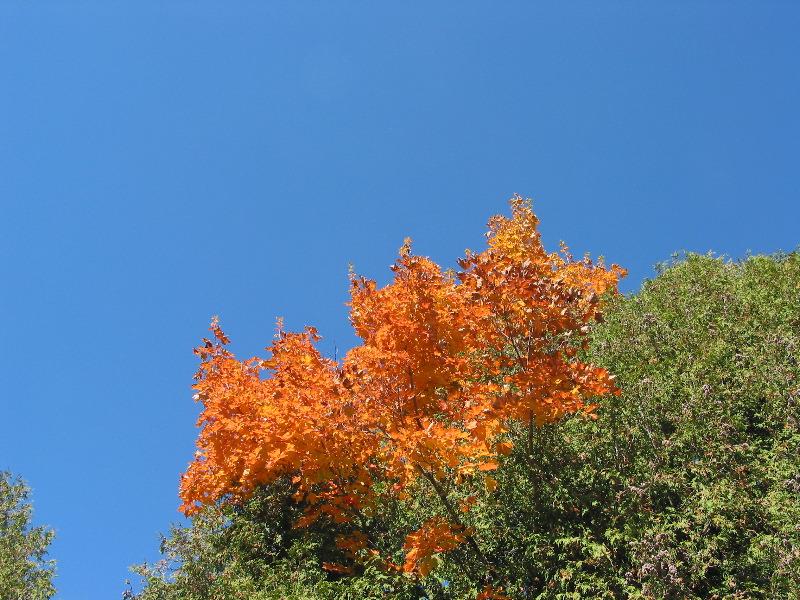
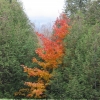
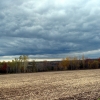
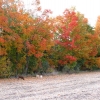
Last week while Joanne was out and about she took some really nice pictures of the land and the fall colours.
I had planned to post them, but then I got sort of sidetracked…
So here they are, if you look in the third picture you can see the wild turkeys back out in the field.
I’m running out of space for this web site so I’m moving a bunch of the photos in the archives over to another server, so if you notice any broken links in the archives please let me know.

We had always intended to install lights in the gallery, and had run wire for four lights, at either end and in between the fans. But while I found many lights I liked I never found any that met that sweet spot of looks, power consumption (low) and price. So I decided to try and make my own.
We decided that for the gallery we wanted lights that didn’t do much more than provide a nice glow, enough to aid in walking around the house without barking your shins on furniture but certainly not enough light that you could read under them. They have to be very low wattage, so that if when go out we can leave them on without worry.
I was in Eurolite one day pestering them about LED lights when Traian brought out some new ones that they had just got in. Basically they’re a single LED in a small plastic shell that incorporates a reflector and a lens. There are two lens’, a flood and a spot. On the back side is a metal disk that has two leads soldered to it and takes care of heat dissipation. The LEDs are very bright, the spots from head on are way to bright to look directly into, like little halogen lights. But best of all, each light is just 1 watt. So all four lights, spanning the whole front of the house, will use just 4 watts!
They cost $20.00 each, plus $50.00 for the power supply - I needed the big one since it’s 50 feet across the gallery. My idea was to mount the lights on the end of 2” clear plastic rod, and hang them from the ceiling. I hoped the rods would glow as well as shine downwards. I was wrong.
I found out that 1 3/4” rod is half the price of 2” rod so I changed that, and it had been my intention to cap the lights with orange tube of the asme outside diameter as my rod but I couldn’t get any cheaply so I bought clear instead. I thought I could paint it. I was wrong.
Every kind of paint I tried cracked the tube. I thought clear would look pretty crappy so I got out the yellow pages and called every single plastic supplier until I found one that could get me affordable orange tubing.
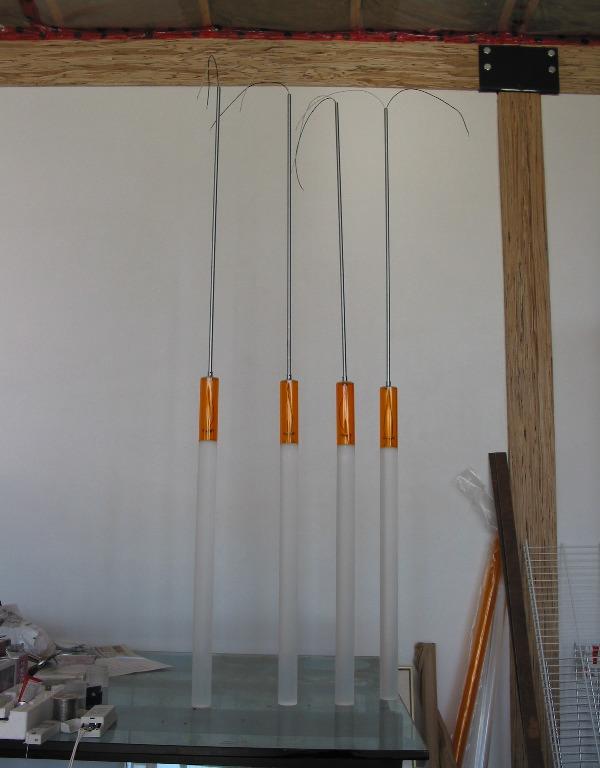
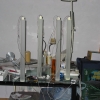
With that settled I started experimenting with my rods and lights and I found out that the clear tubes, with polished ends, act as fibre optics. No glow, just the light coming right out the end. I took some sandpaper and scuffed up both ends of a rod and that helped somewhat, but it still wasn’t quite the effect I wanted. So I gritted my teeth and sanded the sides of the rod as well, so the whole thing now looked like it had been etched, or sandblasted. And it glowed. That was the look I was going for. I sanded the remaining three rods and glued on the lights.
The orange tubing has two purposes: first it covers and protects the light, and second it provides and anchor point for the downrod. The downrods, incidently, were salvaged from the kitchen lights. They couldn’t be used there because the rods are a fixed length and the ceiling in the kitchen slopes, so we had to hang those lights with wire instead. I wanted coloured tubing to provide some contrast between the whitish plastic rod. It might have been interesting to have both the rod and tubing the scuffed white colour, and if I were building more I’d probably try that. I was hoping that the orange might also glow a bit from the light, and it does, but not as much as I’d like. I also left the orange tubing clear, and if I were doing this again I’d probably sand the outside of it as well - for more glow.
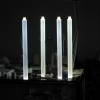
I started to installed the lights on Sunday but two of my glue joins weren’t very strong and had to be re-done. Dad was over today and he and I installed the other two lights. During the day they are barely visible and in sunlight I’m sure you wouldn’t even be able to tell that they were on. At night they glow very nicely, sort of a purplish/blue colour - not pure white, which could be due to the LEDs or the plastic. I’m not sure how ‘white’ white LEDs actually are. Esthetically they are very nice, but from a practical standpoint I’‘d like it if they threw just a bit more light. The frustrating thing about all projects like this is that I have built the prototype of a production unit. I now know all of the pitfalls, flaws, and weaknesses of the design and if I had to build them again I could do a much better job. But of course that would double my costs and I don’t really want to do that, so these lights will have to be good enough.
The materials cost per light came out at $100.00 per light. I didn’t really keep track of my labour so I’m not sure what that would add to the cost. But still even at $200.00 / light I’d be pretty darn happy with them!
As always I took a bunch of pictures as I built them. Many thanks to Traian, Charles, and Jerry at Eurolite.
More to come…
Now that we’ve been in the house for six months I’ve compiled stats for what we’ve generated off of our solar panels since June of 2003. Because we reset the system when we swapped in the new battery in early June the stats for June start at the 11th.
I have no stats for the wind generator because we have no way to track its production over time right now. If I can find a method of storing data for the wind generator that isn’t expensive and that doesn’t consume electricity itself I’ll set it up, until then it’s all anecdotal. Most of the summer was pretty still and winds have been steadily increasing since late September/early October.
All readings are in amp/hours (AH). Our solar panels and battery bank are wired for 48 volts (V). To calculate Kilowatts (KW) multiply AH times voltage (V) which will give you kilowatt/hours (KWH) at 48V, divide by 2 for KWH at 110V.
Our solar collection system consists of 8 BP Solar 85 watt panels, which feed 48V through a Trace C40 into our battery bank. All of the stats are taken from the C40.

We’ve been here six months now, we’ve gone through our first summer and are headed into our first winter. I was thinking last week, as I walked across the fields to get my mail, how much I’m really enjoying living in the country. Joanne and I have a knack for choosing good locations, our first house was on a really fantastic street in downtown Toronto, with amazing neighbours, and all that downtown has to offer. Good and bad. It looks like we’ve lucked into a great neighbourhood once again.
Last Saturday was the neighbourhood Christmas party. Every year everybody on the Line gets together at one house to celebrate the season. Everyone brings a little something to add to the table, some booze, and this year, a sealed envelope with a contribution for a young boy on the line who has cancer and is going through chemo.
This is an adult affair, though an exception was made for Gil, since he’s so young. As soon as we walked in the door Gil had been wisked out of my arms and I hardly saw him for two hours, though you could follow his progress around the room by all the cooing of the women. He slept through the whole thing. Midway through the night my next door neighbour and I slipped out and went to play hockey in Millbrook. When we came back two hours later the party was still going on.
Hockey in Millbrook is a quintessentially Canadian affair. Pick-up hockey, played on a small-town rink with a bunch of guys of various skill levels in various levels of equipment, with either classic rock or country playing at ear-splitting levels over the PA system. I step on the ice and I feel like singing Oh Canada. We rarely have enough players (or goalies), there are no lines, no positions, and nobody seems to keep score, it really is hockey played for the sheer joy of it.
I’ve been composing a list of things I love and ... er ... like less about the country. I’ll post it soon. Right now there’s about 6 inches of snow on the ground, it’s minus 10C, and the whole countryside looks like a Christmas card. I love winter in the country - that’s number one!
Bruce Sterling’s annual ‘State of the World’ address/dialogue is up on the Well right now. As always, it makes for great reading.
Since we’re talking about Bruce Sterling I highly recommend that anybody interested in Green Building/Sustainable Living check out the Veridian Design Movement.
And no, I haven’t yet posted that list, and I wouldn’t count on seeing it soon. I do have a working dining room light though, that I will post pictures of real soon, and some other lighting news.
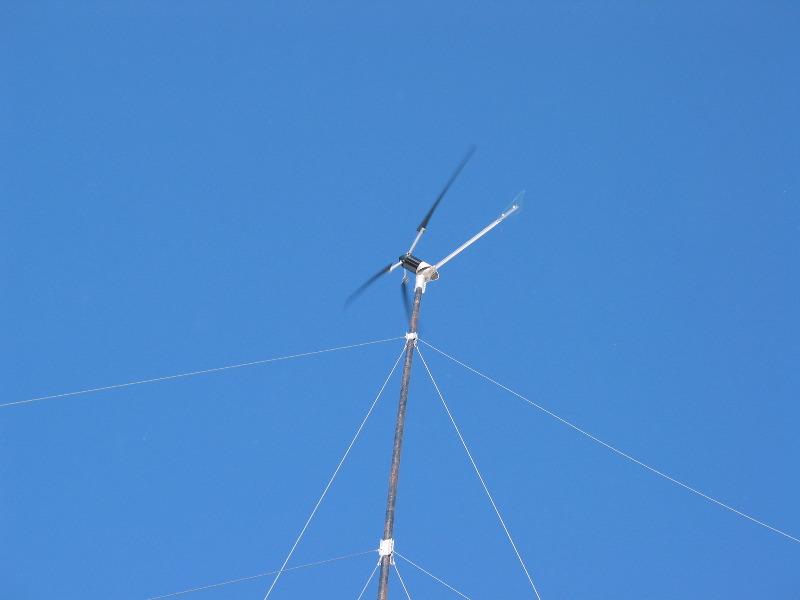
Some folks have asked how my wind generator deals with high winds. I took some pictures the other day with wind speeds around 35km/h.
Basically there is a angled pivot in the body of the generator. As wind speeds increase the blades are pivoted up at an angle, out of the wind. In the highest possible winds, I imagine, the blades would be parallel to the ground, horizontal rather than vertical.

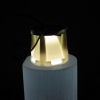
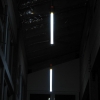
I’ve finished the prototype of the dining room light (pictures here). It’s been hanging for a week now and I’m fairly pleased with the results, though there are some adjustments to be made. Like the gallery lights this fixture uses LED’s. There are four bulbs, each 1 watt, wired with two small power supplies on the ceiling. The drawback to using two power supplies is that I need to run four conductor wire down to the light (which is bulky). The benefit is that all four lights are quite bright.
The body of the light is maple, stained with the dark victorian mahogany stain that we’ve used elsewhere in the house. This matches our dining room table and chairs. The LEDs shine through plastic rod that has plastic tube of the same outside diameter joined to the top. This results in a slight glow from the top sides and a bright glow from the bottom sides. The majority of the light shines down - as is intended. The effect, is very pleasant.
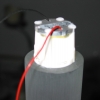
The light hangs from two very thin lines of wire, which are secured for now, with simple plastic screw clips. Once Jo and I have decided on the perfect height for the light I will cut the wire to length and secure it internally (and invisibly).
One of the big problems with the LED bulbs is that the manufacturing process is not perfected at this point. As a result the lights are slightly different colours. They range from a shade of violet-white to a greeny-white. I’ve also had some tinted towards yellow and blue. When the bulbs are made a small amount of phosphure is sprayed onto the inside of the bulb, with the red, orangle, and green bulbs this process is highly tuned, and the colours of those bulbs are very uniform. As it stands right now if I were making these lights commercially I’d have to colour-match all of the bulbs.
I’m going to try another version of the light using plastic for the body. I’m hoping to use blue-tinted plastic so that the light shines down white, but glows outward in a deep blue from the sides. I’m also working on some overheard lights for the ‘bedrooms’, and a couple of other designs for the dining room.
The guys at Eurolite have a whole bunch of brand new prototype LED lights and are getting me a bunch to play with. I can hardly wait.