The Straw House Blog

project_sample1

Sorry it’s been so long.

As often happens around here it’s been quite a while since my last post, so I figured I’d upload some pictures to give a sense of some recent events around here.

We finished of the deck on the east side of the house with some steel grating we acquired a year or so ago. Near the back part of the house we built a sandbox for the kids. When they’re grown we’ll make a nice zen garden or something back there.

Joanne has been busy finishing the ash boards that will be going up on the ceiling. We figure that we have enough for the whole front half of the house. The scaffolding is out on loan right now, but comes back in a week or so, this will be a late summer job for us, but it will be fantastic to have a ceiling up.

Most blog readers beyond friends and family won’t know this but we lost both of our dogs in the last 12 months. Ceara had a stroke and had to be put down last May, she was 14 1/2. Gator had a tumour on his spine, we had to put him down in February. Gator made it to 11, which if you were familiar with his tendency to eat foreign objects was a miracle. We were devastated. The picture above is Cash. He’s our new boy, a 3 year-old Chesapeake Bay Retriever. The boys are head over heals in love with him. Fortunately he has shown no inclination to eat rocks.

Sometimes I can’t believe how lucky I am to have ended up here with such a fantastic family and place to live. Sometimes the universe concurs.


project_sample1

New Panels

Last month we installed two more 175W solar panels to our array. For those keeping track we now have eight 85W BP solar panels, four 165W Sharp panels, and two 175W Sharp panels for a grand total of 1360W.

Unfortunately one of the realities of building an array piecemeal is that the sizes of the panels change from model-to-model and year-to-year. We really didn’t want to buy new racks so we decided to modify the existing racks that hold the BP Solar panels. We added two new mounting rails and moved the two existing rails to the sides. The new panels squeeze quite nicely in the middle.

This required that new holes be drilled to mate the horizontal rails to the rack uprights. If you look closely you can see a piece of wood we were using a blocker to prevent us from accidently drilling into the back of a panel. With Dad, J.P. and I it took most of the day to get the racks modified, panels mounted and wired.

Most of the time that we worked Declan played outside in the sand pile (side note: a pleasant side effect of straw bale construction is that you usually end up with enough leftover sand for a good play area.) He’s a remarkably self-sufficient kid.

We’ve been really lucky, so far this fall and we’ve had lots of sun. We call this time of year the “100 days of grey” because we typically go from late October to early January with little or no sun. In the last four weeks we’ve had many sunny days and have really seen the benefit of our new panels. Here’s a picture of the readout form our Outback MX-60 charge controller. You can see that the panels are bringing in 31.4A but the MX-60 is upping that to 38.3A. Typically we have to run the generator weekly through the 100 days of grey to keep the batteries charged but in the last four weeks we’ve only run it twice. In addition to saving money on gas, we really appreciate the peace and quiet.


project_sample1

The new deck

Long time readers might recall a post I wrote back in April of 2005 talking about milling cedar and the fabulous decks that would be built. I’m pleased to report that construction has finally begun on the east decks, including a new deck directly off the front door.

This deck is a team effort, unfortunately I have to spend as much time trying to keep the kids on my team as I do building the deck. It takes only a matter of seconds for them to not only form their own team but for that team to splinter into two entirely separate (and warring) factions. Things degenerate rapidly at that point. So as a result both children are gradually accumulating their own tool sets and each has a simple task that they must perform in order to “help” me. For example both travel with a handful of 3 1/2” screws that each gets to hand me in turn as I screw down the decking. Both kids help me measure the deck (each with his personal dollar store tape measure natch) which lends an interesting twist to the old saw “measure twice, cut once” since neither can actually read a tape measure.

I have noticed that they are doubly helpful when they are wearing superhero pyjamas.

It’s all worth it when you get a section done and the kids are so proud that they helped build the deck.

project_sample1

March Update - Snow, Photoshoots and the Return of Sun

We had a huge dump of snow in the last 24 hours. It’s the biggest snowfall in the time that we have lived here. There’s at least three feet of snow in most places and more in the drifts. It took Joanne and I a couple of hours to shovel down to the cars and clear around them. Even so we’re not going anywhere until the driveway gets plowed out.

I love the snow so for me this is great, I’ll be heading off into the bush with my snowshoes following animal tracks and watching for the birds. I love trekking through the parts of the land that are normally too wet and inaccessible in the warmer months.

The week before last we had a camera crew here from an Australian magazine taking pictures of the house. So we had Gil take some pictures of them while they took pictures of us.

Now that we’ve left the grey grey grey months of November, December, January and February we’re producing lots of power again. Those months are what we usually refer to as the “100 Days of Grey” because the sun rarely makes any substantial appearance. We make a fair bit of power off the wind generator at this time of the year, but we still have to run the gas generator far too often for my tastes. Through the worst parts of December and January we have to run the generator about once per week. By that I mean that we run one full tank of gas through the genset, which lasts for about 7 hours.

Around mid-February the sun starts to make more regular appearances and especially in those brutally cold -20C and -30C days we can do quite well. As we move into March we tend to get both sun and wind - today we’ve been generating about 25A from the solar panels and between 10A and 15A all day from the wind generator. As a result we’ve run the dishwasher, and done five loads of laundry and we’re still making tons of power. We haven’t run the generator in about four weeks.


project_sample1

An update in pictures and numbers

Ceara’s 13. She just got groomed. The groomer went a bit nuts with the sheers. Ceara is not impressed.

Gil’s nearly two and a half. He likes to help me build things. He helps by moving all the tools around.

Declan is 6 months old. This is his first meal of “solid” food. Not bad for flavourless mush.

We installed four more solar panels this winter. They doubled our production to 1.3KW. Life is good.

The first two of possibly five decks to be built this year.


project_sample1

Stonework and Serendipity

Joanne and I were driving up to my parents on Saturday when she pointed out a tent, high up on a hill beside the highway. “I wonder what’s going on up there?” she said. As we came by the base of the hill there was a sign: Dry Stone Wall Association of Canada. Well, I did what any self-respecting member of the Hunter family would do, I ditched Joanne and Gil at my parents and my father and I headed back to find out what was going on.

At the top of the hill we were warmly greeted by John, the leader of the seminar. Their goal was to build an arch from an old stone pile, and whatever other rocks they could gather from the pasture. The seminar was full but we were invited to stick around and observe, and if we had any questions, please feel free to ask.

John proved to be an excellent teacher and just watching, asking a few questions and taking it all in I learned more that afternoon than I have in all the various books I’ve read. I’ve been thinking of building the bottom 4’ of the south wall of Gil’s room from stone, and now I feel confident that I can get it done. Building a 12’ x 4’ x 18” wall would add 4400 pounds of thermal mass to the house, thermal mass that would receive heat from then sun, the new wood stove, and the radiant floor.

I was great to watch them build this because it was exactly the same kind of stone that we have here. The books tend to deal with nice easy to work with stones like sandstone, limestone, and shale. That’s nice but what we have is fieldstone, granite and other difficult to split stones.

The finished the arch late in the afternoon and it’s a fantastic sight. It looks like it’s been there forever, I suspect a lot of locals will be doing a double take as they head up the highway wondering why they’ve never seen that before.

The Dry Stone Wall Association of Canada


project_sample1

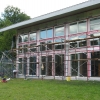
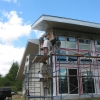
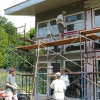
What’s happening this summer - Outside

Did I mention that it’s going to be a busy summer?

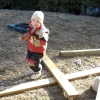
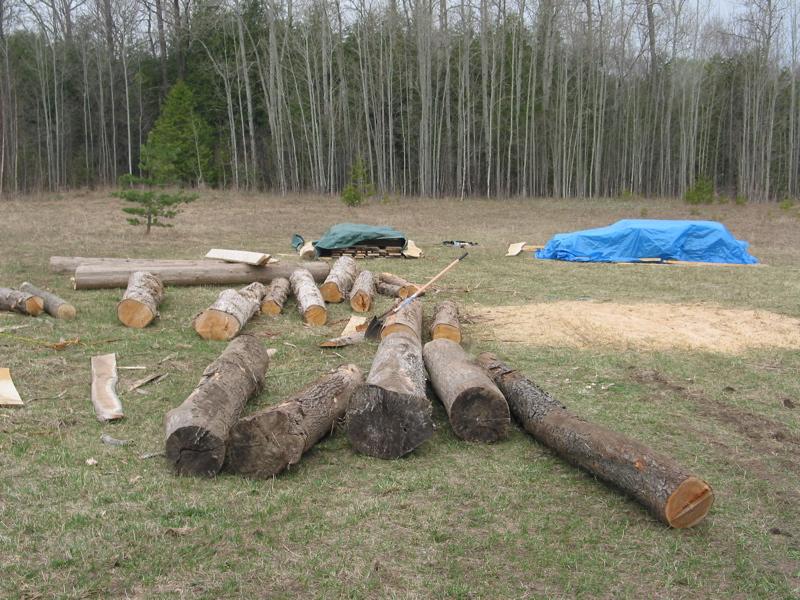
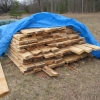
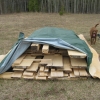
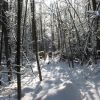
Last fall Dad and I logged a bunch of cedar trees from the west and south parts of the land. We’re lucky, in that we have good cedar, it often rots from the inside out, so you can’t tell how good a tree is until the tree is on the ground. The other problems with cedar are that it tapers considerably from bottom to top, and that there are lots of small branches that sprout out directly from the trunk all the way up the tree. This usually means that you have to clear around the base of the tree first before dropping it, both to have space to cut, and to ensure an escape route. I drop the trees, so I’m damn careful about making sure I have lots of space to run if the tree doesn’t drop in the right direction!

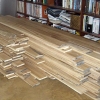
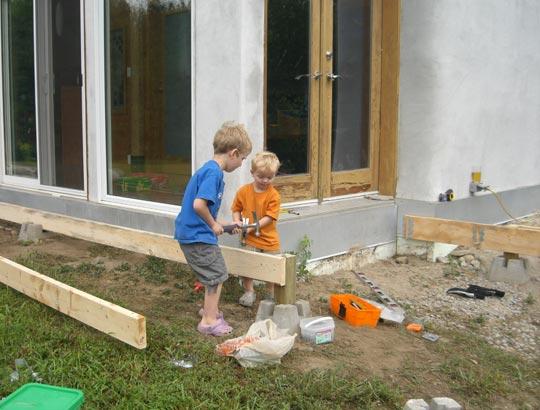
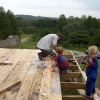
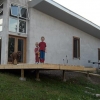
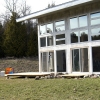
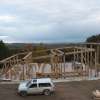
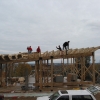
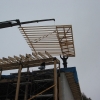
What we want from the cedar is mostly 2” thick boards. I’m hoping to build some decks around the house this summer. We don’t bother drying the cedar first, it dries very quickly in place with minimal cupping, and we use screws rather than nails to make later adjustments easier. In two years when it’s dried out in place, we’ll rent a floor sander and get rid of any cupping/bowing. We did that on Dad’s deck and it seems to have worked out just fine.

Here’s a sketch of the proposed decking:

Clicking on the image will bring up a larger version. As an added bonus there is a bunch of extra info on the sketch for those of you interested in the interior changes.

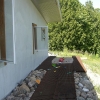
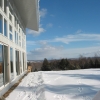
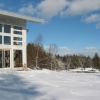
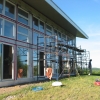
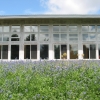
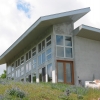
The deck across the front is largely cosmetic, as you wouldn’t want to sit on it, it would be much to hot and sunny for most of the year (reflection from the windows). The 12’x12’ area to the west is a small deck for the BBQ, and to sit and look out over the forest, we may also screen in this deck. The large east deck is the main sitting portion as it has the best view, and is sheltered from most of the summer sun. We aren’t big fans of sitting out the sun. We’re also lucky in that we get a bit of a breeze around the house year-round, and that helps keep the bugs away in spring/summer.

At this point we have probably 1/4 of the wood that we will needs for these decks, and as a result, they may get built in stages. Over the next couple of weeks Dad and I will be dropping another six cedars (at least), as well as some more standing dead Black Cherry, and at least one standing dead Ash. The Black Cherry isn’t very large, it’s hard to get much more than 2 or 3 inch boards out of it, but it’s a very interesting wood, and I think I may use it to replace the cupboard and drawer faces in the kitchen.

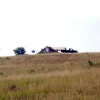
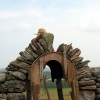
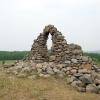
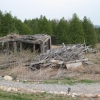
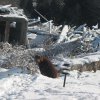
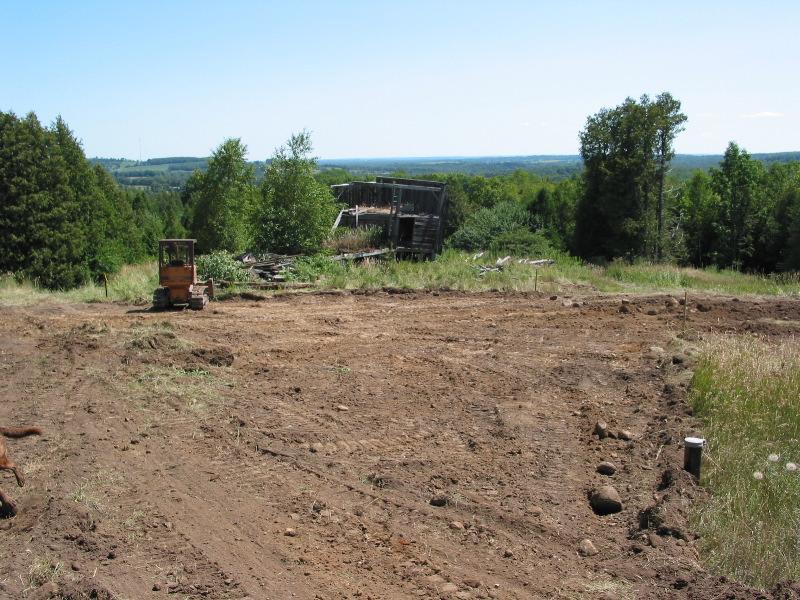
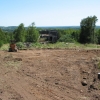
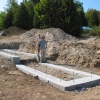
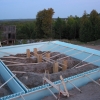
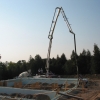
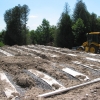
The other big job I’d like to get started on this summer is the barn. The original barn collapsed a couple of decades ago, and we’ve pulled a great deal of the lumber, and farm machinery, and cow bones, and old straw, and…. Yep, it was pretty bad. Unfortunately once all that stuff was removed it allowed the weeds, shrubs, and even trees a chance to set roots. Something must be done. The plan is to bulldoze all of the old timbers into a hole on the other side of the driveway where they can continue to rot in piece. The part that is currently standing will be torn down and rebuilt as a shed. Cheap and cheerful, will be the name of the game. With a low roof line that matches the look of the house without obscuring the view. I’d also like to clean off the top of the walls and pour a new concrete cap to prevent further deterioration. Right now water is getting into the tops of the walls each fall, freezing in the winter and spalling off the top layers of stones. I don’t intend to re-point the whole walls, I have neither time nor inclination for that, I only hope to slow their inevitable collapse.


project_sample1

Winter 2005 - Part Two: Hot Burrito #1

When it is sunny (in the winter) the house gets very warm. It has been sunny all day today and the inside temperature is 27C. It’ll probably get up to 28C before the sun goes down. Now as uncomfortable as 28C is (to us) one big benefit is that most nights we can carry that heat through to the enxt morning. In other words the floor system (which consumes a lot of electricity) does not have to come on. That said, a shading strategy is under development and will hopefully be put in place by next winter.

Opening windows isn’t really an option since that just brings cold air in along the floor. So your head stays hot and your feet get cold. Not to mention that we really don’t want to bleed off too much of the heat, since it will last over night and even into the next day.

This certainly isn’t the fault of the architect (though I don’t think he realized how hot it might get in here), since we wanted the wall of windows, and the high ceilings, but if we were doing it again I’m not sure that we would do things any different, we like the windows that much.

Here’s some pictures that show why.


project_sample1

Cladding the front of the house

From the very beginning there has been a debate over how we would finish the front of the house. We went through the first winter with no cladding at all which was a mistake.

As you can see from the image above there are a great many cracks and crevices along the front wall. We believed that sealing up the inside would be ‘good enough’ to get us through the first winter. We were wrong. The house was drafty and at times cold. At the very least we should have put up house wrap and taped all of the seams.

We knew that cladding the front was a priority for this year but what material? We had always thought of covering it with western red cedar, similar to our doors, which contrasts nicely with the grey stucco and soffits/fascia. WRC also weathers well and is durable. The drawbacks are that it is (in Ontario) an expensive material and that with all the windows would require a great deal of custom work to make it all fit. Even then guaranteeing a weather-tight seal would be very nearly impossible. We talked to Paul (our architect) and he and Charlie came up with a plan. First we would prime the walls, then a layer of a material called Blueskin, which is adhesive and waterproof over the wood and attaching to the sides of the windows (which stand proud of the front of the house by almost one inch). Over this we would apply strapping and then the WRC would be attached to the strapping. As Paul says you start from the assumption that water is going to get behind the cladding and work from there. Unfortunately all of these layers would leave the wood about one and a half inches out from the windows - and aesthetically we were not very happy with that idea.

Earlier this spring I helped Pete and Tina from Camel’s Back Construction on a stuccoing job at Camp Kawartha and I began to wonder about using stucco as our cladding. It has several benefits for this kind of job: it’s very easy to shape which would make working around the windows a breeze, stucco as it is used in strawbale homes is breathable so water is less of a concern, and it is relatively inexpensive. So back to Paul and Charlie for a plan.

Paul and Charlie’s new plan was very similar to the old one, primer, Blueskin, but adding rigid foam insulation and a sheathing to allow water to run behind that over the Blueskin (should water ever get back there). Over the foam they wanted mesh and then stucco. All told this came out to six layers and again would have resulted in cladding that was proud of the windows.

While I agree with the base philosophy - water will get in, so build to expect it - the whole thing seemed overly complex and to me six layers means six places where failure can occur. Water is just about the worst thing that can get into a strawbale wall, yet they’re just covered with only two or three layers of stucco. Why does this work? Because the walls are breathable - moisture from inside passes freely through the wall to the outside, water from outside has a very hard time getting through the stucco to the bales. I believe this is one of the reasons that people find strawbale homes so comfortable to live in. Blueskin is not breathable, any water vapour that manages to migrate through the wall to behind the Blueskin would remain there. That’s why the rigid foam was necessary, to move the dew point out of the centre of the wooden beams.

So we formulated our own plan. The cladding needs to perform two functions: seal the house from drafts and water, and protect the front from the elements. First we caulked all of the seams in the structure and any gaps around the windows with a high quality caulking. Then we applied a layer of Tyvek house wrap and taped all of the seams with Tuck tape. Tyvek allows moisture to travel one way, from the house out, but not from the outside in. It will greatly (if not completely) cut down the drafts, but will be an imperfect water barrier since it’s pierced hundreds of times by staples that hold down two layers of plastic mesh. The plastic mesh is in place to give the stucco something to grip onto, since it will not adhere to Tyvek. We’re counting on the stucco to stop the bulk of the water from ever getting though to the Tyvek. Since the front of the house rarely gets directly rained on this shouldn’t be too much of an issue. The east and west ends of the gallery do get some weather and we will have to keep our eyes on them.

There are some risks to our method: if a quantity of water gets behind the stucco, or the stucco gets saturated that could present problems to both the stucco and the Tyvek covered wood. While straw is quite breathable, wood is less so and if a quantity of water (condensation for example) builds up inside the beams it may exceed the breathablility of the materials, mould and rot could occur (though this could happen with the other method as well). It’s possible that the plaster could shrink back somewhat from the windows and we may need to apply a thin bead of caulking around the windows. We did use metal mesh for the corners but two layers of plastic mesh for the faces. Plastic mesh is not as strong or stiff as metal, but is much easier to work with. To test the plastic mesh we plastered the north face of the gallery first, left it for several days and checked it before starting on the front of the house.

In the end only time will tell if we have made the right decision, but there’s no debate that it’s made a huge improvement in the look of the front of the house.


project_sample1

The House in Pictures

I’ve put together an overview in pictures of the house from the day we broke ground (August 2002) to when we moved in (May 2003).