The Straw House Blog

We’re in World Changing!!

World Changing a blog devoted to “Models, Tools, and Ideas for Building a Bright Green Future”, has picked up the story from MocoLoco and has mentioned us on their blog, and I couldn’t be more thrilled.

But, it’s important to note that while these sites refer to it as my house, I most certainly did not build it on my own. A whole lot of people helped and I want to thank them all again here, especially: Mike Cooper, Simon & J.P. at Generation Solar, Pete and Tina at Camel’s Back Construction, Paul Dowsett at Scott Morris Architects, and my father, Ron Hunter, who was on site everyday, and without whom this house just would not be here. Thank you Dad.


We’re on Mocoloco!

The house has been featured on Mocoloco! A website devoted to modern contemporary design and architecture Mocoloco is one of my daily reads. Given the fantastic stuff that appears on the site I am totally stoked to be included!


project_sample1

Cladding the front of the house

From the very beginning there has been a debate over how we would finish the front of the house. We went through the first winter with no cladding at all which was a mistake.

As you can see from the image above there are a great many cracks and crevices along the front wall. We believed that sealing up the inside would be ‘good enough’ to get us through the first winter. We were wrong. The house was drafty and at times cold. At the very least we should have put up house wrap and taped all of the seams.

We knew that cladding the front was a priority for this year but what material? We had always thought of covering it with western red cedar, similar to our doors, which contrasts nicely with the grey stucco and soffits/fascia. WRC also weathers well and is durable. The drawbacks are that it is (in Ontario) an expensive material and that with all the windows would require a great deal of custom work to make it all fit. Even then guaranteeing a weather-tight seal would be very nearly impossible. We talked to Paul (our architect) and he and Charlie came up with a plan. First we would prime the walls, then a layer of a material called Blueskin, which is adhesive and waterproof over the wood and attaching to the sides of the windows (which stand proud of the front of the house by almost one inch). Over this we would apply strapping and then the WRC would be attached to the strapping. As Paul says you start from the assumption that water is going to get behind the cladding and work from there. Unfortunately all of these layers would leave the wood about one and a half inches out from the windows - and aesthetically we were not very happy with that idea.

Earlier this spring I helped Pete and Tina from Camel’s Back Construction on a stuccoing job at Camp Kawartha and I began to wonder about using stucco as our cladding. It has several benefits for this kind of job: it’s very easy to shape which would make working around the windows a breeze, stucco as it is used in strawbale homes is breathable so water is less of a concern, and it is relatively inexpensive. So back to Paul and Charlie for a plan.

Paul and Charlie’s new plan was very similar to the old one, primer, Blueskin, but adding rigid foam insulation and a sheathing to allow water to run behind that over the Blueskin (should water ever get back there). Over the foam they wanted mesh and then stucco. All told this came out to six layers and again would have resulted in cladding that was proud of the windows.

While I agree with the base philosophy - water will get in, so build to expect it - the whole thing seemed overly complex and to me six layers means six places where failure can occur. Water is just about the worst thing that can get into a strawbale wall, yet they’re just covered with only two or three layers of stucco. Why does this work? Because the walls are breathable - moisture from inside passes freely through the wall to the outside, water from outside has a very hard time getting through the stucco to the bales. I believe this is one of the reasons that people find strawbale homes so comfortable to live in. Blueskin is not breathable, any water vapour that manages to migrate through the wall to behind the Blueskin would remain there. That’s why the rigid foam was necessary, to move the dew point out of the centre of the wooden beams.

So we formulated our own plan. The cladding needs to perform two functions: seal the house from drafts and water, and protect the front from the elements. First we caulked all of the seams in the structure and any gaps around the windows with a high quality caulking. Then we applied a layer of Tyvek house wrap and taped all of the seams with Tuck tape. Tyvek allows moisture to travel one way, from the house out, but not from the outside in. It will greatly (if not completely) cut down the drafts, but will be an imperfect water barrier since it’s pierced hundreds of times by staples that hold down two layers of plastic mesh. The plastic mesh is in place to give the stucco something to grip onto, since it will not adhere to Tyvek. We’re counting on the stucco to stop the bulk of the water from ever getting though to the Tyvek. Since the front of the house rarely gets directly rained on this shouldn’t be too much of an issue. The east and west ends of the gallery do get some weather and we will have to keep our eyes on them.

There are some risks to our method: if a quantity of water gets behind the stucco, or the stucco gets saturated that could present problems to both the stucco and the Tyvek covered wood. While straw is quite breathable, wood is less so and if a quantity of water (condensation for example) builds up inside the beams it may exceed the breathablility of the materials, mould and rot could occur (though this could happen with the other method as well). It’s possible that the plaster could shrink back somewhat from the windows and we may need to apply a thin bead of caulking around the windows. We did use metal mesh for the corners but two layers of plastic mesh for the faces. Plastic mesh is not as strong or stiff as metal, but is much easier to work with. To test the plastic mesh we plastered the north face of the gallery first, left it for several days and checked it before starting on the front of the house.

In the end only time will tell if we have made the right decision, but there’s no debate that it’s made a huge improvement in the look of the front of the house.


March to May 2004 Solar Stats

This May was our one year anniversary in the house. I can barely articulate how much we have learned in the past 12 months. It has been a fantastic experience, and, notwithstanding the birth of Gil, probably the best year of my life.

We’re quickly coming to appreciate that the spring is a great time to be living off grid; we’re getting appreciable amounts of both sun and wind.

March Stats
Monthly Total: 718.3 AH
Daily Average: 23.17 AH
Best Day: 58.5 AH
Worst Day: 0 AH
Days Below 5 AH: 4

April Stats
Monthly Total: 1011.4 AH
Daily Average: 33.71 AH
Best Day: 63.7 AH
Worst Day: 0 AH
Days Below 5 AH: 4

May Stats
Monthly Total: 985.2 AH
Daily Average: 31.78 AH
Best Day: 57.1 AH
Worst Day: 7.2 AH
Days Below 5 AH: 0

These stats are for the solar panels only, I still don’t have any method of measuring the output of the wind generator (H80) over time.


Talk Energy

A new discussion and news site based on Slashcode has just started up called Talk Energy.

It’s worth a look.

From their site: “Talk Energy is an online community that bridges the gap between those who desire a sustainable future and those with ideas of how to achieve it. It focuses on energy conservation and alternative energy within the home. If we want to make a real difference in the world that we live in, that change will begin at home.”

I found this through the fine folks at World Changing.


Off-grid System Maintenance

I’m not sure why but some people seem to have it in their minds that living off-grid, generating your own electricity involves lots of work (though if tinkering is what you want it can, as a quick browse through the the archives of Homepower magazine will demonstrate). However for most people, myself included, the system takes care of itself quite well. So for the benefit of the curious I thought I’d detail the maintenance needs of the various parts of my system.
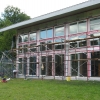
The Solar Panels
The panels themselves are solid state and require no maintenance. In the winter I prefer to brush off the snow, but that’s just because I don’t want to wait for the snow to melt off. If I’m up on the roof I usually do a quick inspection of the panels and racks just to make sure that nothing is loose or damaged in any way, and in the last year nothing has been.
Total Time: one hour every six months (if that)

The Wind Tower
Like the panels whenever I’m at the top of the hill I do a visual inspection of the tower, just to make sure nothing is obviously loose or noisy. Every two years the tower must be lowered to do an inspection of the generator itself, and lubricate/clean/tighten various parts.
Total Time: visual inspections / half day every other year
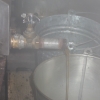
The Batteries
Once a week we try and make sure that the batteries get a full charge in them, this often means running the generator for a few hours. Once every month to three months (depending on the season) we do an equalize charge, which requires sun, wind, and the generator running all day. Every month I check the fluid levels of each cel, and top them up with distilled water if needed. Before and after an equalize charge I take readings of each cel with a hydrometer to measure the specific gravity of each cel, this is the most accurate method of determining stage-of-charge.
Total Time: half an hour every month

Electronics
I’m lumping the inverter, solar charge controller and wind charge controller into this group, and aside from monitoring (see below) there is no maintenance for any of this equipment, it’s all solid state.
Total Time: zero

Monitoring
Monitoring the system performance is important for many reasons: first it lets you know how your power generation and power consumption are comparing, which I think we can all agree is pretty vital, second by tracking base line numbers you’ll realize if something does go wrong. My biggest gripe with various aspects of the system is the lack of quality monitoring, especially where the wind generator is concerned. I keep a chart by the inverter and every night before I go to bed I write down how much the solar panels generated that day and cumulatively, the battery voltage, amp/hours away from full charge (which is an approximation), and details about whether the generator was run, if we achieved float, full charge, equalize, and if water levels were checked.
Total Time: two minutes each night

Gas Generator
Unfortunately this is still an important part of the system, and with months like November likely always will be. Aside from adding gas, I check the oil once a month, clean the air filter every other month, and just generally check it over whenever I gas it up.
Total Time: one hour every month

To sum up that comes out to about three hours every month, which is less time than I spend cutting the grass. Every couple of months I might have to spend an extra hour on some aspect of the system, and in fact most of the extras (like equalizing) are highly automated, start the generator at the beginning and stop it when the equalize is done.

For most people using a wind generator or solar panels in a grid inter-tie situation there is even less work to be done, since the vasy majority of my maintanence is the care and feeding of my batteries.

I have a well planned system installed by professionals (I recommend the fine folks at Generation Solar), if you’re a hard-core do-it-yourselfer your milage may vary, and if you go with some fly-by-night installers all bets are off. Remember when you’re talking to any kind of contractor ask lots of questions, if they can’t answer them in a way that you can understand that’s a bad sign. Ask for references, and CHECK THEM! Ask to see some systems they have installed, pay attention to the details, is the wiring neat and well routed? Does the system look like a pro job or some kid’s science fair project? How long have they been in business? How many systems have they installed? You might spend a bit extra but the results will be worth it.


project_sample1

Logging

As much as possible we have tried to use wood off our own land inside the house. The inside and outside walls of the bathroom are cedar milled from trees on our land, as are the maple window and door frames.

Before we started the house we marked 102 trees and sold them to a logger. They had a big machine that carried out the logs, and that could navigate nearly anywhere. Before the job was over we traded them an additional ten maple trees in exchange for taking down and cutting into 12’ sections 6000 board feet of white cedar. White cedar are difficult trees to drop because their branches come directly off the trunk and run from the ground up. They can be very dangerous when they fall. The trees are also problematic because, unlike most hardwoods you can’t tell if the tree is any good until you’ve dropped it. White cedar, like Poplar, tend to rot from the inside out. We were very lucky, it turned out that most of the trees they cut were very good. The boards we got from those cedars built a deck on the back of Dad’s house, and most of the walls of his garage. It was the leftovers that went into our bathroom.

Over time, walking around the land, we started finding sections of trees that had been left in the bush. Good trees, on the sides of hills, in gullies, even out in the open. We pulled eleven oak and maple sections, all solid, at least 18” in diameter, and about 12’ long, out of the north west corner a couple of years ago. We had them milled and have just come to the end of the maple.

Recently Dad and I have managed to pull out two pieces of black cherry, five really nice pieces of ash, and a bunch of oak from the south east corner of the property. The main section of ash was 22’ long and 18” in diameter and had fallen across a small gully with a creek in the bottom. There were tracks from the logger’s big machine but they couldn’t seem to get close enough to grab the logs. We pulled them up from the other direction, up a very steep hill using a pulley and my truck. While we were down there we found two more pieces of ash and several sections of oak. We’re also going to drop a couple of cedars from the same area.

In addition to this wood we’ve also cut up and dragged out two poplar trees that were solid, but had blown down in a wind storm. We’ve also been marking and dropping cedars from other parts of the land. The various hardwoods we’re going to cut up into 1” planks, possibly for use on our ceilings. The cedar we’re going to cut into 2” stock that will be used to build decks on the south and east sides of the house.

Four of the cedar trees that we took down were just below the house near where we park the cars. They were taller than any of the trees around them and spoiled the view to the south east. With them gone the whole view from the front door is greatly improved. How much? Well check the pictures and see for yourself.


2004 Ontario Strawbale Home Tour

The OSBBC Annual Straw Bale House Tour has been scheduled for October 2nd, 2004. We’ll be on the tour this year, last year Gil was just two weeks old and we just didn’t feel up to having dozens of people trooping through the house. If you’d like more info about the tour send me your contact info and I’ll forward it to the appropriate people - or you can go to their website.

As far as I know we’re the only off-grid house on the tour it will be interesting to see if that effects the number of people coming to see the house. OK, so it turns out there’s at least three other off-grid homes on the tour. Thanks to Tina for making me feel so much less unique.


project_sample1

Collecting Maple Sap

Dad and I went out today to help Allen collect sap from his two maple stands. All told he has about 500 trees tapped, this is down from 1100. We collected about 500 gallons of sap.

Here are the pictures.


project_sample1

Making Maple Syrup

Many of our neighbours tap trees and make maple syrup. In our little area there are several good sized operations and one of our neighbours has even won a few ‘World Champion’ ribbons for his syrup (I add the quotes because maple syrup is only made in Ontario, Quebec and a few north-eastern states).

Our neighbour Allen invited us over today to watch them boiling off the sap to make syrup. Allen has quite the operation, he has a dedicated sugar shack with a large evaporator. He can boil off 500 gallons of sap at a time. The ratio of sap to syrup is 40 to 1. So 500 gallons of sap will boil down to about 12 gallons of syrup. Allen has 500 trees tapped, some people hang line from tap to tap ending at a 50 gallon drum. All of Allen’s trees are hung with taps and buckets. When the sap runs they go from tree to tree and empty each bucket to get the sap. They used to have around 1100 trees tapped but are scaling back the operation.

Tomorrow I’m going back to help with collecting the sap and more of the boiling. Allen gave us a sample to bring home and it is very good stuff. Sometime in the future I plan on tapping a bunch of my trees and making some of my own syrup. They sell small evaporators for the ‘hobbyist’.

Here’s a bunch of pictures with explanations.