The Straw House Blog

project_sample1

Six Month Stats

Now that we’ve been in the house for six months I’ve compiled stats for what we’ve generated off of our solar panels since June of 2003. Because we reset the system when we swapped in the new battery in early June the stats for June start at the 11th.

I have no stats for the wind generator because we have no way to track its production over time right now. If I can find a method of storing data for the wind generator that isn’t expensive and that doesn’t consume electricity itself I’ll set it up, until then it’s all anecdotal. Most of the summer was pretty still and winds have been steadily increasing since late September/early October.

All readings are in amp/hours (AH). Our solar panels and battery bank are wired for 48 volts (V). To calculate Kilowatts (KW) multiply AH times voltage (V) which will give you kilowatt/hours (KWH) at 48V, divide by 2 for KWH at 110V.

Our solar collection system consists of 8 BP Solar 85 watt panels, which feed 48V through a Trace C40 into our battery bank. All of the stats are taken from the C40.


project_sample1

Making LED lights

We had always intended to install lights in the gallery, and had run wire for four lights, at either end and in between the fans. But while I found many lights I liked I never found any that met that sweet spot of looks, power consumption (low) and price. So I decided to try and make my own.

We decided that for the gallery we wanted lights that didn’t do much more than provide a nice glow, enough to aid in walking around the house without barking your shins on furniture but certainly not enough light that you could read under them. They have to be very low wattage, so that if when go out we can leave them on without worry.

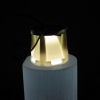
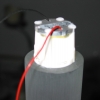
I was in Eurolite one day pestering them about LED lights when Traian brought out some new ones that they had just got in. Basically they’re a single LED in a small plastic shell that incorporates a reflector and a lens. There are two lens’, a flood and a spot. On the back side is a metal disk that has two leads soldered to it and takes care of heat dissipation. The LEDs are very bright, the spots from head on are way to bright to look directly into, like little halogen lights. But best of all, each light is just 1 watt. So all four lights, spanning the whole front of the house, will use just 4 watts!

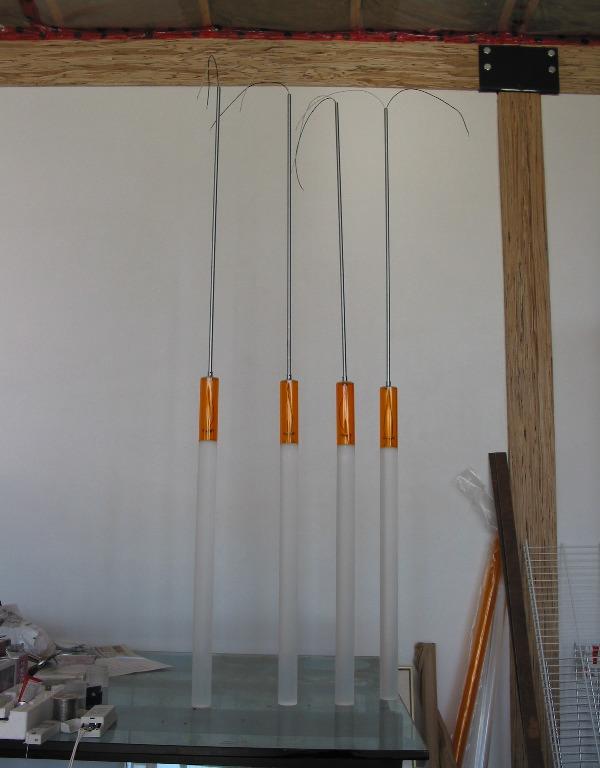
They cost $20.00 each, plus $50.00 for the power supply - I needed the big one since it’s 50 feet across the gallery. My idea was to mount the lights on the end of 2” clear plastic rod, and hang them from the ceiling. I hoped the rods would glow as well as shine downwards. I was wrong.

I found out that 1 3/4” rod is half the price of 2” rod so I changed that, and it had been my intention to cap the lights with orange tube of the asme outside diameter as my rod but I couldn’t get any cheaply so I bought clear instead. I thought I could paint it. I was wrong.

Every kind of paint I tried cracked the tube. I thought clear would look pretty crappy so I got out the yellow pages and called every single plastic supplier until I found one that could get me affordable orange tubing.

With that settled I started experimenting with my rods and lights and I found out that the clear tubes, with polished ends, act as fibre optics. No glow, just the light coming right out the end. I took some sandpaper and scuffed up both ends of a rod and that helped somewhat, but it still wasn’t quite the effect I wanted. So I gritted my teeth and sanded the sides of the rod as well, so the whole thing now looked like it had been etched, or sandblasted. And it glowed. That was the look I was going for. I sanded the remaining three rods and glued on the lights.

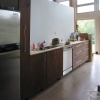
The orange tubing has two purposes: first it covers and protects the light, and second it provides and anchor point for the downrod. The downrods, incidently, were salvaged from the kitchen lights. They couldn’t be used there because the rods are a fixed length and the ceiling in the kitchen slopes, so we had to hang those lights with wire instead. I wanted coloured tubing to provide some contrast between the whitish plastic rod. It might have been interesting to have both the rod and tubing the scuffed white colour, and if I were building more I’d probably try that. I was hoping that the orange might also glow a bit from the light, and it does, but not as much as I’d like. I also left the orange tubing clear, and if I were doing this again I’d probably sand the outside of it as well - for more glow.

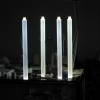
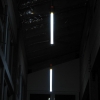
I started to installed the lights on Sunday but two of my glue joins weren’t very strong and had to be re-done. Dad was over today and he and I installed the other two lights. During the day they are barely visible and in sunlight I’m sure you wouldn’t even be able to tell that they were on. At night they glow very nicely, sort of a purplish/blue colour - not pure white, which could be due to the LEDs or the plastic. I’m not sure how ‘white’ white LEDs actually are. Esthetically they are very nice, but from a practical standpoint I’‘d like it if they threw just a bit more light. The frustrating thing about all projects like this is that I have built the prototype of a production unit. I now know all of the pitfalls, flaws, and weaknesses of the design and if I had to build them again I could do a much better job. But of course that would double my costs and I don’t really want to do that, so these lights will have to be good enough.

The materials cost per light came out at $100.00 per light. I didn’t really keep track of my labour so I’m not sure what that would add to the cost. But still even at $200.00 / light I’d be pretty darn happy with them!

As always I took a bunch of pictures as I built them. Many thanks to Traian, Charles, and Jerry at Eurolite.


project_sample1

Fall Colours

Last week while Joanne was out and about she took some really nice pictures of the land and the fall colours.

I had planned to post them, but then I got sort of sidetracked…

So here they are, if you look in the third picture you can see the wild turkeys back out in the field.

I’m running out of space for this web site so I’m moving a bunch of the photos in the archives over to another server, so if you notice any broken links in the archives please let me know.


project_sample1

The Obligatory Baby Picture

Here you go, Gil Hunter, age <24 hours.


The Obligatory Birth Announcement

He’s a week early, but Gil Hunter was born October 18, 2003 at 6:20pm. He’s 7lbs 4oz, 21” long. Everyone is healthy and happy.


project_sample1

Shelves & Ends

The shelves are up and my Mom is currently applying a coat of urethane - she likes painting but hates sanding, I don’t mind sanding but hate painting, we’re a good team. This afternoon we’ll slide (ha! - they’re huge and heavy) them into place and start laying in the books! We’re leaving the backers as wood for now, but I want to replace it with 1/8” translucent polycarbonate sheets. These look like sandblasted glass but are actually cast in place with the texture. They allow light through but only show the faintest of silhouettes. At night they should have a gourgeous glow from the bedroom lights. The drawback? $102.50 per sheet and I need 5 sheets.

Here’s some pictures, including close-ups (by request) of the kitchen handles.


project_sample1

Kitchen & Closet

With Joanne due in less than three weeks the house has once again been the focus of frantic activity. The kitchen is done except for an upper shelf and kickplates.

I bought some rough aromatic cedar which we planed, jointed, ripped and routed for a walk-in closet and coat closet for the mudroom. The walk-in closet is pretty much done but the coat closet will have to wait a bit. The benefit to using rough cedar is the thickness. Regular aromatic cedar that you buy pre-cut is barely 3/8” thick and won’t withstand many sandings, our cedar is over 3/4” thick and should last a lifetime. Aromatic cedar is Eastern Red Cedar which only grows in the south, while regular cedar does smell it isn’t “aromatic”.

I designed bookshelves to create a wall separating the bedroom from the rest of the house. We cut the wood on Gene’s big machine and we’ve been busy sanding and staining the shelves and uprights. Installation should happen tomorrow. I will take pictures, until then here are some pictures of the kitchen and closet, including a very pregnant Joanne.

So far as power goes we had mostly been breaking even but all of the extra work (sanding, sawing, vacuuming) has been putting us into a deficit. Fortunately the insurance company came through and gave us the money to buy a new generator. This proved to be harder than expected since we got the money right after the big blackout so of course all of the good Honda generators in Southern Ontario were sold, but then Honda was diverting all shipments of new generators to the west coast to help fight the forest fires. Stores were telling us that they weren’t expecting a shipment until late October at the earliest. But we got lucky and found one in Uxbridge and drove out there the same day.

Ideally we’d like to put four more solar panels on the roof but that’s going to cost nearly $4K and I’m not sure that’s in the cards right now.


Media #3

Yesterday was fairly hectic around here. We had an electrical inspection to hopefully close out that permit but there’s apparently still some debate around our battery box. So we wait again.

In the morning I received word from Simon Boone (Generation Solar) that CHEX TV (our local CBC affiliate) had seen the Peterborough Examiner article and wanted to do an on camera interview with me for the six o’clock news. The CHEX guy showed up while the inspector was still inspecting so he did some shooting around the house. Then he did a segment outside the house looking up at the panels and a short interview with both Simon and myself inside. Unfortunately he cut Simon’s piece such that it appears Simon is almost recommending against solar power (based on cost). Off-grid and grid-intertie aren’t all beer and roses but I doubt that you’ll find many people on the east coast expressing great support for the status quo. From what others have told me I looked and sounded fine, it’s hard to judge personally since it’s always just sorta freaky seeing yourself on TV.

One of the things that bothers me a bit about this media attention (and yes, I knew it was coming after last Thursday) is the natural bias of the media to see us as radicals. Not in that we choose to live differently but in that since we choose to live this way we must also be out blocking whaling ships in Zodiacs on the weekends, churning our own butter, and such. Each reporter, upon learning that Joanne is pregnant, asked if we will be doing a home birth (we aren’t). I tried very hard especially with the CP interviewer to reinforce the idea that we are just normal people, living our lives in a normal home, except of course that we generate our own power. I have found with some people that as the environmentally friendly buzz words about our home (passive solar) start to pile up (straw bale) I can sense that (off grid) we are being further and further marginalized in their minds. This perception definately appears in most of the media surrounding houses like ours. In a way I end up trying to seem less green that I really am in the hopes that people might start see renewables as a reasonable option.

What I would rather see is some indication from the media, from the government that there are lessons to be learned from the events of last Thursday, and that some of them might be learned by looking, really looking at houses like mine and the thousands of other people around North America who produce their own power. Or they could just patch the grid, everyone can crank their air conditioning and hope that the problem solves itself. Guess which I think is going to happen.


Canadian Press Article

It looks like finding a online link for the Canadian Press article is going to be problematic so for now (or until CP sends me a cease and desist) here’s the article text:

Canoe.ca has picked up the article, thanks to Art for the heads-up.