The Straw House Blog

project_sample1

Ceiling progress

We’ve been making some excellent progress on the ceiling. It’s rough work handling the hardwood boards up over your head, I can only manage about 4 hours at a time before I’m done. For the back section we’ll mill the boards thinner, we don’t need a full 5/8” for a ceiling, 1/2” would work out just fine.

Luckily we’ve been getting some help from friends and family. Phil and his boys made a trip up and we got a big section done, Stephen came by and lent a hand, and of course Dad’s been a rock.

Every board has to have each end squared up with the chop saw and all of the end boards have to be custom cut to fit. Joanne has become a master with the saw, tape and square.

We’re about two thirds done and might even be ready for trim in a few weeks.

Of course the boys wouldn’t mind if the job lasts a while longer, after all most kids don’t have a jungle gym in their living room.

project_sample1

Sorry it’s been so long.

As often happens around here it’s been quite a while since my last post, so I figured I’d upload some pictures to give a sense of some recent events around here.

We finished of the deck on the east side of the house with some steel grating we acquired a year or so ago. Near the back part of the house we built a sandbox for the kids. When they’re grown we’ll make a nice zen garden or something back there.

Joanne has been busy finishing the ash boards that will be going up on the ceiling. We figure that we have enough for the whole front half of the house. The scaffolding is out on loan right now, but comes back in a week or so, this will be a late summer job for us, but it will be fantastic to have a ceiling up.

Most blog readers beyond friends and family won’t know this but we lost both of our dogs in the last 12 months. Ceara had a stroke and had to be put down last May, she was 14 1/2. Gator had a tumour on his spine, we had to put him down in February. Gator made it to 11, which if you were familiar with his tendency to eat foreign objects was a miracle. We were devastated. The picture above is Cash. He’s our new boy, a 3 year-old Chesapeake Bay Retriever. The boys are head over heals in love with him. Fortunately he has shown no inclination to eat rocks.

Sometimes I can’t believe how lucky I am to have ended up here with such a fantastic family and place to live. Sometimes the universe concurs.


project_sample1

The Ceiling - Part 1

Over the Christmas holiday’s we started covering the ceiling in the gallery space with tongue and groove cedar. Dad won the cedar at an auction last spring for a very good price. We won a large stack of boards almost all of which were 16’ long, 8” wide and all were tongue and grooved. Unfortunately about 40% of the boards were in pretty bad shape: worm-eaten, weathered, rotten, or warped in some way. We’ve been cladding our various sheds in the crappier boards and putting aside the good ones to use inside. This fall Joanne and Mom sanded and finished some of those good boards and that’s what we’ve been using.

Over time the Tuck tape that sticks the vapour barrier to the beams has lost it’s tack so I’m re-taping as I go.

Fitting the long boards is much easier with a helper. By the end of a day working over your head like this your arms feel like they are about to drop right off.

For extra fun every board in the middle row had to be custom cut to accommodate the light and fan junction boxes. Also because the boards need to be staggered the scaffolding had to make the full trip back and forth across the gallery about a half-dozen times over the course of the project.

We didn’t have quite enough boards so we’ll complete the job in the spring when we can finish the boards outside - the stain that we use for colour really reeks.

As usual when Dad works so do the children. What’s remarkable about this picture is that Gil is actually hammering real nails, into real wood with a toy plastic hammer. No I don’t know why there is a parking lot beside the board. Look at how long those legs are! Wonder where he gets his build from?


Morso Stove Review

We’re very happy with our Morso stove. It puts out a nice even heat, lights very very easily and is quiet. Yes quiet. I’ve been around many wood-stoves that ping and pop and make all manner of noises as they heat up or cool down. The Morso does very very little of that which I suspect is due to the quality of its construction. It’s a solid little stove, there’s virtually no play in any of the moving parts, though there is a nasty squeak in the firebox latch. I’m not sure what to do about the squeak, can you grease a part that is that close to the fire?

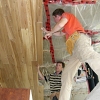
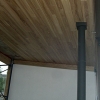
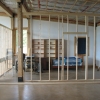
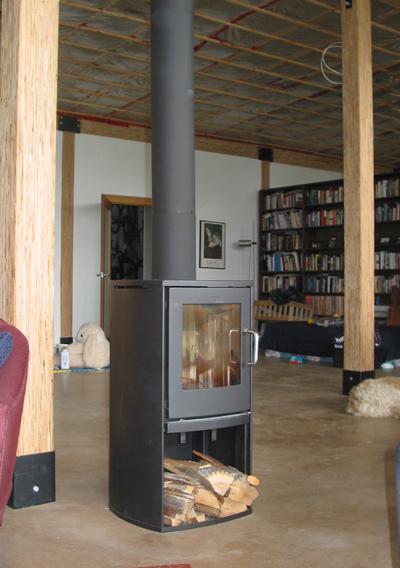
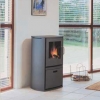
Esthetically it’s exactly what I was expecting and everybody (so far) reacts very favourably to its clean lines, though Joanne says it’s a bit smaller than she was expecting. It’s very nice in that it isn’t the focal point of the room, it doesn’t demand attention, but it is pleasing to look at. A very nice addition to the room I think.

I’ve never used a stove that lights as easily and quickly as the Morso. It has two controls for allowing air into the firebox: the primary air lever has a very small throw and it used only while lighting the fire. The secondary airflow lever has a much longer throw and controls the burn temperature after ignition. I crumple up 4-5 pieces of newspaper, toss on a little kindling and a couple of small logs and the fire always catches right away. Even Joanne, who was worried (after watching my various travails with the cottage wood stoves), gets the fire going first try every time.

The firebox of the stove is very small (it’s a small stove), but I wasn’t prepared for how tiny it really is. If you are expecting to get a good burn going all night long in this stove forget it. I’ve also had to get used to cutting my firewood much smaller than I normally would. The Morso brochure suggests 12” for log size, but in reality 11 1/2” is a more realistic number - and the manual suggests 10”. I’ve also found that I need to split the logs a bit smaller than normal as well, just in order to fit more into the firebox. This could be an issue if you are getting your wood delivered from an outside source.

The small firebox does create one problem though, there is an annoying tendency for ash to leave the firebox when the door is opened. Either from overflowing over the grate or from the suction caused when the door opens. There is a lip on the front edge of the grate but it is only about 1 1/2” tall, and considering that Morso suggests keeping 1” worth of ashes on the grate that doesn’t leave much room. Consequently we find ourselves constantly cleaning up fallen ash and cinders. Worse if a log falls against the door while burning then when you next open the door you get a tidal wave of ash and cinders down onto the floor. If you open the door while the fire is burning you can actually get red hot embers falling onto the floor, or even onto the wood stored in the space below the stove. Not good. If we had carpet we’d probably have all sorts of charred bits of carpet by now, as it is this is a stove that pretty much requires a stone floor or a floor plate. To be fair the Morso manual only recommends adding new logs once the previous have burned down to coals, but that would be no defense against falling ash and cinders.

Speaking of the manual there is definitely room for improvement here as well. This is, by most people’s standards, a fairly expensive stove. Yet the manual is printed in black and white on cheap paper and while it does provide useful information for the installer is lacking when it comes to information for the end user. Indeed I had to read the section describing the separate uses of the pilot, primary and secondary air intake levers several times to discern their uses. Pictures and photos within the manual are small and not very clear - the downloadable PDF version is better. What I would like to see is separate manuals for installers and end-users. The end-user version would have bigger and clearer images as well some judicious copy editing. To put it another way, think of how much money most companies (and Morso is no exception) spend on their glossy brochures to try and sell you the product, but how little (comparatively) they spend on their manuals after you’ve bought their product. But then again I actually read (and keep) manuals so I may be in the minority here.

Overall we really like the stove, so much so that I’m already thinking of one of the slightly larger versions for our cottage.


project_sample1

Interior Work - Part Two - The Stone Wall

One of the tenets of passive solar design is thermal mass, and from a passive solar standpoint there are two problems with our house: too much glass and too little thermal mass. But we’ve been over this before. This weekend we added about 3500 pounds of thermal mass to the north wall of the bedroom. Due to an odd coincidence I met again one of the stonemasons who helped build the arch mentioned here. I got to talking with him about my ideas for the north wall of the living room and ended up hiring him and his partner to help me build the wall using stone from my land. This is a dry laid (no mortar is used) stone wall measuring 12’ long by 3’ high and 20” deep. 20” is pretty narrow for a drystone wall but we’re not anticipating getting any frost heave in the living room. To figure out the weight of stone you usually use the weight of water which is 62 pounds per cubic foot.

Bright and early Saturday morning Matt and Mike arrived and we spent the morning drivinga round the land investigating and excavating the various stone piles around the land. Eight trips later we had a good bunch of stones to work from and we started work on the wall. I’ve rebuilt some of my grandfather’s mortared walls, but I don’t have very much experience with dry stacked stone. One of the secrets of a dry stacked stone wall is that it is actually two walls, that lean into each other. This lean is called the batter. We could cheat a fair bit because we were building on a solid surface that wouldn’t (hopefully) be moving. So we have only 1” of batter in 3’ of height; it’s barely noticable.

On Sunday Matt and Mike returned and brought John the fellow who was running the arch seminar that I crashed. With three of them working (and me helping) things moved much faster. We made four more trips for stone - if you’re building a wall budget on needing about two to three times as much stone as you need for the wall. Things wrapped up around noon, with the wall capped and level and looking pretty spectacular. It’ll take a bit of time to see if the wall is enough thermal mass, I suspect that we’ll need a bit more mass. But it looks spectacular, and when the wall is finished with our cedar I think the whole living room area is really going to come together.

Now if you know Gator, you know that he loves stones. Loves them in a way that is nothing short of disturbing. So imagine if you will attempting to build a stone wall witrh a dog who is obsessed with rocks. Imagine that dog spending two days with several men who are equally obsessed with rocks, though not perhaps in quite the same way as Gator (I never saw Matt lick a stone). It was an interesting weekend.


project_sample1

Interior Work - Part One

Sometimes life interupts the blog and this has been one of those times. But there has been some great progress in the last few weeks, despite more than a few setbacks. I’ve picked up a contract in the city and so with Joanne home on leave now I’m cimmuting into Toronto on a daily basis. Needless to say this has cut into my available time for working on the house. Recognizing this we hired a friend of my father’s, Russ, to help us with the framing if the interior walls. Gil has walls and a room, but no doors. We have an entry to our bedroom room and a linen closet but no door either. Our weekend alarm clock is Gil jumping onto our bed.

Gil’s room is drywall on the inside, we figure that kids are so hard on walls, why bother with wood. In the long east wall of his room we’ve actually roughed in a doorwayd. We figure that he and Declan can share the room until they’re about 10 (or so) and when the time come to separate them, we cut open the wall, throw up a door, and build a wall between them. Hey presto! Two bedrooms. So we have ten years to forget where the door is.

Dad has been busy dressing the cedar that we cut back in the summer. We tried to do it here using my generator (the tools are 240V and the house doesn’t do 240V). Unfortunately the generator doesn’t supply the quantities of current that the tools need and we blow motors on both the planer and jointer. The planer was fixed with a capacitor change, but the jointer needed a whole new motor, which we just got on Thursday. Next it’s routing and finishing and those walls can go up. The doors are on order and will hopefully arrive soon. We didn’t build the alls up to the ceiling yet for two reasons, we don’t really have a ceiling to build to, and we’re hoping to do something with sandblasted glass and awning windows for both light transmission and ventilation.


project_sample1

The Wood Stove

We have a wood stove. Installation was completed a couple of weeks ago and we’ve already had several small fires (it’s getting cool at night - that’s our excuse, not that we just want to play with the new stove). So far it looks like we’ve made the correct choice, the little box (and it is very little!) puts out quite a bit of heat.

Many thanks to Andrew at Renewable Energy of Plum Hollow in Kingston who made two trips out for the installation to make sure that everything was just right.


project_sample1

Woodstove - A decision has been made….

We placed an order for a Morso 4600 woodstove today. Hopefully we’ll have it installed by the end of the month. Because, you know, it’s important to have a brand new woodstove in August.


project_sample1

The Ceiling - Part One: Strapping

Well I guess that was easier than expected. Though I don’t know how we would have done it without a nail gun (Thanks S!). Thursday I had 200 1"x2” delivered and Friday we braved pre-May 24 traffic to buy supplies.

We started after lunch, and had the bedroom done before dinner.

Where we can we’re strapping on 16” centres as we still haven’t decided on a final ceiling material. Things are tricky out at the ends as the trusses run east/west, rather than north/south (due to the overhang), and so we’re pretty much stuck with 24” centres. We’ll cope.

I’ve also been retaping all of the edges of the vapour barrier, as the red tape - which sticks to everything else - does not adhere very well to paralam. Once the ceiling is up the will be a trim piece that essentially tacks the red tape permanently in place.

Saturday was spent cursing at wiring. One of the more interesting conceptual problems in designing and building a home is imaging not just the current uses of any given space, but the future uses as well. When my parents retired and sold my childhood home the running joke was that if anybody had ripped out all of the extra wiring that we had run over the years the house could become structurally unstable. That is why our house is really just four exterior walls, with the interior as open as possible. The problem lays in running the plumbing and electrical systems. Plumbing is run under the slab, so really there is not much to be done about that. We’ve circumvented many of the potential problems with electrical wiring by using conduit as baseboard, but power for lights and rooms like the kitchen and bathroom must be run through the ceiling. So to that end we located a J-box in the centre of each of the back ‘bays’ of the house. Then we ran a line of 14/3 Nomex from each J-box to a post. 14/3 instead of 14/2 simply because the cost is relatively low and why not run an extra conductor if you can? I don’t know why I’d need it, but if I ever do I’ll be very happy that it is there, and very very annoyed if it wasn’t. The 14/3 was left coiled up in amongst the trusses when the insulation and vapour barrier was installed. This was OK with the electrical inspector because the 14/3 IS NOT wired into power at the J-Box. If it had been we’d have had to terminate the 14/3 in another J-box with the ends properly capped, etc. 

So now we get to the cursing. I couldn’t find one of the coils of 14/3. I knew where it should be, and even after stuffing my arm through a slit in the vapour barrier and rooting around in the insulation I couldn’t find it. And in 1500+ pictures of the house being built I didn’t have a single one that showed where the coils we located. Note to budding home builders: You CANNOT take too many pictures of your house under construction. Buy a cheap digital camera and don’t leave every day until the thing is full. Document every single step, from many different angles. Trust me on this.

I found the cable, did the preliminary wiring for Gil’s room and the track lighting for the new office/work area. That was Saturday.

Sunday Dad came over in the morning and we were done by late afternoon.

So that’s the whole back area done. I have enough 1"x2” boards left to do the hallway and probably most of the front part of the house, so we may get that strapped very soon as well.

Next weekend we have the sawmill coming in again. I think we’ll just be doing the front deck and entrance way this summer, and the east deck next year.


project_sample1

From the apple doesn’t fall far from the tree file

Gil sands the door.