The Straw House Blog

Green Expo this weekend

The 2nd Annual Natural Events Green Expo will be held this Saturday at the Peterborough Armories. Last year’s Expo was well attended and a lot of fun, this year they have twice the exhibitors, and some good presentors.

I’ll be there, come on up and introduce yourself.


project_sample1

From the apple doesn’t fall far from the tree file

Gil sands the door.


project_sample1

The Barn is Gone

The barn is gone.     

project_sample1

The Ceiling - Part One: Strapping

Well I guess that was easier than expected. Though I don’t know how we would have done it without a nail gun (Thanks S!). Thursday I had 200 1"x2” delivered and Friday we braved pre-May 24 traffic to buy supplies.

We started after lunch, and had the bedroom done before dinner.

Where we can we’re strapping on 16” centres as we still haven’t decided on a final ceiling material. Things are tricky out at the ends as the trusses run east/west, rather than north/south (due to the overhang), and so we’re pretty much stuck with 24” centres. We’ll cope.

I’ve also been retaping all of the edges of the vapour barrier, as the red tape - which sticks to everything else - does not adhere very well to paralam. Once the ceiling is up the will be a trim piece that essentially tacks the red tape permanently in place.

Saturday was spent cursing at wiring. One of the more interesting conceptual problems in designing and building a home is imaging not just the current uses of any given space, but the future uses as well. When my parents retired and sold my childhood home the running joke was that if anybody had ripped out all of the extra wiring that we had run over the years the house could become structurally unstable. That is why our house is really just four exterior walls, with the interior as open as possible. The problem lays in running the plumbing and electrical systems. Plumbing is run under the slab, so really there is not much to be done about that. We’ve circumvented many of the potential problems with electrical wiring by using conduit as baseboard, but power for lights and rooms like the kitchen and bathroom must be run through the ceiling. So to that end we located a J-box in the centre of each of the back ‘bays’ of the house. Then we ran a line of 14/3 Nomex from each J-box to a post. 14/3 instead of 14/2 simply because the cost is relatively low and why not run an extra conductor if you can? I don’t know why I’d need it, but if I ever do I’ll be very happy that it is there, and very very annoyed if it wasn’t. The 14/3 was left coiled up in amongst the trusses when the insulation and vapour barrier was installed. This was OK with the electrical inspector because the 14/3 IS NOT wired into power at the J-Box. If it had been we’d have had to terminate the 14/3 in another J-box with the ends properly capped, etc. 

So now we get to the cursing. I couldn’t find one of the coils of 14/3. I knew where it should be, and even after stuffing my arm through a slit in the vapour barrier and rooting around in the insulation I couldn’t find it. And in 1500+ pictures of the house being built I didn’t have a single one that showed where the coils we located. Note to budding home builders: You CANNOT take too many pictures of your house under construction. Buy a cheap digital camera and don’t leave every day until the thing is full. Document every single step, from many different angles. Trust me on this.

I found the cable, did the preliminary wiring for Gil’s room and the track lighting for the new office/work area. That was Saturday.

Sunday Dad came over in the morning and we were done by late afternoon.

So that’s the whole back area done. I have enough 1"x2” boards left to do the hallway and probably most of the front part of the house, so we may get that strapped very soon as well.

Next weekend we have the sawmill coming in again. I think we’ll just be doing the front deck and entrance way this summer, and the east deck next year.


The German Book

Building with StrawBuilding with Straw bookI have the German straw bale book I mentioned back here, and much to my surprise it isn’t in German it’s in English.There was something sort of undefinably cool about having our house in a foreign book that we couldn’t read. I suspect it’s just more that Friedemann was kind and thoughtful enough to send me a translated copy that we could read. It’s called Building with StrawBuilding with Straw: Design and Technology of a Sustainable Architecture
I haven’t had a chance to do a complete reading yet, though my quick scan shows lots of good clear drawings and an abundance of technical information. The featured houses are grouped at the end of the book with several nice colour pictures of each, as well as technical drawings and a nice write-up. In terms of the houses shown this one of the best straw bale books I have ever seen, as most of the houses are very interesting, modern and different.

I’ll try and post more when I’ve had a better chance to go through the book in a more thorough fashion.


project_sample1

Logging

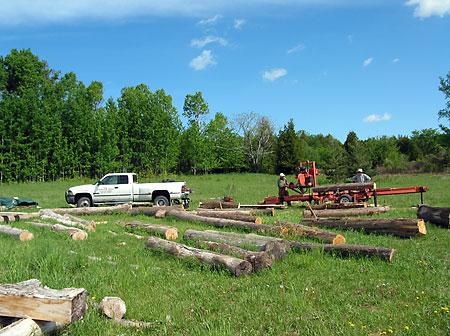
We had Rick Allen back with his sawmill this weekend. As you may recall we had a few logs to cut up. Well all those logs are gone. We don’t know how many logs we milled yesterday, but today we milled 18 logs. We managed to stack and sticker more than half of that as well.

We were lucky in having two very nice days to work. Neither too hot or too cold, sunny but cloudy enough to cool things off, and a nice breeze. It rained everywhere all around us, but except for 15 minutes on Saturday, never on us.

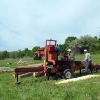
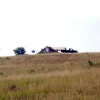
We started on Saturday with our Cedar - that’s a Cedar log on the mill in the picture above. We were looking to cut both 1” and 2” stock, one inch for panelling inside the house and 2” for decking outside. By our count we have more than enough wood for all of our new inside walls, and enough to build both the south and east decks. As I mentioned before, we’ll probably be building the south deck this year, and the east deck next year. 

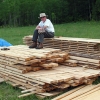
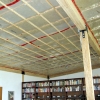
The big news though is that we think we have enough wood to cover most, if not all, of the interior ceilings. Now the drawback is that unless we find a nearby kiln willing to rent space, or build our own, we won’t be able to use the wood for about two years. That’s how long it can take to air dry wood. That’s Dad sitting on one of our stickered stacks. He’s sitting on 1” ash, and his feet are on 2” Cedar. The bulk of the ceiling would be Ash, with borders of Black Cherry, Basswood, Butternut, and Yellow Birch.

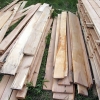
Black Cherry on the left, and Basswood just behind. Black Cherry is very hard, has a beautiful grain, and smells fantastic when cut. It’s not a very common wood and we probably have fewer than fifty Black Cherry trees on the land. We only cut down dead trees.

Basswood is very soft, very white and has almost no grain. Most people consider it a garbage wood, and it’s primarily used by wood turners to make bowls and such. We took this tree because it had split in a wind storm and it was either harvest the tree or watch it rot where it stood. We only cut it up because it was very large.

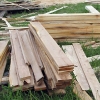
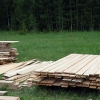
This stack is mostly a mix of 1” Cedar and 1” Ash. We have a lot of Ash on the property and it’s time for some of the larger ones to be harvested. We have two more that we’ll be bringing down soon, both should yield about four logs. Ash is very strong, and has a nice grain. Some call it ‘the poor man’s Oak’, but I like it better than Oak.

This is Butternut, one of my favorite woods. We don’t have very much Butternut on the land at all, and by volume most of it is in three huge trees that are so old and decrepit that there’s no point in even dropping them. I like Butternut for it’s rich brown colour and pleasing grain.

From left to right, Eastern White Cedar, Maple (Spalted and Quilted), Yellow Birch, and Ash. This is the first Yellow Birch that Dad and I have ever cut, or even seen in board form. Rick says it’s pretty rare. I have a whole bunch of it, including several trees so large that I can’t even get my arms around them. The sap wood is a lovely yellow colour and the heartwood is very red. It is a beautiful wood and we have one more piece in the bush to pull out.

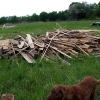
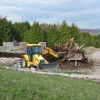
This is the slash pile. As the logs are squared, and when you hit rot all the scrap is thrown into this (actually these) pile(s). Because we hope to use as much of the tree as we possibly can we have three piles, softwoods and hardwoods are separated, hardwoods can be cut up and burned in our wood stove (to be installed this year, we seem to have agreed on Morso - well that’s the concensus right now anyway). Softwoods that have any scraps of dimensional lumber on them will be cut up and used for steps on bridges on trails, and the rest will go to neighbours to use in their maple syrup evaporators. Anything that is left will be tossed into the bush to rot.


Recommended Reading

I’ve added a recommended reading section to the house section of the website. In this section I’ll be listing the various books that we used while designing and building the house as well as other books that we have found helpful recently. If you’re looking to learn about straw bale building, passive solar design or off-grid power these books make excellent resources.


project_sample1

Woodstove - A decision has been made….

We placed an order for a Morso 4600 woodstove today. Hopefully we’ll have it installed by the end of the month. Because, you know, it’s important to have a brand new woodstove in August.


project_sample1

Stonework and Serendipity

Joanne and I were driving up to my parents on Saturday when she pointed out a tent, high up on a hill beside the highway. “I wonder what’s going on up there?” she said. As we came by the base of the hill there was a sign: Dry Stone Wall Association of Canada. Well, I did what any self-respecting member of the Hunter family would do, I ditched Joanne and Gil at my parents and my father and I headed back to find out what was going on.

At the top of the hill we were warmly greeted by John, the leader of the seminar. Their goal was to build an arch from an old stone pile, and whatever other rocks they could gather from the pasture. The seminar was full but we were invited to stick around and observe, and if we had any questions, please feel free to ask.

John proved to be an excellent teacher and just watching, asking a few questions and taking it all in I learned more that afternoon than I have in all the various books I’ve read. I’ve been thinking of building the bottom 4’ of the south wall of Gil’s room from stone, and now I feel confident that I can get it done. Building a 12’ x 4’ x 18” wall would add 4400 pounds of thermal mass to the house, thermal mass that would receive heat from then sun, the new wood stove, and the radiant floor.

I was great to watch them build this because it was exactly the same kind of stone that we have here. The books tend to deal with nice easy to work with stones like sandstone, limestone, and shale. That’s nice but what we have is fieldstone, granite and other difficult to split stones.

The finished the arch late in the afternoon and it’s a fantastic sight. It looks like it’s been there forever, I suspect a lot of locals will be doing a double take as they head up the highway wondering why they’ve never seen that before.

The Dry Stone Wall Association of Canada


More Press

We’re in the lastest issue of Canadian Homes and Cottages: a nice article with some good pictures.

We’re also in the latest issue of the Italian architecture magazine Construire - in Italian, so I’ve only read various translations, it’s very technical, not really interested in us, just the house.